15 Best Wrap Skirt Sewing Ideas You Need To Try!
I’ll be honest—I used to think wrap skirts were intimidating until I actually tried making one. Now they’re my go-to project when I want something stylish without wrestling with zippers or complicated closures. Whether you’re working with a simple rectangle of fabric or ready to tackle curved panels and ruffled edges, I’ve gathered 15 designs that’ll transform how you think about this versatile garment. Let me show you what’s possible.
Key Takeaways
- Start with beginner-friendly single-rectangle wrap skirts using fabric 1.5 to 2 times your waist circumference for easy construction.
- Create adjustable elastic-waist skirts by sewing a rear waistband casing and threading elastic with a safety pin for customization.
- Add design elements like ruffled edges, curved front panels, or bias-cut techniques to transform simple patterns into stylish pieces.
- Achieve professional results using French seams on lightweight fabrics for clean, boutique-quality finishes that hide raw edges.
- Calculate fabric yardage by multiplying desired bottom width by four, dividing by 36, and adding extra for seam allowances.
Classic Simple Wrap Skirt With Tie Detail at Waistband

One of my favorite beginner-friendly projects is the classic wrap skirt with tie detail—it’s forgiving, endlessly customizable, and surprisingly quick to sew. I always start by taking an accurate waist measurement, then add 15–20 inches for those essential ties. Using non-stretch interfacing on the waistband gives it structure that’ll last through countless wears. Additionally, this project can easily incorporate sustainable practices like using fabric scraps or thrifted finds.
Here’s my go-to process: I finish the side and bottom hems first, then construct the ties by folding fabric lengthwise and sewing with a 5/8-inch seam allowance. The waistband—typically 1.75 to 2 inches wide—gets attached last, with careful notch alignment ensuring everything sits perfectly. I love adding buttonholes positioned strategically (waist circumference divided by 4, plus 4 inches) for pass-through ties that reduce bulk and create that polished, adjustable fit.
This versatile design works beautifully for any body size, making it an ideal pattern whether you’re sewing for yourself or even adapting it for kids.
Figure-Hugging Mini Wrap Skirt With Curved Front

There’s something undeniably playful about a mini wrap skirt that hugs your curves while showing off a cheeky asymmetrical hem. I love how the curved front creates instant visual interest without complicated construction. You’ll use strategic darts at the waist and back to sculpt the fit perfectly over your hips, making this pattern surprisingly beginner-friendly despite its polished look. Additionally, this type of skirt is a popular choice among makers for its versatility in styling and comfort.
I recommend starting with medium-weight cotton or twill—they’ll hold that gorgeous curved hem beautifully without slipping around while you sew. The best part? No zippers or buttons needed. Just secure it with ties and adjust the wrap depth based on your mood. Want more coverage? Wrap it deeper. Feeling bold? Let that curve really show. You can even customize the hem shape from curved to square. This faux wrap design features an A-line shape that flatters a wide range of body types while maintaining that structured, tailored appearance.
Zero-Waste 18th Century Double-Tie Wrap Skirt
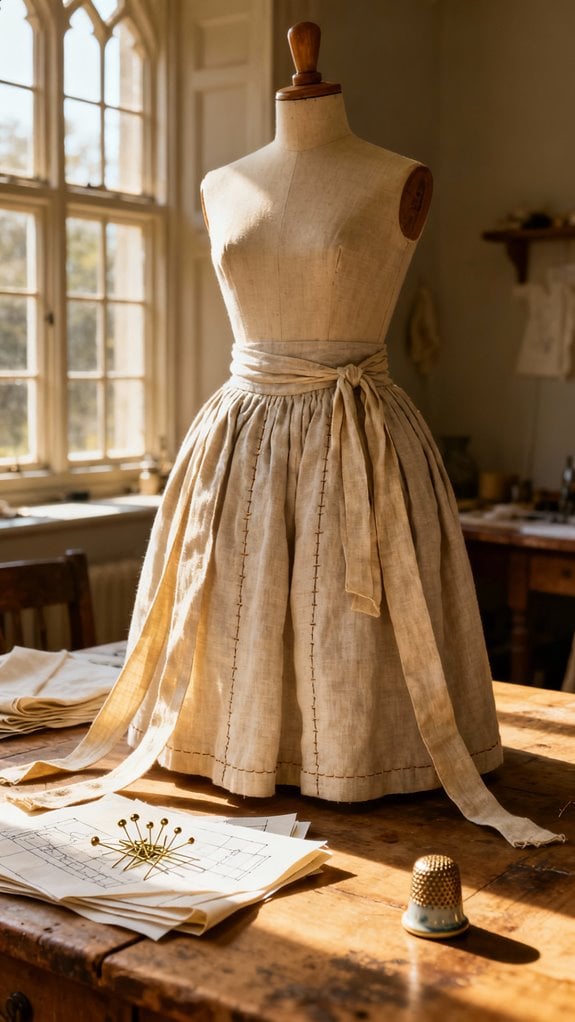
When I first discovered 18th-century wrap skirts, I couldn’t believe how brilliantly simple they were—just rectangles and ties, yet they’ve survived centuries because they actually work. This zero-waste design uses two rectangular panels with long ties attached at the center of each. No curved cutting, no complicated patterns, no zippers—just straight seams and adjustable waist ties that wrap independently around your body. I love that it fits multiple sizes without alterations.
The construction’s straightforward: fold your waistband ties to enclose raw edges, match panel centers to tie centers, then pleat or gather evenly. You’ll typically create 12–20 pleats by dividing your fabric width into equal sections. The ties themselves should measure 24–28 inches each to ensure proper wrapping and secure fastening. Additionally, this design allows for creative personalizations such as adding decorative touches or using unique fabrics that reflect your style.
What sold me? It’s beginner-friendly, hardware-free, and genuinely sustainable. Perfect for historical costumes or everyday wear.
Wrap Maxi Skirt With Side Ties for Flowing Elegance

After experimenting with dozens of skirt styles, I’ve found that wrap maxis with side ties strike the perfect balance between comfort and sophistication. I always choose lightweight fabrics like cotton or linen—they create that gorgeous flowing movement I’m after. Additionally, opting for beginner-friendly tutorials can help streamline the sewing process for those new to garment making.
Here’s what makes construction straightforward: I cut three tie straps (50–70 cm long, 4 cm wide) and position them 10 cm below the waistband for balanced drape. The wrap design accommodates sizes XS–XXXL through adjustable ties, so you’ll achieve a custom fit every time.
My favorite trick? Press everything flat before assembly. It transforms the final look from homemade to professional. I typically topstitch the waistband for stability, then attach ties by inserting them into opened side seams with reinforced backstitching. When sewing the side seams, I use a 1 cm seam allowance to ensure proper fit and durability. Style yours with crop tops or flowing blouses—you’ll love the versatility.
Ruffle Hem Faux-Wrap Skirt Design

I’ll never forget the first ruffle hem faux-wrap skirt I made—it transformed my wardrobe overnight with its ideal blend of movement and security. Unlike traditional wraps that can fly open unexpectedly, the faux-wrap design uses a mock panel with fixed closures, giving you that flattering wrapped silhouette without wardrobe malfunctions.
I recommend adding 8–12 inches to your waist measurement for proper overlap, and doubling your hem length for the ruffle piece. When gathering, I’ve found that 2x fullness creates the most dramatic effect, though 1.5x works beautifully for everyday wear. To achieve the best results, it’s essential to choose the right pleat width and depth that complements your body shape.
The key is marking your center points before pinning—trust me, this prevents uneven ruffles. I prefer lightweight cotton or gingham for excellent drape, and a 4–6 inch ruffle depth strikes the perfect balance between subtle and statement-making. For closure options, you can use ribbon ties, sewn straps, buttons, or even elastic depending on your comfort preference and style goals.
Midi Length Wrap Skirt for Versatile Everyday Wear

The midi-length wrap skirt sits in my closet as the hardest-working piece I own—I’ve worn it to client meetings, weekend brunches, and even dressed it down for grocery runs. What makes it brilliant is the adjustable waist that flatters every body shape and grows with you through life’s changes.
I draft mine with one back panel and two overlapping front panels, falling around 30 inches for that perfect mid-calf hit. The radius calculation—waist circumference divided by 2π—ensures the drape sits just right. I always interface my waistband and finish edges with bias binding so it survives constant wear.
Try it in lightweight linen for summer or wool blends for fall. The natural side slit gives movement without compromising coverage, making it genuinely versatile. Fabric choices such as rayon and jersey can also create a lovely drape for this skirt style.
Elasticated Back Waistband Wrap Skirt for Comfort

Last month I caught myself tugging at my waistband during a long workday, and I realized my favorite skirts all had one thing in common—an elasticated back panel. That’s why I’m obsessed with wrap skirts featuring this detail—they combine the elegant flat front with hidden comfort at the back.
The construction is surprisingly simple. I sew the side seams first, then create a casing in the rear waistband only. Using a safety pin, I thread elastic through, adjusting the fit before securing the ends with a zig-zag stitch. I always try it on before finalizing—this step saves frustration later. To prevent twisting issues, I add woven tabs at each end of the elastic before stitching. Additionally, the choice of fabric is crucial, as lightweight options like lightweight cottons provide both comfort and breathability.
The result? A skirt that moves with you, accommodates fluctuations, and looks polished from every angle. Plus, you can easily replace the elastic when needed.
Wide Waistband Wrap Skirt With Floaty Silhouette

Something magical happens when you pair a statement-making wide waistband with floaty, swishy fabric—you get a skirt that feels both structured and dreamy. I cut my waistband about 2.5 times my waist measurement, leaving 50–70 cm extra for wrap ties. The construction’s straightforward: sew right sides together, fold raw edges in, then fold in half and topstitch along the lower edge.
For that coveted floaty effect, I reach for lightweight rayons or voiles cut in A-line or circular panels. Bias-cut techniques add even more fluidity. Before attaching the waistband, I stay-stitch the waist to prevent any distortion during construction. This method is similar to the considerations for fitting and hemming in A-line dresses, ensuring a polished finish. I keep seams minimal so nothing interrupts the drape.
The three long ties (each 50–70 cm) let you adjust the fit perfectly. I sew, turn, and press each tie before attaching them at strategic points. The result? A skirt that moves beautifully and flatters endlessly.
Rectangular Construction Wrap Skirt for Beginners

One rectangle transforms into a complete wrap skirt—that’s the beauty of this beginner-friendly approach. I remember cutting my first straight lines with tailor’s chalk, amazed that no curves or darts were needed. You’ll measure your waist and desired length, then cut fabric 1.5 to 2 times your waist circumference for lovely fullness.
The process couldn’t be simpler: hem the edges, attach a folded waistband strip, and add ties for closure. I love that there’s virtually no waste—those offcuts become pocket pieces or tie extensions. Cotton and linen work beautifully here.
What makes this construction brilliant is how forgiving it is. Need more length? Cut a longer rectangle. Want extra wrap? Add width. You’re building fundamental skills while creating something genuinely wearable. The extended waistband design particularly suits those experiencing weight changes, as it adapts to various body sizes without requiring alterations.
French Seam Wrap Skirt for Professional Finish

When I learned French seams, my wrap skirts suddenly looked store-bought—no visible raw edges, no loose threads threatening to unravel.
I start with wrong sides together, sewing at 1 cm. After trimming the allowance by half, I press flat, then flip the fabric right sides together for the second pass. That 1 cm stitch encloses everything beautifully.
I use French seams on side seams and frill attachments. Lightweight fabrics like cotton lawn work best—they fold crisply without bulk. Lightweight viscose also drapes beautifully for wrap skirts while maintaining the crisp folds needed for French seams.
Yes, it takes longer than a standard seam. You’ll need precision with your seam allowances and pressing. But when I flip my skirt inside-out and see those clean, enclosed seams, I know the extra effort was worth it. It’s boutique-quality finishing you can absolutely master.
Knee-Length Wrap Skirt for Classic Styling

The knee-length wrap skirt sits at that perfect sweet spot between professional and playful—I’ve worn mine to parent-teacher conferences and weekend brunches with equal confidence. I typically aim for 20-22 inches from waist to hem, which hits right at that Audrey Hepburn elegance zone.
Here’s my drafting shortcut: take your waist measurement, add 8 inches total (6″ overlap plus 2″ seam allowance), then divide by four for your pattern width. Don’t forget to add 3 inches to your desired length for hem and waistband finishing. When drafting your pattern, start at the top right corner of your wrapping paper to make the most efficient use of space.
I love using lightweight cotton for breathability—you’ll need about 3 yards for a standard knee-length version. The high-waisted placement elongates your legs beautifully, and the adjustable wrap accommodates those inevitable body fluctuations we all experience.
Multi-Wear Wrap Pattern for Skirt, Blouse, and Dress

Since discovering multi-wear wrap patterns five years ago, I’ve reduced my travel packing by half—no exaggeration. One rectangular piece transforms into 7–9 looks: skirt, halter dress, strapless top, asymmetric drape, and more.
Here’s what makes these patterns brilliant: you only need waist and length measurements. I recommend fabric at least 54″ wide—go for lightweight, drapey materials like jersey or rayon. The waistband should measure 106–116″ for maximum styling flexibility.
Construction is wonderfully simple. You’ll sew a long waistband, create pull-through holes for wrapping, and finish the hems. No elastic needed—everything’s adjustable through tying. The Inna pattern includes layered PDF files that let you print only your size to save ink.
I’ve sewn mine in solid colors for maximum versatility. Side knots, twists, and strategic folds create completely different silhouettes. It’s perfect for capsule wardrobes and quick outfit changes.
Edge Ruffle Detail Wrap Skirt for Added Texture

Ruffles transform a simple wrap skirt into something special—I learned this after sewing my first edge-ruffled version three years ago and watching it become my most-complimented piece. I recommend starting with cotton or lightweight linen since they create beautiful movement without overwhelming the silhouette.
Here’s my foolproof method: cut your ruffle strip at least double the skirt’s edge length (wider strips create more drama). Use a long basting stitch for gathering, then distribute the gathers evenly before attaching with a 1/4-inch seam allowance. I’ve tried both circular and spiral ruffles—spirals give that gorgeous wave effect, while circular ruffles add consistent fullness.
Place ruffles along the vertical wrap edge for drama or at the bottom for playfulness. The wrap design makes this style suitable for various sizes, which is why it’s perfect for gift-giving or wardrobe staples. You’ll love customizing the fullness ratio to match your style preference.
Curved Front Section Wrap Skirt With Back Darts

When I discovered how much a curved front edge could elevate my wrap skirts, I immediately started drafting this variation with back darts for every pattern in my collection. The curved wrap creates visual interest while back darts maintain excellent rear shaping—preventing that awkward sagging I used to get with relaxed front designs.
I start with my basic skirt block, then extend and shape the curve at center front using a curved ruler. To add flare, I cut from the dart tip to hem, close the dart, and spread for fullness. The back gets two darts when my waist-hip difference exceeds five inches, positioned strategically for structure. I always mark the middle between the dart legs before cutting a straight line from the dart tip perpendicular to the hemline, which helps me achieve balanced shaping when I align and tape one dart leg to the other.
This combination transforms a simple wrap into something truly special, balancing comfort with tailored precision.
Custom Sized Wrap Skirt Using Personal Measurements

After years of squeezing into standard sizes that never quite fit right, I finally learned that taking my own measurements transformed my wrap skirt sewing. I measure my waist at its narrowest point and hips at the fullest part, keeping the tape parallel to the floor.
Here’s my secret: I grade between sizes when my waist and hips differ greatly. I simply draw a smooth shift line on my pattern between these measurements. This customization eliminates gaping and pulling.
For fabric yardage, I multiply my desired bottom width by four, then divide by 36. I always add extra inches for seam allowances. The beauty of custom sizing? I control the overlap amount for perfect coverage and adjust tie lengths to my preference. The wrap design functions as 2 skirts in one, giving me multiple styling options from a single garment.
Conclusion
I’ve fallen in love with wrap skirts over the years, and I know you will too! There’s something magical about creating a garment that’s both flattering and forgiving. Whether you’re tackling your first simple rectangle wrap or diving into that ambitious zero-waste design, remember that every stitch is progress. Don’t be afraid to experiment with fabrics and finishes—that’s where the real fun begins. Now grab your favorite fabric and let’s start sewing!
