15 Best Star Sewing Ideas You Need To Try!
I’ve been sewing star patterns for years, and I can tell you they never go out of style. Whether you’re a beginner tackling your first Ohio Star block or an experienced quilter ready for the intricate Lemoyne Star, there’s a project here that’ll match your skill level perfectly. I’ve gathered 15 of my favorite star sewing ideas—from festive ornaments to personalized patches—that’ll transform your next creation into something truly special.
Key Takeaways
- Ohio Star and Sawtooth Star quilt blocks offer versatile projects ranging from single blocks to full quilts with classic nine-patch construction.
- Machine embroidery and appliqué stars enhance bags, apparel, and accessories using digitized designs, iron-on hot-fix, or hand-sewn techniques.
- Star-themed mug rugs and coasters provide quick, gift-friendly projects using mini charm packs and scrap fabrics in various sizes.
- Fabric star ornaments serve as tree decorations or garland using sewn or no-sew folded strip methods with coordinating fabrics.
- Metallic and glitter fabrics create eye-catching star projects through layering, decorative stitching, and padded appliqués for special occasions.
Classic Ohio Star Quilt Block
The Ohio Star quilt block has earned its place as one of my absolute favorite traditional patterns, and for good reason—it’s straightforward enough for confident beginners yet versatile enough to keep experienced quilters coming back. I love its nine-patch construction: four quarter square triangles form the star points, four background squares fill the corners, and one center square creates the core. For a 9″ finished block, I cut my center and corner squares at 3½” and my QST squares at 4½”. The key is maintaining that accurate ¼” seam allowance throughout. I always press seams in alternating directions so they nest perfectly when joining rows. Once assembled, I square up the block with my ruler for crisp, professional results every time. This pattern works beautifully whether you’re making a single block or entire quilts, giving you complete flexibility in your project scope. Additionally, experimenting with different quilt patterns can add a unique twist to your Ohio Star projects.
Fabric Star Ornaments for Holiday Decorating
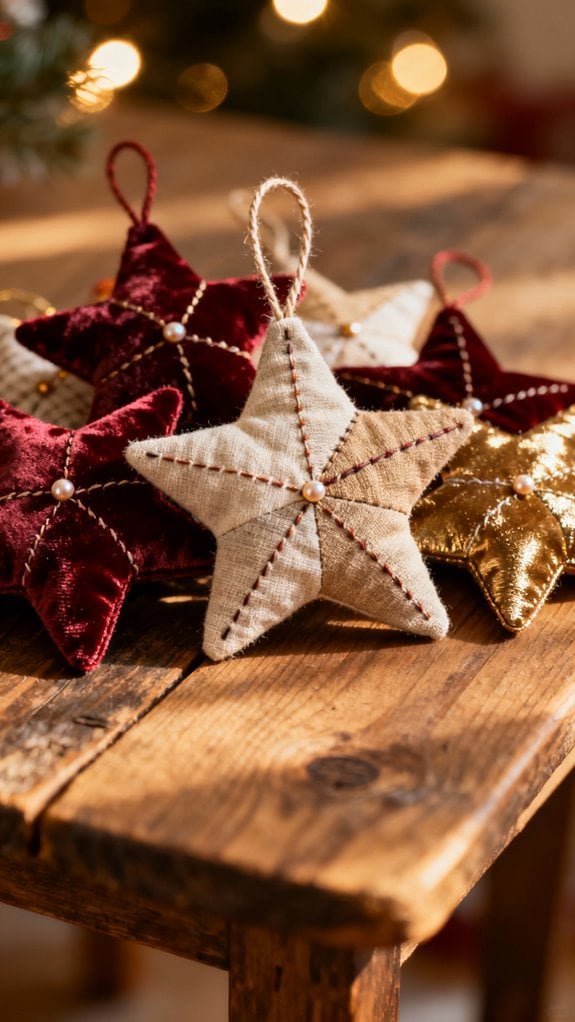
Every holiday season, I find myself reaching for fabric scraps to create one of my favorite quick decorating projects: fabric star ornaments. These versatile decorations work beautifully as tree ornaments, gift toppers, or garland accents.
I’ve made both sewn and no-sew versions. For sewn stars, I cut two star shapes, stitch around the edges leaving an opening, stuff lightly with batting, and close the seam. The no-sew Scandinavian method uses four fabric strips folded and interlocked—perfect when I’m crafting with my kids. Sewing techniques can greatly enhance the durability and appearance of your ornaments.
I typically mix 2–4 coordinating fabrics per star, sizing them from 2.5″ to 5.5″. What I love most is their sustainability; vintage sheets and leftover quilting fabric create unique, cost-effective ornaments. They’re lightweight, customizable, and store flat between seasons. For a professional finish, I often choose cotton with metallic weave which adds an elegant shimmer to the final ornament.
Sawtooth Star Block With Half-Square Triangles

Moving from quick fabric stars to more structured piecing, I’ve found that mastering the Sawtooth Star block opens up countless quilting possibilities. This classic design features a central square surrounded by eight half-square triangles that create those distinctive star points.
I typically cut one center square (6.5″ works well), four corner squares (3.5″), and make eight HSTs using the 2-at-a-time method. I’ll pair four white and four colored 4″ squares, draw diagonal lines, stitch ¼” on both sides, then cut apart. After cutting and pressing, I trim each HST to 3.5 inches for accurate piecing. Simple mending is an excellent way to practice your precision cutting and sewing skills.
The key is arranging those HSTs into flying geese units before assembling in rows. I always lay out my pieces first—it prevents color placement mistakes. Press seams away from the center for crisp points. Once you’ve nailed this block, you can create stunning quilts with endless variations.
Mini Star Embellishments for Bags and Accessories

When I started adding mini star embellishments to my handmade bags, I was amazed at how such tiny details could transform a simple tote into something special. I’ve experimented with various techniques, from machine-embroidered appliqués using metallic threads to iron-on hot-fix stars for quicker projects.
My favorite approach involves sewing cotton or felt star patches onto bag panels with satin stitches. The designs range from traditional five-pointed stars to primitive rustic shapes, each creating a different mood. I’ve found that layering multiple stars adds beautiful dimension, and using variety of pouch styles can enhance the overall design of the bags.
For children’s backpacks, I’ll use playful colors, while gold and silver work perfectly for holiday bags. Essential tools include embroidery hoops, adhesive stabilizer, and specialty needles. I also love incorporating moon and star combinations for unique celestial-themed accessories. These mini embellishments greatly increase my bags’ perceived value at craft markets.
Lemoyne Star Pattern for Intermediate Sewists

The Lemoyne Star has intimidated me for years—those eight perfect points seemed reserved for quilters with far more patience than I possessed. Then I discovered modern adaptations using half-square triangles and flying geese units instead of dreaded Y-seams, and everything changed.
I now construct my 12″ blocks using four background squares, four HSTs, and four flying geese units. Breaking down those parallelograms into manageable triangles adds extra seams but guarantees accuracy. I’ve learned that paper piecing those flying geese prevents color placement mishaps—trust me, I’ve mixed up wing fabrics before. Additionally, using lightweight or structured fabrics can greatly enhance the overall appearance of your quilt.
The key? A precise quarter-inch seam allowance and nesting those seams at the center pinwheel join. With careful pressing and a good squaring ruler, you’ll create sharp points worth celebrating. When joining rows together, I alternate the seam direction to make final assembly easier.
Three-Dimensional Stuffed Fabric Stars

After years of making flat quilted stars, I craved something I could actually pick up and hold—something with dimension and personality.
I started with woven cotton and a printed template at 100% scale. Cutting two mirror-image layers with 6mm seam allowance, I stitched around the edges, leaving a 2-inch gap. The key? Clipping seam allowances at the points before turning. Using stretch knit fabrics can also add a unique touch to your star projects.
Once right-side out, I used a blunt stick to push out crisp tips. Stuffing the points first prevented that lumpy, overstuffed look that distorts the shape. I closed the gap with invisible stitches.
Now I make weighted versions with poly-pellets for fidget toys and larger pillow stars for holiday décor. For an even softer feel, I’ve switched to using faux fur or minky on some designs, which creates a plush texture perfect for children’s toys. Each project feels personal and adaptable—from patriotic garlands to nursery mobiles.
Star Appliqué Designs for Clothing

Since I’d grown confident with three-dimensional stars, I wanted to carry that playful energy onto everyday clothing—and appliqué became my go-to method.
I started with sequin fabric backed with fusible interfacing, creating sparkling statement pieces on t-shirts and denim jackets. Paper templates kept my star shapes consistent, while fusible web materials like Pellon prevented shifting during stitching.
For machine embroidery, I explored digitized designs compatible with multiple formats. My rainbow-and-star combo on my niece’s sweatshirt used nearly 4,900 stitches and fit perfectly in my 5″ x 7″ hoop. I found that designs sized at 5.7″ high by 7.7″ wide worked beautifully in a 6 x 10 hoop for more elaborate projects.
Hand-sewn stars gave me precise control—I’d draw five-point patterns on fabric grids, then secure them with double-sided fusible web before adding decorative blanket stitches.
I even crocheted lightweight star appliqués using DK yarn, finishing each in under an hour for baby clothes.
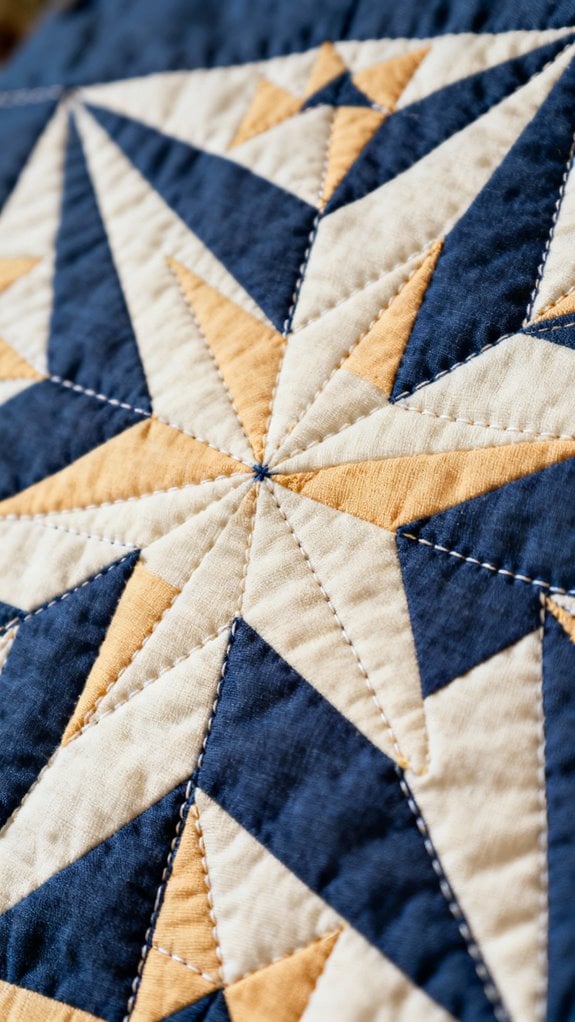
Lone Star Quilt as a Statement Piece

Nothing commands attention quite like a Lone Star quilt draped across a bed or hung on a wall—it’s the kind of piece that makes guests stop mid-conversation to admire the sheer geometry of it. I’ve found that radiating eight-point star, spanning 50–80 inches, creates unmatched visual drama. The A-line dress variations showcase how geometric patterns can be used in sewing to create stunning designs in various mediums, much like the Lone Star quilt.
The construction demands precision—cutting fabric diamonds accurately and maintaining consistent seam allowances. I recommend starting with 3.5″ strips and calculating background pieces based on your star unit size. You’ll need substantial yardage: 4–5 yards for background, 1–2 yards per star color.
Modern quilters now experiment with ombré gradients and metallic fabrics, transforming this 19th-century Texas tradition into contemporary gallery-worthy art. The block works beautifully as a centerpiece for medallion quilts, where the star becomes the focal point surrounded by complementary borders. Whether you’re marking a special occasion or simply craving bold statement décor, this pattern delivers impact.
Star-Themed Mug Rugs and Coasters

I’ve sewn dozens of mug rugs over the years, and star patterns remain my absolute favorites for their quick satisfaction and gift-giving appeal.
The Ohio Star block translates beautifully to 6″–8″ squares using mini charm packs and rotary cutters. I love how beginner-friendly free patterns make this classic accessible to everyone, making it easy for beginners to pick projects.
For faster projects, I turn to Half Star designs at 8½” square. They require fewer cuts while delivering modern minimalist style—perfect for everyday coffee breaks.
When I need something dynamic, spinning star motifs create movement through angled piecing. They’re ideal for patriotic holidays or special occasions. A spinning mat helps organize fabric pieces during assembly for more precise results.
My favorite challenge? Periwinkle eight-point stars that double as snowflake coasters. Acrylic rulers simplify cutting symmetrical points, and scrap fabrics work perfectly.
All these designs are machine washable and practical for daily use.
Metallic and Glitter Fabric Star Projects

Metallic fabrics transform ordinary star projects into eye-catching showstoppers that catch light from every angle. I’ve discovered that layering fabric scraps under organza with metallic quilting threads creates stunning dimension. A walking foot is essential when working with slippery materials—trust me, it prevents frustrating puckering.
I always apply basting spray before quilting to stabilize glitter fabrics. For easier handling, fuse interfacing to your metallic materials first. Decorative stitches like serpentine or zig-zag amplify the shimmer beautifully.
These stars work beyond ornaments. I’ve added padded metallic appliqués to bags, quilts, and even nursery décor. Glittery gold rick rack makes perfect hanging loops with a polished finish. You can attach wood beads on top of the hanging loop for additional decorative detail.
The celestial trend keeps these projects popular, and they’re ideal for using fabric scraps sustainably while creating dazzling gifts.
Beginner-Friendly Simple Star Blocks

Every quilter remembers their first star block—mine had wonky points and puckered seams, but I was hooked. The Sawtooth Star became my go-to practice block because it’s straightforward: one center square, four flying geese units, and four corner squares.
I’ve learned that success hinges on consistent ¼” seam allowances and pressing seams toward the star points. High-contrast fabrics make those points pop—I’ll pair a bright solid with a neutral background for maximum impact.
Chain piecing saves me time when making multiples, and I always square up units before final assembly. If points get cut off, I check my flying geese sizing first.
Start with a 12.5″ finished block—larger pieces are more forgiving for beginners while you’re mastering precision. The 8-inch finished block is another excellent option that works beautifully with both large and small scale prints.
Star Patches for Personalized Jackets

Star patches transformed my plain denim jacket into my most-complimented piece of outerwear—I spent one Saturday afternoon stitching five colorful stars across the back, and suddenly strangers were stopping me to ask where I bought it.
I used quilting cotton scraps and OESD PolyMesh stabilizer for structure. After creating my stars through machine appliqué, I carefully trimmed excess fabric with duckbill scissors to prevent fraying. For attachment, I switched to a size 90 needle and longer stitch length, backstitching at start and end points for security.
I placed stars asymmetrically across my sleeves and back yoke—the contrast against dark denim created stunning visual impact. The durable denim fabric withstands high heat beautifully, making it ideal for secure patch application. You can also use fusible adhesive sheets for temporary placement before committing to permanent stitching. This technique beautifully upcycles fabric remnants while creating personalized statement pieces.
Multi-Layered Star Wall Hangings

Last winter, I hung my first multi-layered star wall hanging above my daughter’s bed, and watching it catch the morning light instantly made me understand why these cascading decorations have become such popular projects.
I started with three fabric star sizes, cutting templates from cotton prints I loved. After sewing each star with a 1cm seam allowance, I stuffed them lightly with fiberfill and turned them right-side out. I carefully snipped the inner corners and trimmed the seams before turning to ensure crisp points. The magic happened when I attached them to a wooden dowel using ribbons at staggered lengths—largest at top, smallest at bottom.
The layering creates incredible depth. I kept 4cm gaps at the dowel ends for balance and finished with loops for wall mounting. You can adapt this technique using clay stars or macrame designs too.
Star Motif Stockings and Slippers

Three Christmases ago, I decided to make personalized stockings for my family instead of buying generic ones, and incorporating star motifs transformed them from simple fabric pouches into heirloom pieces we’ll treasure for years.
I chose the Ohio Star pattern for its striking geometry and straightforward construction. Using festive quilting cottons and metallic scraps, I pieced together star blocks with careful ¼-inch seam allowances—precision matters here. Steam pressing kept my seams sharp while I worked.
I positioned each star block at the stocking’s center for maximum visual impact, then framed it with contrasting strips before assembling the outer fabric, batting, and lining. Adding sturdy twill tape loops guaranteed they’d hang securely. For the final assembly, I left a 2-3 inch opening in the toe of the lining to pull the stocking through before hand stitching it closed.
Recently, I’ve adapted this technique for slippers using appliqué stars, bringing that same festive charm to everyday comfort.
Patchwork Stars With Mixed Fabric Prints

When I finally gathered courage to tackle my first patchwork star quilt, I spread twenty different fabric prints across my cutting table—florals, geometrics, and whimsical dots that had been languishing in my scrap bin for months. I cut 2.5″ squares from each print, pairing them with white fabric to create contrast. Drawing diagonal lines on the back of my squares felt tedious initially, but it guaranteed precise star points. I used chain piecing to speed through the blocks, watching each star emerge as I pressed seams flat. The eight-at-a-time HST method became my secret weapon for efficiency. My vinyl seam guide maintained consistent quarter-inch allowances throughout. Arranging the finished blocks in alternating patterns revealed unexpected color conversations between prints I’d never thought to combine. After completing all the blocks, I measured the quilt sides carefully before adding my inner white border to prevent any warping.
Conclusion
I’ve explored countless star sewing projects over the years, and I’m always amazed by how versatile they are! Whether you’re piecing your first Ohio Star or embellishing a jacket with custom patches, each project builds your confidence. I remember my wobbly first attempt at a Lemoyne Star—now it’s my favorite pattern! Start with something simple, embrace imperfections, and watch your skills shine. You’ve got this, and I can’t wait to see what you create!
