10 Best Snowman Crochet Patterns For Yard Or Shelf Joy
I've spent countless winter evenings perfecting snowman crochet patterns, and I'm enthusiastic to share what I've learned with you. Whether you're looking to brighten your front porch or add charm to your living room shelf, these ten designs offer something special for every skill level. From weighted farmhouse styles to whimsical draft stoppers, each pattern brings its own personality. Let me walk you through my favorites and show you how simple adjustments can make each snowman uniquely yours.
Key Takeaways
- Weighted Farmhouse Snowman stands 10.5 inches tall with rice-filled base for stability, perfect for shelf displays with rustic charm.
- Draft Stopper Snowman measures 28-36 inches, combining functional cold air blocking with seasonal décor for doors and windows.
- Shelf Sitter Snowman features whimsical striped legs and poly pellet base, finishing between 7-15 inches for stable seated positioning.
- Miniature tabletop snowmen use amigurumi techniques to create 2-4 inch accents with 2:3 head-to-body proportions for balanced displays.
- Customizable designs include interchangeable accessories like removable hats and scarves, allowing year-round decoration with personalized embellishments.
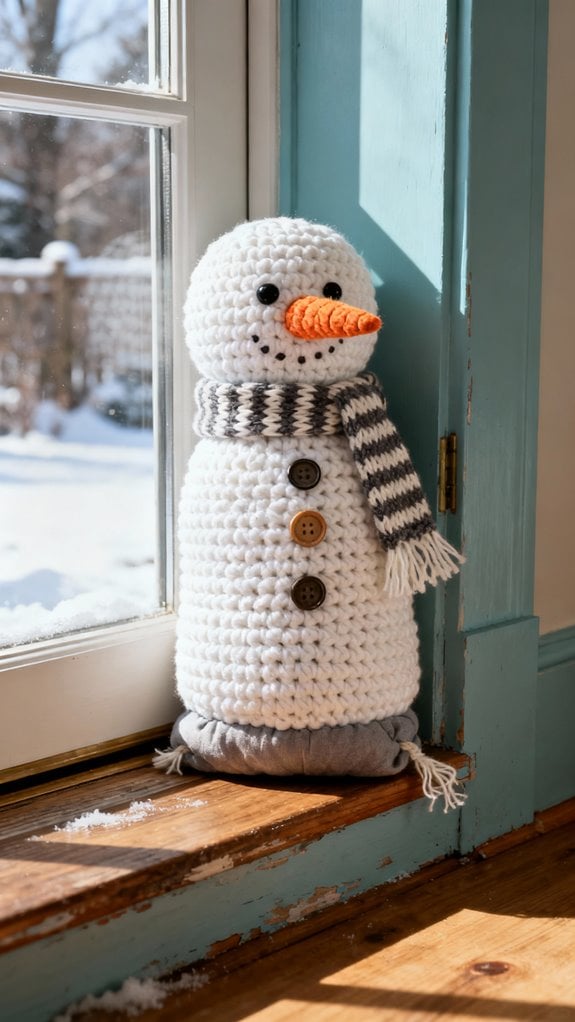
Weighted Farmhouse Snowman With Top Hat and Stick Arms
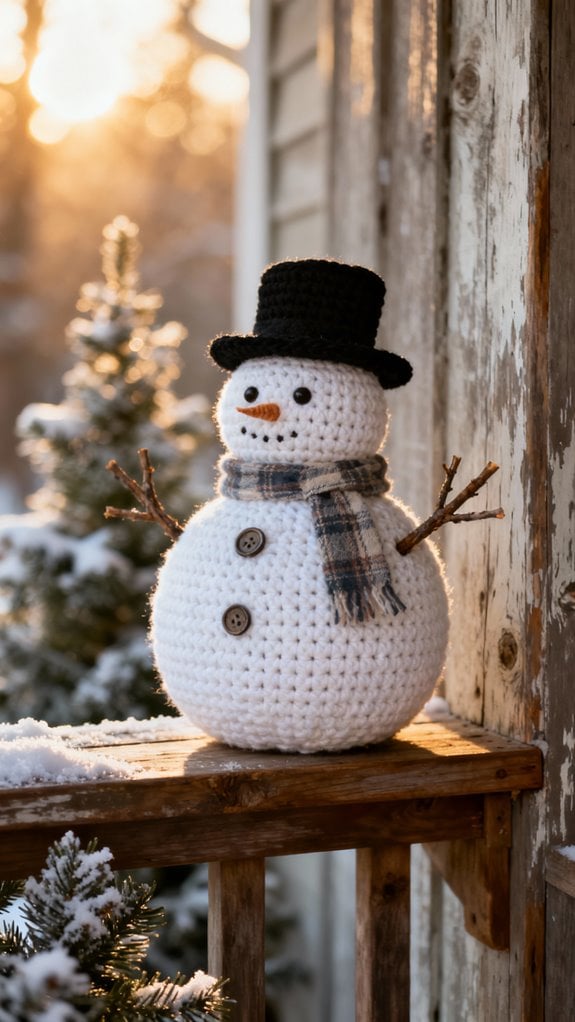
This weighted farmhouse snowman combines rustic charm with clever construction—rice fills a small fabric bag in the base while fiberfill shapes the body above. You'll crochet seamlessly from the bottom up using two strands of bulky yarn held together, creating three connected snowballs in continuous rounds. The ridged texture comes from working half double crochet and single crochet in back loops only. Additionally, this project offers a great opportunity to incorporate budget-friendly, upcycled designs that enhance your winter décor.
I love how natural twig arms and a worsted-weight top hat add authentic farmhouse appeal. The weighted base keeps your snowman upright on shelves or mantels, even in busy spaces. This beginner-friendly pattern includes a video tutorial alongside the PDF download, making it accessible whether you're new to crochet or experienced. The finished snowman stands 10.5 inches tall with graduated sections measuring 17.5 inches at the base, 13.5 inches at the middle, and 10.5 inches at the head for balanced proportions. Customize with neutral tones like ivory or taupe, then embellish with buttons and felt for personalized winter décor. Click Here to Search For The Pattern
Shelf Sitter Snowman With Dangling Legs
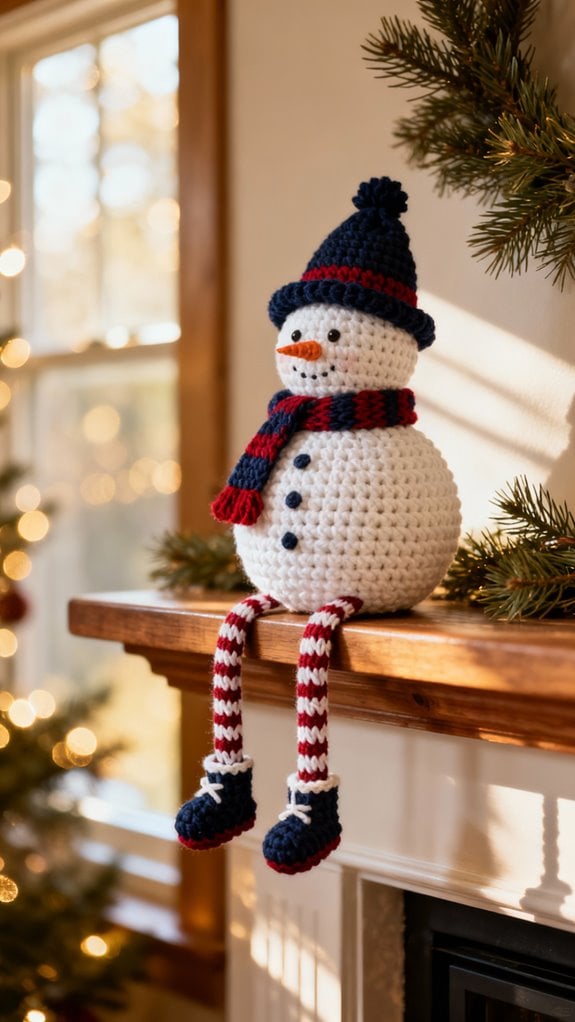
When you want a snowman that brings instant personality to any shelf or mantel, these dangling-leg designs deliver both charm and function. I love how the long, striped legs—typically alternating colors every five rows—add whimsical movement while keeping your snowman upright. Including appropriate dimensions for your design will ensure the best fit for your display area.
You'll crochet the body and head as one piece, then attach arms and those signature legs separately. The secret to stability? Fill the lower body with poly pellets or craft beans, keeping legs lightly stuffed except for firmly packed feet or boots. Most patterns finish between 7 and 15 inches tall using worsted weight yarn and size F to I hooks.
I recommend adding 12mm safety eyes and personalizing with scarves, hats, and buttons. Position the legs on row 10 of the body, spacing them 4 stitches apart for balanced sitting. These shelf sitters double as draft stoppers when you adjust leg length. Click Here to Search For The Pattern
Quick Mini Snowman Ornament Pattern
A mini snowman ornament works up so fast you'll want to crochet an entire family in one sitting. Most patterns finish in under an hour using basic stitches like single crochet and decreases, making them perfect for beginners or last-minute gifts. These charming creations can also be personalized with various creative DIY Christmas ornaments that add a festive touch to your home.
I recommend DK or medium weight yarn in white with a 3mm-4mm hook. You'll construct the head and body in continuous rounds from a magic ring, stuffing as you go. The hat and scarf crochet separately for easy assembly—many patterns offer no-sew options to minimize finishing work.
Add 10mm safety eyes and an orange yarn nose for classic character. Customize with embroidered expressions or decorative buttons down the body. Thread a ribbon through the top for hanging, and you've created adorable tree ornaments, gift toppers, or craft fair treasures. This design is perfect for using up leftover scrap yarn from other projects. Click Here to Search For The Pattern
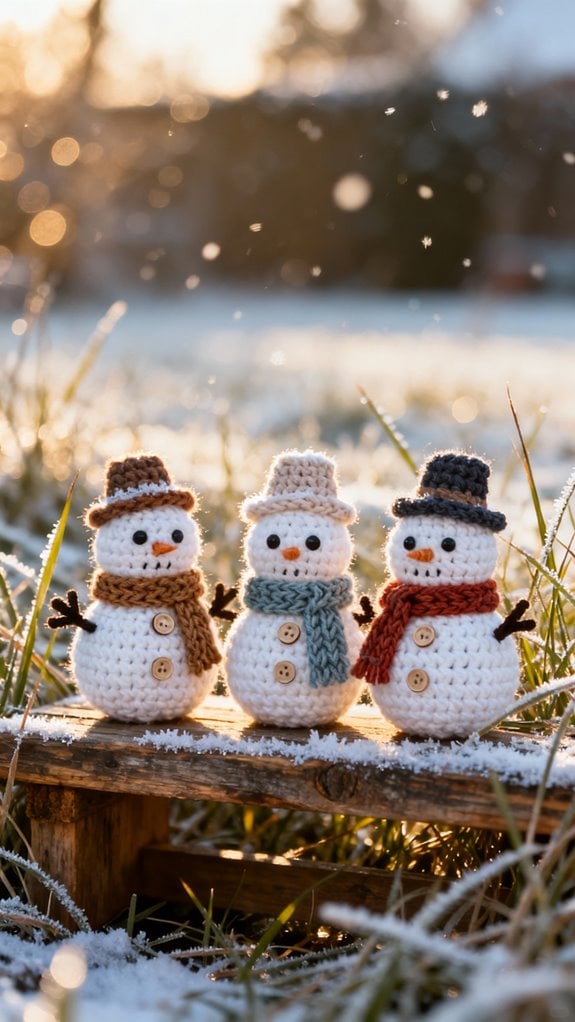
Primitive Snowman Amigurumi for Rustic Holiday Décor
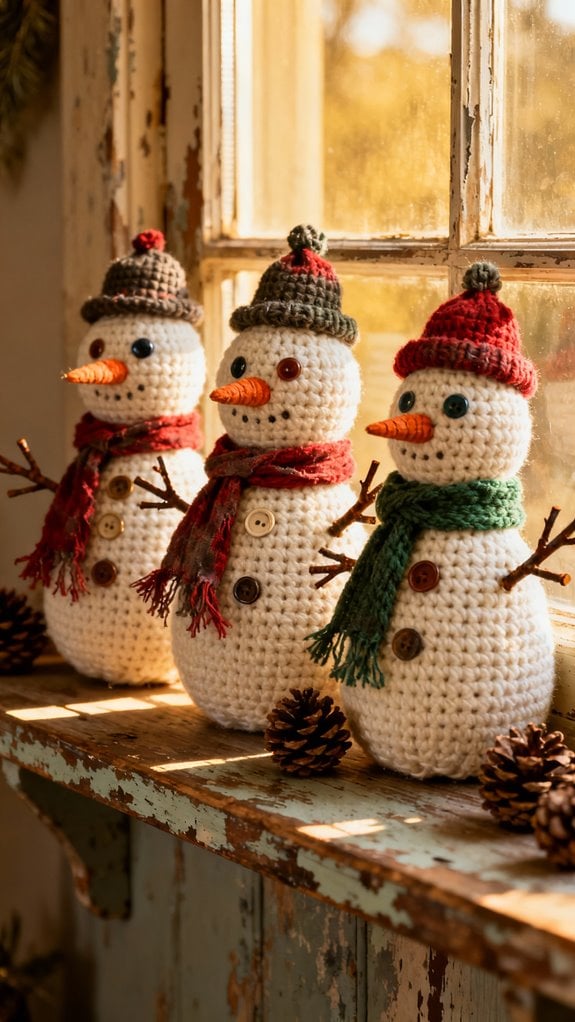
Primitive snowman amigurumi brings farmhouse charm to your holiday mantel with its deliberately simplified features and earthy aesthetic. I love how these designs embrace rustic imperfection—minimal facial details, muted off-white or oatmeal yarns, and distressed finishing techniques create authentic vintage appeal.
You'll typically crochet two or three stacked spheres measuring 6 to 15 inches tall using sport to bulky weight yarn. I recommend cotton-acrylic blends with hooks sized B through J for tight, stuffing-secure fabric. Work in the round using invisible decreases for smooth shaping. Marina Nikolaidou's one-piece construction pattern creates a 6.3-inch snowman using sport weight yarn with 3.5mm and 3.0mm hooks, perfect for achieving that compact primitive look.
What sets primitive snowmen apart are natural embellishments: twine scarves, stick arms, wooden buttons, and jute accents. Many patterns use no-sew construction methods perfect for confident beginners. Add weighted pellets for shelf stability, and you've created décor that shifts beautifully from holiday display to year-round farmhouse styling. Click Here to Search For The Pattern

Draft Stopper Snowman for Doors and Windows
Draft stopper snowmen transform everyday energy efficiency into delightful winter décor that works as hard as it charms. I love how these functional pieces block cold air at door and window bases while adding seasonal personality to your home.
The construction requires strategic filling—I stuff the boots firmly but leave upper legs flexible so they drape naturally around door bottoms. Weighted polly pellets in the base keep everything anchored against drafts and movement. Most patterns work in the round using single crochet, with standard lengths between 28-36 inches fitting typical doorways.
You'll find both free and paid patterns featuring classic snowman details: white bodies, colorful hats, scarves, and button accents. I recommend cotton or acrylic yarns for durability and washability, plus secure attachment stitching if you have curious pets or children. Creating weighted pouches from nylon stockings filled with polly pellets helps your snowman maintain position without excessive bulk. Click Here to Search For The Pattern
Large Outdoor Yard Snowman With Sturdy Construction
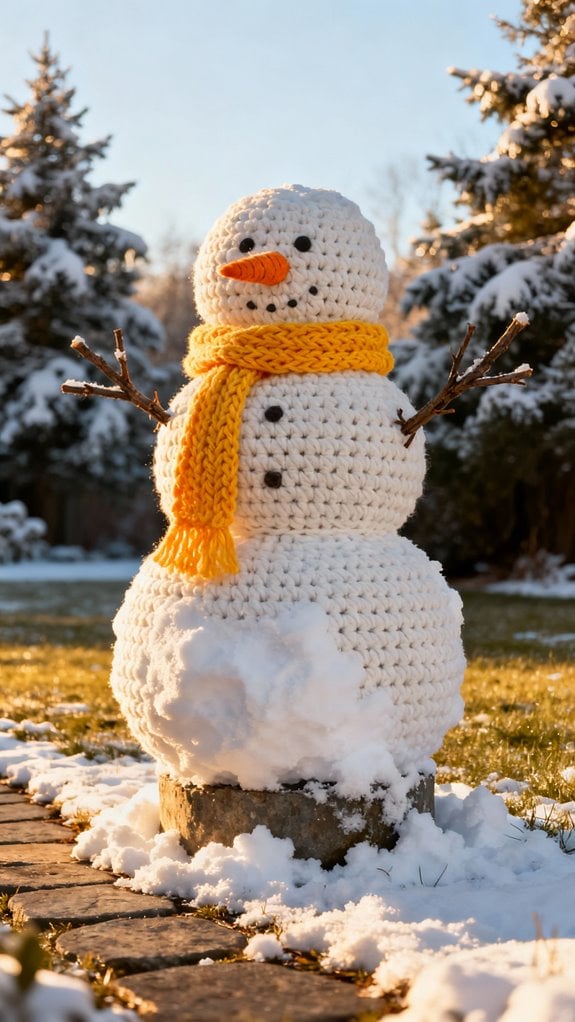
While draft stoppers solve indoor winter woes, I'm always thrilled when crafters take their snowman projects outside to create cheerful yard displays that greet neighbors and visitors throughout the season. Giant crochet snowmen reaching 18–24 inches (or even 3 feet tall) transform porches and lawns into winter wonderlands.
I recommend using chunky acrylic yarn with continuous spiral single crochet for weather resistance and structural integrity. The key to outdoor durability lies in bottom-weighting your snowman—add sand or poly-pellets in sealed plastic bags within the base to prevent tipping. Insert plastic canvas disks between sections for extra support, and stuff with weatherproof fiber rather than standard poly-fil.
Secure plastic safety eyes and UV-resistant accessories with reinforced stitching, then anchor your finished snowman with tent pegs for wind protection. For outdoor displays, consider brown pipe cleaner branches that can withstand light weather conditions while maintaining that authentic twig-arm appearance. Click Here to Search For The Pattern
Seamless Bottom-Up Snowman for Easy Assembly

If you're new to amigurumi or simply want a stress-free project, seamless bottom-up snowmen deliver the classic three-tiered silhouette without wrestling multiple pieces together. You'll crochet from base to head in continuous spiral rounds, using simple increases and decreases to shape each snowball section. I recommend keeping a stitch marker handy to track your rounds.
As you work upward, progressively add stuffing to maintain even firmness and proper shaping. You can insert safety eyes mid-process for accurate placement, then close the top with a small seam. Arms, nose, and accessories attach afterward—no complicated sewing required.
This construction method creates a polished finish with minimal exposed seams, reducing wear over time. You'll find the continuous spiral maintains beautiful roundness, and adjusting yarn weight lets you scale your snowman effortlessly. Basic stitches like single crochet and double crochet form the foundation of most seamless patterns, making them accessible even if you're still building your skills. Click Here to Search For The Pattern
One-Piece Head and Body Snowman Design

The one-piece head and body design takes seamless construction a step further by eliminating even the subtle shaping changes between snowball sections. I work this pattern in continuous rounds using a magic ring start, creating a flowing silhouette from base to head without breaks. You'll gradually increase for the bottom sphere, maintain stitches through the middle, then decrease for the head—all while keeping your stitch marker moving.
I recommend stuffing firmly as you go and adding weighted pellets at the base for stability. Since there's no assembly needed, you'll simply attach safety eyes, embroider the nose, and add arms after completing the body. This approach gives you fewer seams, stronger construction, and faster finishing time—perfect for creating multiple snowmen for your holiday display. The entire body and head typically involve 37 rounds each, creating a balanced proportion for your finished snowman. Click Here to Search For The Pattern
Miniature Tabletop Snowman Accent

Creating miniature snowmen between 2" and 4" tall transforms your crochet into perfect tabletop accents that fit anywhere—mantels, bookshelves, or workspace desks. I use amigurumi methods with sport weight cotton and a 2.0–3.5 mm hook for compact, three-dimensional shapes. Start with a magic ring of 6–8 single crochets, increasing to 24–45 stitches for proper sphere formation. I maintain a 2:3 head-to-body ratio for balanced proportions.
For stability, I weight the base with poly pellets or glass gems before stuffing with fiberfill. Place 6–9 mm safety eyes 4–7 stitches apart between rounds 7–8 for ideal facial display. Add hanging loops to convert them into ornaments, or group several together for modular winter scenes. Following video tutorial guidance helps visual learners master the stitch sequences and shaping techniques needed for precise miniature construction. These miniature snowmen make thoughtful gifts and charming seasonal decorations that won't overwhelm small spaces. Click Here to Search For The Pattern
Customizable Snowman With Interchangeable Accessories

Swappable accessories transform your crochet snowman from a single-season decoration into a year-round crafting companion. I recommend creating removable hats—like Santa caps or top hats—and scarves in multiple color combinations to match evolving décor themes. You'll find most patterns use basic stitches (chain, single crochet, increases, and decreases), making them beginner-friendly while delivering professional results.
Work with worsted or super bulky yarn and a 3.75–5mm hook to achieve a sturdy 6.5–8 inch figure. I suggest crafting several hat bands and button sets so you can personalize your snowman's expression and style instantly. For a classic finishing touch, create a carrot-style nose using a magic ring with 4 stitches that gradually increases to 6 stitches over four rounds. This interchangeability isn't just convenient—it's profitable if you're selling at markets, since buyers love mix-and-match options. Click Here to Search For The Pattern
PDF patterns typically include visual guides for attaching accessories, streamlining your construction process and eliminating sewing frustration.
Conclusion

I've shared my favorite snowman patterns that'll bring warmth to your home this winter. Whether you're crafting a weighted farmhouse beauty or a quick mini ornament, each project offers something special. Don't be afraid to experiment with yarn colors and accessories—that's where your snowman truly becomes yours. I encourage you to start with whichever pattern speaks to you. Trust me, once you hook that first stitch, you'll want to create an entire snowman family. Happy crocheting!