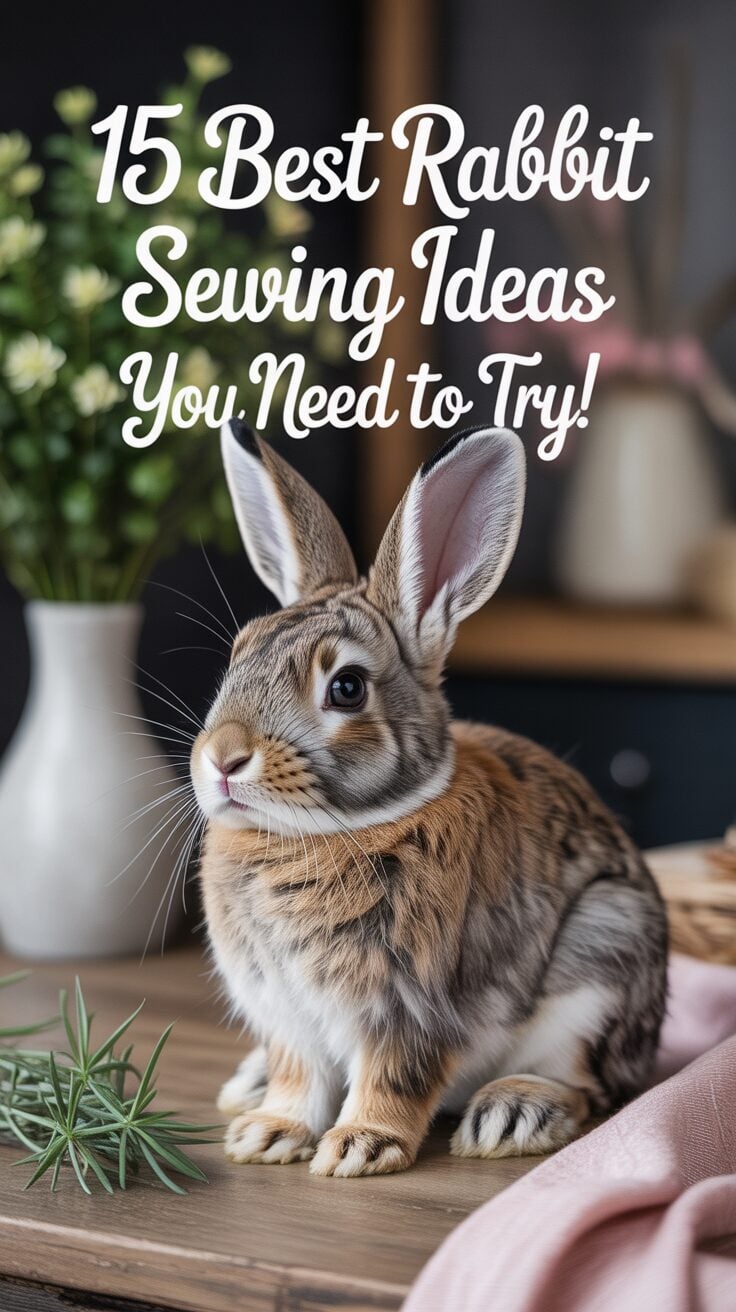
15 Best Rabbit Sewing Ideas You Need To Try!
I’ve been sewing rabbit projects for years, and I can tell you there’s something magical about watching these adorable creatures come to life under your hands. Whether you’re just starting out or you’ve got serious skills with a needle, I’ve gathered fifteen bunny patterns that’ll spark your creativity and challenge you in all the right ways. From quick weekend makes to heirloom-quality keepsakes, let me show you which projects deserve a spot on your crafting table.
Key Takeaways
- Classic floppy-eared stuffed bunnies offer customizable heights and fabric choices, requiring minimal materials and basic sewing skills for cuddly results.
- Mini bunny dolls take just hours to complete using simple stitches, perfect for beginners with fabric scraps and basic embroidery.
- Functional bunny tote bags and backpacks combine practical storage with adorable designs, ideal for seasonal celebrations or everyday use.
- Upcycled sock bunnies require no sewing, transforming old materials into eco-friendly toys in under twenty minutes using glue.
- Advanced jointed bunnies use specialized materials like viscose fur and cotter pin joints for heirloom-quality, poseable stuffed animals.
Classic Floppy-Eared Stuffed Bunny
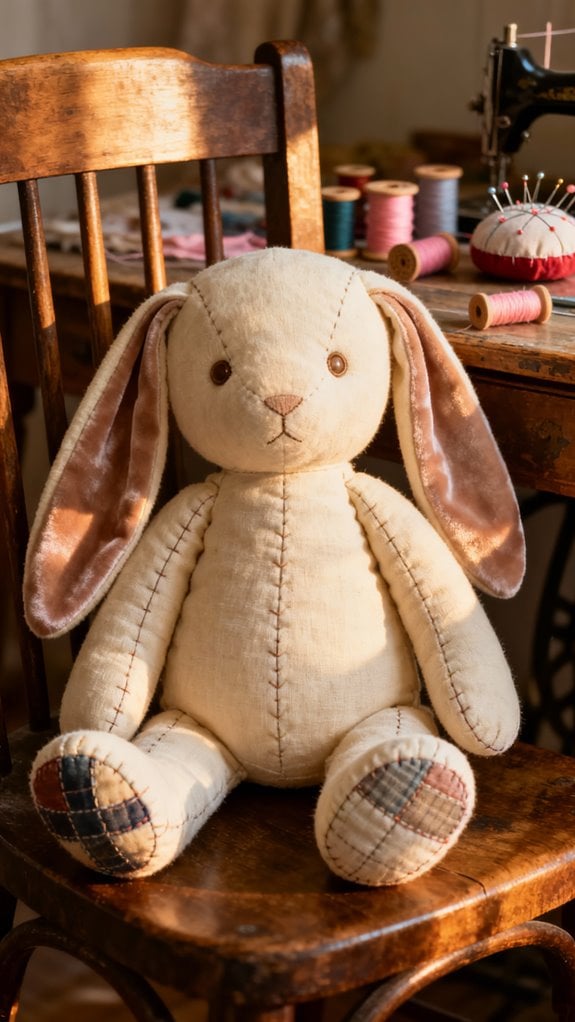
The classic floppy-eared stuffed bunny has charmed makers and recipients alike since the early 20th century, earning its place as one of the most beloved handmade toys you can create. I love how approachable this pattern is—you’ll need less than half a meter of chenille or fleece, polyester fiberfill, and basic notions like buttons and embroidery floss. The construction involves cutting paired pieces for ears, limbs, body, and head, then assembling with right-sides-together seams. Advanced jointing techniques like button-jointed arms and legs add gentle posability, while hand-embroidered facial features bring personality to life. You can customize fabric choices, scale the 10-to-18-inch height, and add safety eyes for toddlers. When stuffing your bunny, keep the filling light for softness to ensure it maintains a cuddly, bouncy texture that makes it perfect for hugging. It’s perfect for Easter baskets, baby showers, or anytime you want to craft something truly sentimental.
Mini Bunny Dolls for Beginners

Scaling down your bunny project opens up a whole new world of quick, portable sewing that’s perfect when you’re just starting out. I love that mini bunny dolls typically measure just 5 to 11 inches and require minimal fabric—around 20″ x 12″ for the body. You’ll complete one in just a few hours using simple straight stitches and basic hand embroidery for facial features. Adding safety eyes and other embellishments can enhance the charm of your mini bunnies while ensuring they are safe for children.
The beauty lies in customization options. You can choose floppy or upright ears, add tiny rompers or dresses with elastic waistbands, and personalize expressions with embroidered or painted details. I recommend quilting cotton or felt for easy handling, plus invest in hemostats or a chopstick for turning those small limbs. If you’re ready to expand your skills, consider patterns that include precision doll construction techniques and proper stuffing methods to take your bunny-making to the next level. These adorable bunnies work beautifully as dollhouse companions or Easter gifts.
Velveteen Rabbit With Nostalgia Appeal

When you stitch a Velveteen Rabbit, you’re creating more than a toy—you’re bringing to life the beloved character from Margery Williams’ 1922 classic that’s touched hearts for over a century.
I love how these patterns capture the story’s themes of love and transformation. You’ll typically work with velveteen or cotton velour to craft a 14-inch standing rabbit, following detailed PDF instructions with photo guides perfect for beginners. Additionally, this project can enhance your sewing skills through techniques like pattern drafting and custom embellishments.
The materials list is straightforward: half a yard of main fabric, contrast fabric for ears and belly, stuffing, and 12mm safety eyes. I recommend adding ground walnut shells or poly pellets for realistic weight, plus horsehair canvas for structured ears.
This handmade treasure makes an incredibly meaningful gift, especially for holidays or welcoming new babies—personalized with your fabric choices and embroidered details. The pattern works beautifully with quilting cottons or velveteen, giving you flexibility to choose the perfect texture for your project.
Bunny Tote Bags as Seasonal Baskets

While a Velveteen Rabbit becomes a cherished keepsake, bunny tote bags offer a practical twist on rabbit-themed sewing that’s perfect for seasonal celebrations. I love how these totes transform Easter egg hunts and spring gifting with their reusable, eco-friendly design. Additionally, creating seasonal accessories like these tote bags can be a fun way to explore customization options that suit every occasion.
You’ll find free templates online for cutting precise ear shapes and panels, making construction straightforward even for beginners. I typically work with sturdy canvas or home décor fabrics paired with cheerful lining prints. The best part? You can customize everything—appliqué bunny faces, add contrasting ear fabrics, or attach pom-pom tails for extra charm.
These bags hold chocolate eggs, books, and small toys beautifully. They’re quick to sew using basic supplies: cotton fabric, wadding, ribbon, and interfacing. Iron your seams carefully for professional results, and you’ll create functional Easter baskets that replace disposable options year after year. When assembling your bunny bag, place the lining and quilted pieces right-sides together before sewing around the edges with a 1/4″ seam allowance.
Child-Sized Bunny Backpacks

Child-sized bunny backpacks bring adorable functionality to everyday adventures, transforming practical storage into a playful accessory kids genuinely love carrying. I recommend quilting cotton or corduroy for the body, with faux fur adding that irresistible plush texture to ears and tails. You’ll find patterns for various ages—small sizes suit 1–3 years, while medium works for 3–7 years—with adjustable straps ensuring lasting wearability. Incorporating basic sewing techniques will help create a durable and well-constructed backpack.
Most designs require intermediate skills, though beginner-friendly tutorials exist with clear video demonstrations. I suggest incorporating a gusset for better depth and capacity, perfect for snacks, toys, or library books. Zipper closures keep belongings secure during active play. Adding fusible fleece to lining provides extra body and structure to help the backpack maintain its shape during use. These backpacks shine as Easter gifts but work beautifully year-round for school, travel, or playdates, making them genuinely practical investments beyond seasonal appeal.
Fragrant Bunny Sachets for Closets

Fragrant bunny sachets transform fabric scraps into charming closet companions that freshen your space while adding a touch of handmade whimsy. I’ll grab fabric pieces around 8.5″ x 6″, trace a free PDF pattern on the wrong side, and sew with right sides together, leaving a 1″ opening. After trimming seams to 1/8″ or 3/8″ and clipping curves, I’ll use blunt tweezers to turn those delicate ears right-side-out.
For filling, I love dried lavender for its gentle scent, though chamomile creates relaxing sleep pillows, and rice or wheat transforms sachets into microwavable heat packs. Activated charcoal works brilliantly for shoe freshening. You can also try catnip-filled versions to create delightful toys for your feline friends. Additionally, consider using upcycled materials to make your sachets even more eco-friendly. I’ll press my bunny smooth, embroider a sweet face if desired, and add a pom-pom tail. These compact sachets make perfect spring gifts!
Personalized Baby Bunny Comforter

Because babies need something soft to snuggle that’s safe for their tiny hands, I’m excited to share how to create a personalized baby bunny comforter that’ll become a treasured companion. I recommend using minky or flannel for that irresistible softness, paired with cotton blend backing for durability. Additionally, stretch vs. non-stretch fabrics can affect the comfort and fit of your comforter, so choose wisely.
The construction is straightforward: print your pattern, stitch ears and body pieces right sides together, then securely attach a polyester fiberfill-stuffed head. I always embroider facial features with floss—absolutely no buttons or beads that could pose choking hazards.
Here’s where personalization shines: embroider the baby’s name before assembly, mix printed fabrics with solids, or add custom ear linings. The KULIO baby comforter offers a bunny lovey pattern specifically designed for newborns with customization options. These 13×13-inch comforters make perfect baby shower gifts, and they’re wonderfully beginner-friendly while being machine-washable for practical everyday use.
Dressable Cloth Bunny Dolls

When you’re ready to create a cherished toy that’ll spark hours of imaginative play, dressable cloth bunny dolls offer the perfect combination of handmade charm and interactive fun. I love how these patterns include full-size pieces for the body, dress, and panties, making construction straightforward even for beginners. You’ll find step-by-step photo diagrams guiding you through precision techniques like gathering, elastic insertion, and lace trimming. Additionally, these projects often include customization tips that allow you to personalize each doll for a unique touch.
What makes these bunnies special is their wardrobe versatility. You can create entire clothing collections with interchangeable pieces featuring Velcro, snaps, or buttons. The clothes are designed to fit all rag dolls and animals in the collection, giving you flexibility to mix and match across patterns. I recommend starting with ½ yard each for the body and clothing, plus wool felt for structured ears. The authentic proportions (15-17 inches) capture nostalgic charm, while embroidered facial features and lace trims deliver heirloom-quality finishes that’ll be treasured for years.
Easter Bunny Mini Quilts With Applique

While dressable bunnies create three-dimensional playmates, I find equal joy in capturing that same whimsy in fabric art—specifically through Easter bunny mini quilts with appliqué. These 12″ x 12″ projects are perfect for beginners and quick enough to complete in an afternoon.
I use fusible web sheets like HeatnBond EZ Print Lite, printing patterns directly for accuracy. After fusing fabric pieces with a hot iron, I edge-stitch them with my machine using a 1/4″ seam allowance. The appliqué motifs—rabbits, eggs, butterflies—shine against tone-on-tone backgrounds.
For added charm, I frame designs with 2.5″ patchwork borders and add faux fur pompom tails. Straight-line quilting spaced 0.5″ apart adds texture. These finished minis make delightful wall hangings or table toppers, bound with coordinating strips for polished edges. The Reverse Pattern Foot #34D ensures precise stitching around curved appliqué edges.
Bunny Wrapped in Blanket Pattern

I’ve discovered that bunny wrapped in blanket patterns offer the perfect introduction to soft toy construction—especially for sewers who feel intimidated by complex plush projects. You’ll typically need just 8″ x 9″ of fleece plus small felt pieces, making this an affordable starter craft. The blanket stitch technique keeps assembly simple, and you can complete one bunny in just one to two hours.
What makes this pattern brilliant is its forgiving nature—you’ll construct the head, ears, and body separately before attaching them to a square blanket. Then you’ll fold the blanket around your bunny, securing the wrap with invisible stitches. I love customizing faces with embroidered features and adding pompom tails. The finished product works beautifully as a lovey for babies or charming nursery décor. For facial details, mark a grid on the bunny’s head with a disappearing ink marker to ensure precise placement of the embroidered eyes, snout, and whiskers.
Upcycled Sock Bunnies

The humble sock sitting orphaned in your drawer holds remarkable potential as a charming stuffed bunny—and you don’t even need to know how to sew. I’ll show you how to transform clean, old socks into adorable bunnies using just stuffing, rubber bands, and hot glue. Simply divide your sock into sections for the body, head, and ears by filling and tying off with elastic bands. Cut slits for ears and limbs, stuff each part for shape, then secure openings with glue. Add personality with button eyes, an embroidered nose, and a fluffy pom-pom tail. Each bunny takes under 20 minutes to complete from start to finish. This eco-friendly craft reduces textile waste while creating personalized gifts perfect for Easter baskets or charitable donations. It’s beginner-friendly, budget-conscious, and endlessly customizable with ribbons and accessories.
Quick Felt Bunny Silhouettes

When you’re short on time but still want handmade charm, felt bunny silhouettes deliver maximum cuteness with minimal effort. I recommend using printable templates and double-layer cutting to create perfectly symmetrical pieces from 14cm x 18cm felt squares. You’ll minimize waste while maximizing efficiency.
I love adding personality through simple details—outline eyes and noses with black embroidery thread, then dab pink marker on cheeks for instant warmth. Join layers using blanket stitch around the edges, leaving a small opening for polyester fiberfill. Compact stuffing with a chopstick guarantees those ears stand proud. For best results, choose wool mix felt over purely synthetic options, which holds stitches more securely in sewing projects.
These versatile bunnies work brilliantly as keychains, garland decorations, or chocolate-free Easter gifts. String multiple silhouettes together for festive banners, or batch-craft them using reusable templates for community events where speed matters.
Bunny Softie From Fabric Scraps

Transforming fabric scraps into cuddly bunny softies gives you one of sewing’s most rewarding experiences—you’ll rescue leftover materials from landfills while crafting gifts that genuinely delight recipients. I recommend starting with free printable PDF patterns that scale easily—print at 100% scale, then cut your mirror-image body pieces, ears, arms, and legs from cotton scraps, old t-shirts, or flannel remnants.
Sew extremities right sides together, clip curves, then turn and press before positioning them between body layers in a “rabbit sandwich.” For the ears specifically, fold in the bottom sides and tack into place before assembling the bunny. Leave a 2-3 inch opening for turning, stuff gradually with polyester fiberfill to avoid lumps, then hand-stitch closed using slip stitch. Embroider facial features with backstitch or satin stitch, add a pom-pom tail, and you’ve created an adorable springtime treasure in under 30 minutes.
Advanced Jointed Bunny With Movable Limbs

Once you’ve mastered basic softie construction, you’re ready to tackle jointed bunnies with fully articulated limbs—a thrilling step that transforms your fabric creations from static decorations into poseable, heirloom-quality toys. I recommend starting with German Schulte viscose (6mm fur length) for that realistic finish, paired with traditional cotter pin joints or button-jointed designs for visible charm.
The magic happens through precise joint placement—16mm discs for arms and head, 20mm for legs—secured with T-shaped cotter pins and washers. You’ll need specialized tools: an awl, 10-15cm needle, and pliers for safe assembly. Mark joint openings carefully on your pattern pieces; symmetry is everything here.
Pack limbs firmly with synthetic filling, add weighted pellets for balance, then insert joints before closing seams. The result? A bunny that sits, poses, and rotates beautifully. These handmade toys are considered an art form that elevates your sewing skills beyond ordinary crafting.
Large Patchwork Bunny Pattern

Patchwork bunnies offer the perfect canvas for turning fabric scraps into statement pieces that radiate personality and charm. I love working with patterns ranging from 16″ to 22″ tall—they’re impressive without being overwhelming. Lisa Pay’s tutorial stands out for its crystal-clear instructions that guide you through constructing manageable sections: front, back, ears, and feet.
Here’s my approach: arrange quilting cotton squares or rectangles by color, sew them into panels with ¼” seams, then cut using your bunny template. The key is maintaining accuracy so patches align beautifully across seams. I typically sew darts first, join patchwork panels, then attach ears and feet separately for contrasting textures.
Don’t skip pre-washing cotton to prevent shrinkage! Add topstitching for security, leave a 3″–4″ opening for stuffing, and finish with embroidered features for irresistible character. For a bunny that sits upright more reliably, use weighted stuffing material like Poly-Pellets in the bottom before adding regular polyester filling.
Conclusion
I can’t wait for you to plunge into these bunny sewing projects! Whether you’re stitching your first mini doll or tackling an advanced jointed design, each pattern offers something special to spark your creativity. Don’t hesitate to mix techniques—add patchwork details to your tote bag or personalize your backpack with unique fabric choices. Grab your supplies, pick a pattern that speaks to you, and let’s create something absolutely adorable together. Happy sewing!