15 Best Messenger Bag Sewing Ideas You Need To Try!
I’ve been sewing messenger bags for years now, and I can tell you there’s something incredibly satisfying about creating a functional piece that gets daily use. Whether you’re commuting to work, running errands, or just need a reliable hands-free option, these 15 designs offer something for everyone. I’ve gathered classics alongside innovative approaches that’ll challenge your skills while keeping things achievable. Let me show you what’s possible when creativity meets practicality.
Key Takeaways
- Classic canvas messenger bags feature adjustable straps, magnetic closures, and multiple pockets ideal for beginners learning basic construction techniques.
- Convertible designs transform between messenger, shoulder, and crossbody modes using multiple D-rings and adjustable webbing straps for versatility.
- Expandable gusset styles increase capacity by 30% while maintaining sleek profiles, perfect for transitioning between laptops and bulkier items.
- Eco-friendly options include recycled denim bags using deconstructed jeans and quilted patchwork designs made from assorted fabric scraps.
- Personalize bags through embroidery, monograms, themed patches, interchangeable straps, and custom fabric colors for meaningful handmade gifts.
Classic Canvas Crossbody Messenger With Adjustable Strap
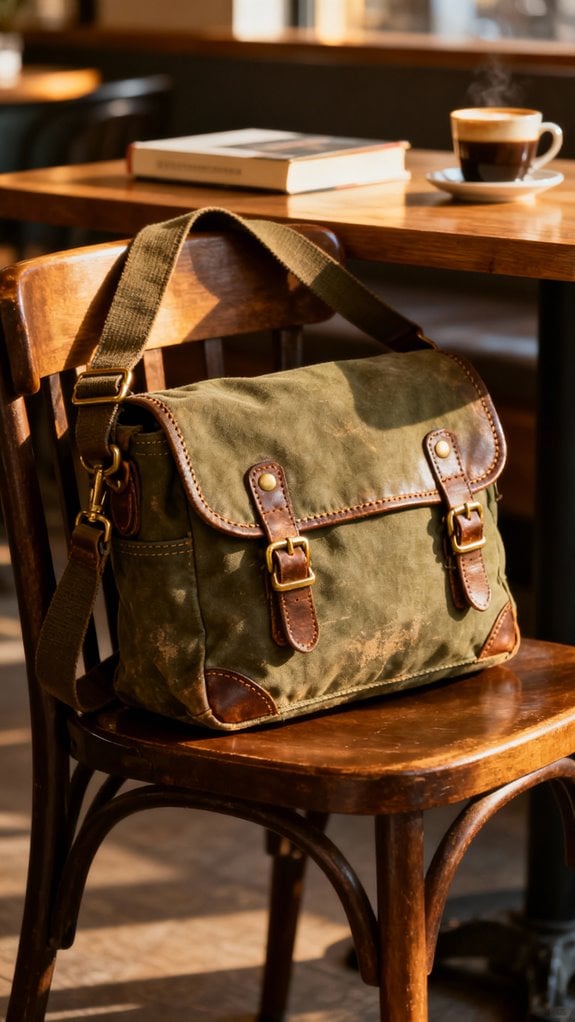
When I first decided to tackle a messenger bag project, I chose a classic canvas crossbody design because it’s genuinely forgiving for beginners yet looks impressively professional when finished. I used 10 oz canvas cut to about 20 cm x 20 cm x 5 cm, which gave me that compact, practical size I wanted. The adjustable 125 cm strap was surprisingly easy to construct, and I reinforced it with extra stitching at attachment points. I added a magnetic snap closure on the flap and included multiple pockets—one 3D front pocket and an interior zip compartment. For additional visual interest, I incorporated camouflage rip stop fabric as an accent along the top edge, which added both durability and a unique design element. The result? A durable, everyday bag that’s withstood months of heavy use. What I love most is how customizable it is; you can experiment with colors and lining patterns to make it uniquely yours. This project is a great example of how you can create a functional and stylish pack that suits your needs perfectly.
Mini Messenger Bag Perfect for Kids and Quick Errands

The joy on my daughter’s face when I handed her a mini messenger bag I’d sewn specifically for her park trips convinced me that this project is absolutely worth the hour it takes. I cut two 12″ x 9″ rectangles and added iron-on interfacing for structure, keeping everything beginner-friendly with straight seams. This project showcases beginner-friendly sewing techniques that can help build confidence in new sewists.
What I love most is the customization potential. I attached a Velcro closure for easy access and embroidered her initials on the flap. The 28″ strap hits perfectly at her hip, and I reinforced those attachment points with extra stitching since she’s constantly on the move. This project is ideal for beginners who want to build confidence while creating something practical.
This compact design works brilliantly for quick adult errands too—just enough room for my phone, wallet, and keys without the bulk of a full-size bag.
Expandable Gusset Design for Variable Storage Needs

While that mini messenger bag perfectly suits my daughter’s simple park outings, I quickly realized I needed something more adaptable for my own unpredictable days. That’s when I discovered expandable gusset designs—absolute game-changers for variable storage needs.
The concept is simple: side or bottom panels fold out when you need extra space, then collapse flat when you don’t. I can easily shift from carrying just my laptop to hauling books, lunch containers, and gym clothes without switching bags. The expandable sides add over 30% more capacity while maintaining a sleek profile when empty. These gusset folds allow the bag to expand outward to accommodate bulkier items while keeping a streamlined appearance when not in use. Many bag patterns also include customizable features that enhance the functionality of your design.
What I love most? My bag stands upright on its own when expanded, making it incredibly easy to pack and access contents. Plus, the extra surface area gives me fantastic opportunities for creative fabric combinations and branding touches.
Convertible Messenger Bag That Transforms Into a Shoulder Bag

After juggling three different bags for work, errands, and weekend trips, I decided enough was enough—I needed one convertible messenger bag that could handle it all.
I installed multiple D-ring attachment points on strategic corners, allowing me to transform the bag from messenger to shoulder to crossbody mode in seconds. The 54″ adjustable webbing strap with swivel hooks made switching effortless—no fumbling with complicated hardware.
I used heavyweight canvas for durability and added interfacing at stress points where straps attach. My design includes a roomy 13″ × 8″ central compartment with multiple interior and exterior pockets that stay functional regardless of orientation.
The flap closure secures everything when I shift configurations. This single bag now handles every scenario I throw at it. Additionally, incorporating functional features like magnetic closures and internal pockets can enhance the bag’s usability.
Eco-Friendly Recycled Denim Messenger With Contrast Lining

When my daughter outgrew her favorite jeans last spring, I couldn’t bring myself to toss them in the donation bin—the denim was still perfectly sturdy, just too short for her long legs. That’s when I discovered recycled denim messenger bags, and I’ve been hooked ever since.
I deconstruct jeans at the seams to create flat panels, then cut a 14″ x 19″ body and 12″ x 8″ flap from the legs. The contrast lining—I love using bright quilting cotton—makes the interior pop and helps me spot my keys instantly. I repurpose waistbands as straps and attach them with reinforced box stitches. Adding pockets is not only practical but also a chance to showcase your creativity.
What excites me most? Incorporating original pockets for extra storage and mixing different denim washes for unique color-blocking effects. You’re literally saving textile waste while creating something gorgeous. I manage my cookie settings through my browser to customize my online sewing tutorial experience.
Quilted Patchwork Messenger Bag With Decorative Topstitching

Last winter, I sorted through my fabric stash and found myself staring at a mountain of leftover scraps—those beautiful bits too precious to discard but too small for most projects. That’s when I discovered quilted patchwork messenger bags, and everything changed.
I pieced together assorted fabrics into vibrant panels, then layered batting between the patchwork and lining. Quilting stitches secured everything beautifully while adding texture. The decorative topstitching became my favorite part—I used contrasting thread along seams for extra pop. This style is particularly popular due to its creative customization options that allow for unique designs.
Construction felt intuitive: interface high-wear areas, baste straps before assembly, and press between steps for crisp results. I added a flap with magnetic closure and boxed corners for depth. The downloadable scrappy piecing guide helped me determine measurements and optimal scrap placement throughout the project. The finished bag measures 14″ wide and perfectly showcases fabric scraps I’d hoarded for years.
Professional Laptop Messenger With Reinforced Bottom Panel

My corporate job demands a bag that protects my laptop without looking like I’m hauling camping gear. I’ve sewn a streamlined messenger that checks every professional box.
The game-changer? That reinforced bottom panel. I used a double layer of heavy canvas with interfacing between, preventing the dreaded sag when my laptop’s inside. The padded compartment keeps my device snug—no rattling around during my commute. For added durability, I ensured my seams were reinforced techniques, which helped in maintaining the bag’s structure over time.
I added a luggage pass-through sleeve after one particularly frustrating airport experience. Now it slides right over my suitcase handle. The exterior pocket with magnetic closure gives me quick access to my boarding pass or office keycard. The adjustable padded strap distributes weight evenly across my shoulder, reducing strain during my daily commute.
Full-grain leather handles and metal hardware elevate the whole design. It screams “professional” without actually screaming anything—exactly what I needed for client meetings.
Embroidered Flap Messenger Bag for Personalized Style

While professional polish matters in some settings, I’ve found that my creative messenger bags spark more conversations than any plain work tote ever could.
I always embroider my flap before assembly—it prevents stitches from showing through the lining. I measure a 9″ wide area, leaving 1–2″ above and below my motif for seam allowances. Staying clear of strap attachment zones is vital so hardware doesn’t obscure my design. Adding stabilizing techniques during the embroidery process helps maintain the fabric’s integrity.
I stabilize cotton or canvas during stitching to prevent puckering, then add interfacing for extra support. After sewing the flap and lining right sides together with 1/2″ seams, I clip corners and topstitch 1/8″ from the edge.
Custom monograms and floral patterns make each bag uniquely mine, and metallic threads add personality that reflects my style. I’ve also adapted my messenger bags for various activities like trips to the pool or carrying supplies to church, proving they’re far more versatile than traditional work bags.
Color-Blocked Messenger Using Multiple Accent Fabrics

When I’m craving visual drama, color-blocking transforms a basic messenger bag into something gallery-worthy. I love combining teal, cream, and navy canvas—three coordinating colors that create stunning visual interest without overwhelming the design.
Here’s my approach: I cut 7.5 x 7 inch squares from each accent fabric for the flap, then arrange them before final attachment. The main body needs 1/2 yard of canvas, while each accent requires just 1/4 yard.
I always fuse Pellon SF101 interfacing to lightweight fabrics like linen for proper structure. For stability, I baste two 19 x 19 inch foam squares to the front and back panels using Wonder clips to maintain alignment.
Mixing textures between canvas and accent fabrics adds unexpected depth that makes each bag truly one-of-a-kind. This colorblocked design works beautifully with fat quarter collections, allowing you to showcase coordinating prints without purchasing large yardage.
Beginner-Friendly Messenger With Turned-Lining Technique

The turned-lining technique revolutionized my bag-making journey because it forgives imperfect measurements and eliminates those exposed raw edges that haunted my early projects. I simply sew the exterior and lining separately, sandwich my handles between them with right sides together, then stitch around the top edge. After turning everything through a 4-inch gap I’ve left in the lining’s bottom seam, I’m always amazed at the professional finish.
You’ll need just basic tools—no specialty feet or binding techniques. I recommend clipping your corners before turning and using a chopstick to push them out crisply. Press that top edge well, add optional topstitching for strength, and hand-stitch the gap closed. Before assembling, attach fusible interfacing to both lining pieces following the product directions for a structured, professional result. This method gives you room to breathe while learning.
Messenger Bag With Modular Interior Pocket System

My last messenger bag turned into a black hole where pens, cables, and memory cards vanished into a jumbled mess until I discovered modular interior pockets. I started sewing Velcro-lined panels into my main compartment, letting me attach and move pouches wherever I needed them. One day it’s a tech setup with padded laptop sleeves and cable organizers; the next, it’s configured for art supplies with pen loops and mesh dividers.
I’ve added zippered pockets for valuables, elastic bands for business cards, and a key leash that’s saved me countless frantic searches. Consider adding a clear vinyl window pocket that’s perfect for displaying maps or important documents you need to reference quickly. The beauty is customization—you’ll reconfigure based on each day’s needs. Try laser-cut MOLLE webbing on the exterior for attaching external pouches. Your bag becomes infinitely adaptable instead of forcing everything into fixed compartments.
Magnetic Snap Closure Messenger for Quick Access

Nothing frustrates me more than wrestling with buckles while juggling coffee and my phone, which is why I’ve become obsessed with magnetic snap closures for messenger bags. They’ve transformed my daily commute into something actually manageable.
I love how one-handed access works seamlessly—just flip the flap and go. For my work bag, I installed double magnetic snaps since I carry a laptop and heavy files. The hold is surprisingly secure, and unlike Velcro, there’s no embarrassing ripping sound during meetings.
Here’s what I’ve learned: match snap strength to your bag’s weight, and choose anti-rust finishes if you’re caught in rain often. Hidden snaps give that sleek, minimalist look I prefer, while decorative covers add personality without sacrificing function. They’re incredibly easy to replace too. The modern touch of magnetic closures really elevates the overall design appeal of any messenger bag you create.
Water Bottle Pocket Messenger for Active Lifestyles

After years of stopping mid-bike ride to dig through my bag for water, I finally designed a messenger with an external bottle pocket—and it’s changed everything about my active routine.
I used air mesh for breathability and sew-in foam to prevent sagging when my bottle’s full. The pocket dimensions (12″ x 8″) fit my 1-liter bottle perfectly, with elastic at the top keeping it secure through bumpy trails.
What I love most is the separate interior compartment that protects my phone from condensation. I added Velcro closures for quick bottle access and reinforced the strap connectors since I’m carrying more weight now. A cord lock toggle at the opening keeps everything cinched tight during movement.
The best part? This pattern works for beginners. You’ll customize pocket placement based on whether you’re right or left-handed—total game-changer for hands-free hydration.
Monogrammed Messenger Bag Perfect for Gift Giving

When my sister graduated college, I wanted to give her something more meaningful than a generic store-bought bag—so I made her first professional messenger with her initials embroidered on the front flap. The look on her face was priceless.
I’ve since learned that monogrammed messenger bags make incredible gifts because they’re both practical and deeply personal. I always use fusible fleece interfacing to give the bag structure, and I position the monogram centrally or on the flap for visual impact. Bold, contrasting thread makes the initials pop beautifully.
You can customize everything—match the fabric to their favorite color, add themed patches for birthdays or holidays, or include interchangeable straps. I reinforce all strap attachments with extra stitching since these bags get heavy use. These versatile messenger bags work wonderfully for daily commutes, professional settings, or casual weekend outings. Trust me, handmade monogrammed bags become treasured keepsakes.
Large Capacity Messenger With Multiple Organization Compartments

I’ll never forget the chaos of my old messenger bag—cables tangled with snacks, my laptop pressed against a leaky water bottle, and important documents crumpled at the bottom. That’s when I discovered the game-changing power of sewing a large capacity messenger with multiple organization compartments.
I designed mine with 20+ liters of space, featuring padded laptop sleeves, zippered pockets for chargers, and dedicated slots for pens and phones. Adding removable dividers lets me customize the layout based on my day’s needs. I reinforced the seams for durability and included a floating bucket liner to separate my gym shoes from clean clothes. For maximum comfort during long commutes, I added an OrthoLite foam strap pad that prevents shoulder fatigue even when the bag is fully loaded.
The result? Everything has its place, and I can actually find what I need without excavating.
Conclusion
I’ve been sewing messenger bags for years, and I can’t tell you how satisfying it is to create something so practical and personal. My first attempt wasn’t perfect—the strap was crooked!—but I learned so much. You’ll love having a bag that’s uniquely yours, whether it’s for daily commutes or weekend adventures. Don’t overthink it; just pick a design that excites you and start sewing. You’ve got this!
