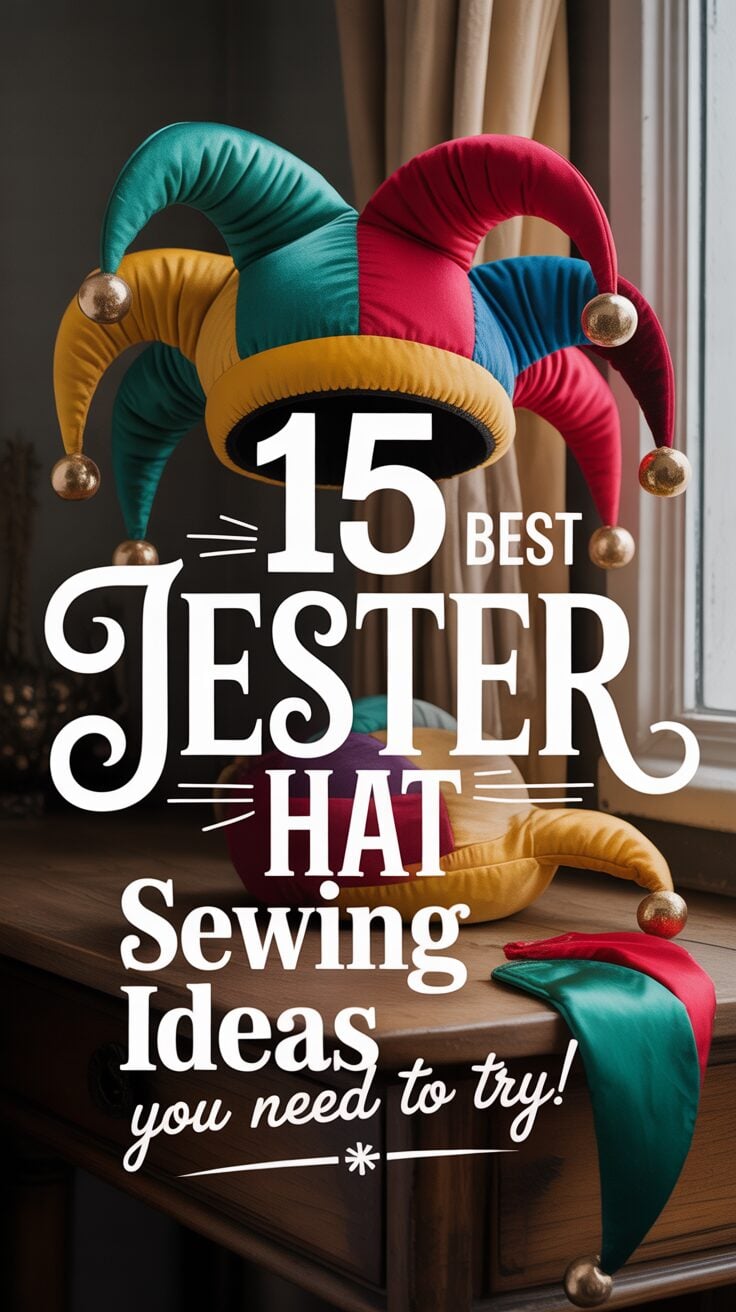
15 Best Jester Hat Sewing Ideas You Need To Try!
I’ll admit, my first jester hat was a disaster—floppy peaks and lopsided bells that made me look more confused than whimsical. But after years of perfecting these playful creations, I’ve discovered techniques that transform simple fabric into showstopping headwear. Whether you’re crafting for Renaissance fairs, theater productions, or just want to add some medieval mischief to your wardrobe, I’m sharing the fifteen patterns that’ll save you from my early mistakes and get you creating like a pro.
Key Takeaways
- Classic three-peak fleece jester hats use printable patterns with double-layered fabric and jingle bells for authentic design.
- Themed options include Harley Quinn two-tone designs and glow-in-the-dark versions with LED strips for night events.
- Luxurious variations feature faux fur trim and wire-structured horns for dramatic, upright effects at festivals.
- Beginner-friendly patterns use forgiving cotton fabric with four-horn designs and simple elastic attachments for easy assembly.
- Construction techniques include buckram brims, poster board crowns, and metal comb attachments for secure, comfortable wear.
Classic Three-Peak Fleece Jester Hat With Bells

The jingling sound of a jester hat always takes me back to my first Renaissance fair, where I watched performers captivate crowds with their colorful, bell-topped costumes. Now I’ll show you how to create this iconic three-peak design using fleece.
Start by downloading a printable pattern and cutting double-layered fleece for each peak. Pin edges every inch to prevent stretching, then sew from tip to base, trimming seam allowance to 1/4″ for sharp points. Turn each peak right side out.
Assemble by placing peaks together—one right side out, the next wrong side out—and sew edges carefully. Repeat with the third peak.
Create a rectangular hat band, fold it in half, and attach it around the base. Finally, hand-sew jingle bells securely to each tip for that authentic jester chime. To enhance your design, consider adding decorative embellishments that can make your hat truly unique and eye-catching.
Harley Quinn Inspired Two-Tone Jester Hat
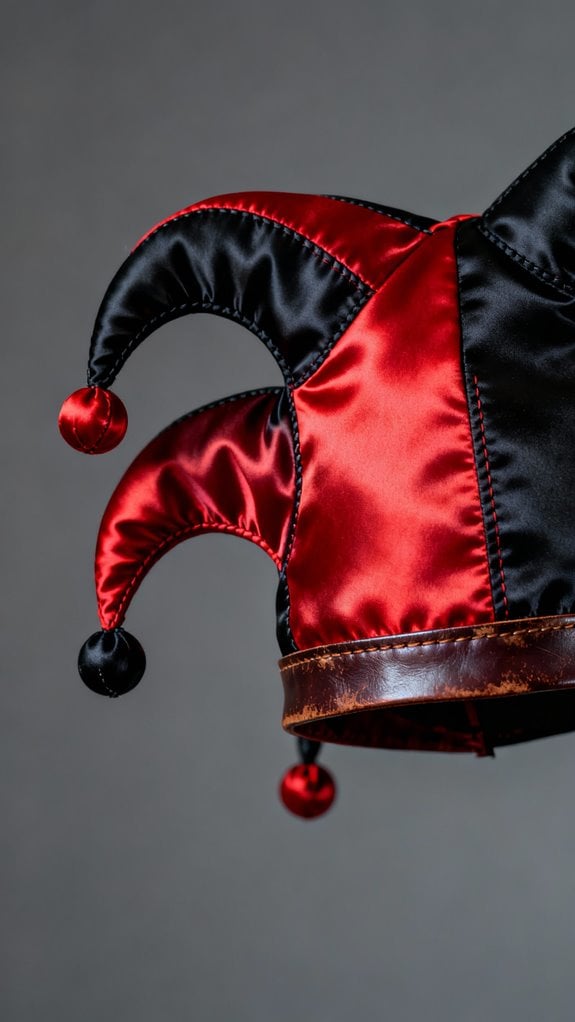
When I first attempted a Harley Quinn jester hat, I underestimated how essential the color split would be—one crooked seam completely threw off the iconic look. I’ve learned to draft my hood pattern carefully, splitting it vertically down the center before cutting red and black lycra panels. Pin everything twice before stitching that center seam—it’s your foundation.
For the horns, I cut jester shapes from scrap fabric and stuff them with polyfill, securing white pom-poms at each tip. Reference comic panels religiously; they’ll guide your color placement perfectly. Sewing techniques like reinforcing seams where horns attach since they create stress points is crucial. I always test-fit before final sewing, adjusting for head circumference. You can use excess fabric from your body suit to create the cowl pieces, which saves money and ensures color consistency. Add optional diamond stencils with fabric paint for authentic detail that elevates your cosplay considerably.
Glow-in-the-Dark Jester Hat for Night Events

After my jester hat vanished into darkness at a twilight parade, I realized standard fabrics weren’t enough for nighttime events—I needed glow power.
I started with glow-in-the-dark polyester as my base, then added luminous thread along every seam for subtle outlines. For dramatic effect, I embedded LED strips into the hat points, concealing battery packs inside an opaque lining. Wire inserts shaped each horn beautifully.
I painted custom star patterns using fabric glow paint and attached phosphorescent bells to the tips. The key is layering: contrast glow and non-glow sections for visual depth.
For comfort, I used lightweight stretch fabric with an elastic back for secure fit during dancing. My hat now shines at raves and night festivals, ensuring I’m visible and stylish simultaneously. Additionally, using contrast fabric techniques can enhance the overall design and make it even more striking.
Luxurious Faux Fur Trimmed Jester Hat

Luxury transformed my basic jester hat the moment I added a plush faux fur trim around the base. I cut my faux fur strip 5/8″ wider than my desired finished width, using short scissor snips to preserve the pile. Before sewing, I subtracted 1/4″ less than the fur width from my main fabric’s edge to maintain proper proportions. Adding a color-blocked design can elevate the overall look of your jester hat.
I gently pushed the fur pile away from seam edges while pinning, then attached it right sides together using a consistent seam allowance. The trick? I slightly overlapped edges for full coverage. After pressing my hat seams open, I joined everything together, aligning carefully for symmetry.
White fur against deep-colored fleece created stunning contrast. I’ve even extended fur up jester points for dramatic effect. Rolling back the lower edge and hand sewing a hem around the base gives the hat a professional finished appearance.
Wire-Structured Multi-Horn Jester Hat

The moment I threaded my first piece of wire through a jester horn, I discovered the secret to creating hats that defy gravity. Wire integration transforms floppy fabric into sculptural masterpieces that hold any angle you desire.
I start by selecting the right configuration—two horns for beginners, three for classic jesters, or four for dramatic symmetry. After sewing my horns good-side to good-side with lining, I turn them right-side-out and stuff each firmly. Then comes the magic: threading wire carefully through the interior without puncturing seams.
The wire gauge matters tremendously. Too thin and horns droop; too thick and they won’t bend. I prefer medium-gauge floral wire—it balances flexibility with structure perfectly, letting me pose each horn uniquely while maintaining its shape through countless wears. Additionally, consider incorporating eco-friendly materials to enhance the sustainability of your jester hat project.
Renaissance Fair Medieval Jester Hat

Walking through my first Renaissance fair changed everything I thought I knew about jester hats. I watched performers captivate crowds, their historically accurate hats integral to their entire costume ensemble.
Here’s what I learned: period accuracy matters. I studied historical illustrations and medieval artifacts before selecting velvet and silk in traditional reds, blacks, and purples. For structural support, I inserted wire into each horn to maintain shape during performances. To enhance the design, I also considered different fabric options that could complement the overall look.
The hand-embroidery took time, but appliqué techniques sped up adding colorful motifs. I attached bells with sturdy ribbons and added asymmetrical points for authentic whimsy. Whether creating pieces for historical re-enactments or theatrical performances, attention to detail elevates the entire costume.
My finished hat integrated perfectly with my Renaissance costume. The public engagement at fairs made every stitch worthwhile—there’s something magical about contributing to that festive atmosphere.
Mardi Gras Carnival Jester Hat With Ribbons
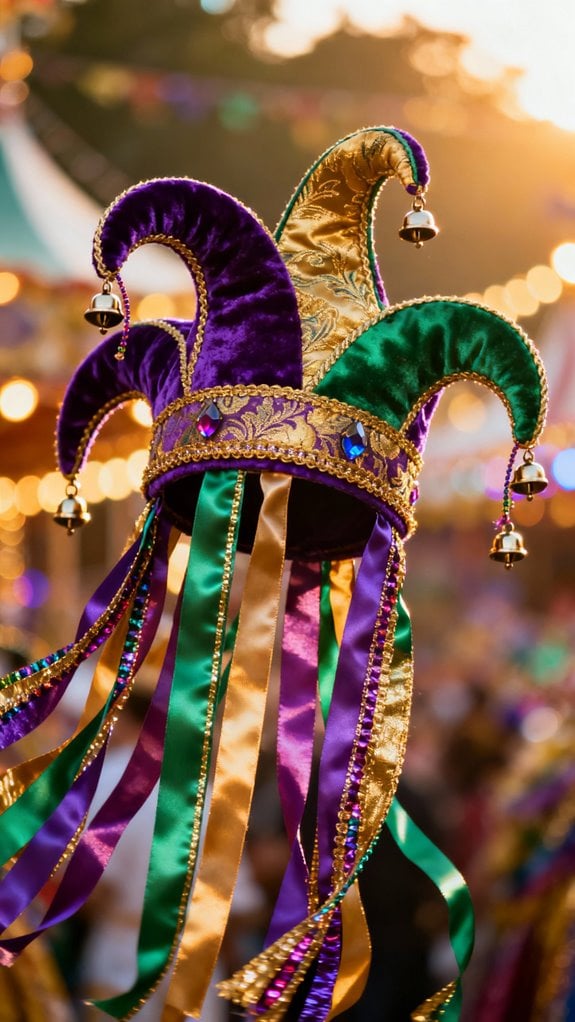
My Renaissance fair experience taught me period accuracy, but crafting a Mardi Gras jester hat opened up an entirely different world of sparkle and celebration. I immediately embraced the iconic purple, green, and gold palette—each representing justice, faith, and power. When selecting fabrics, consider durable materials that can withstand the festivities while maintaining a vibrant appearance.
I cut three pointed dollies from sequined polyester and reinforced them with interfacing to maintain their upright shape. For the base, I measured 23 inches circumference to fit comfortably. The magic happened when I layered metallic ribbons along each seam, alternating colors for maximum vibrancy. I hand-stitched bells at every tip, then added cascading ribbon bunches for movement.
Inside, I finished seams with bias tape for comfort. The durable construction ensures the hat maintains its shape throughout extended celebrations. This hat transformed simple parade attendance into an unforgettable, attention-grabbing experience.
LED Light-Up Jester Hat Design

After mastering traditional jester hats, I couldn’t resist the challenge of adding programmable LED lights to create a showstopper for night festivals. I started with a sturdy base using thermoplastic reinforcement to support the electronics. The real magic happened when I integrated an Arduino board—it’s simpler than you’d think! To ensure the design is both functional and stylish, I took inspiration from sustainable sewing techniques that emphasize creativity and resourcefulness.
I carefully sewed LED strips into the fabric using conductive thread, running them along each point. For dynamic displays, I added a flexible LED matrix that creates custom animations. The trickiest part was soldering extension wires for better connectivity, but electrical tape secured everything nicely.
I powered mine with a compact battery pack tucked inside the lining. Programming different color patterns transformed my hat from ordinary to extraordinary. I chose super bright LEDs specifically for their wide angle throw, which ensures the hat looks amazing from nearly any viewing position. Now it flashes synchronized patterns that turn heads everywhere!
Beginner-Friendly Cotton Jester Hat

When I first attempted a jester hat, I chose cotton fabric because it’s forgiving and doesn’t require special needles or techniques. I downloaded a four-horn PDF pattern and printed it at home, which made things incredibly straightforward.
Here’s what I did: I cut the fabric pieces carefully, sewed the peaks together with basic stitches, and turned everything right side out. I added topstitching for a polished look, then hemmed the bottom edge. To keep the horns upright, I inserted wire and light stuffing—this made all the difference.
I attached a simple hat band and added elastic in back for a secure fit. The whole project took an afternoon, and I’ve worn it to Renaissance fairs ever since!
Stretch Fabric Fitted Jester Hat Pattern

The fitted jester hat completely changed my approach to costume headwear. I discovered fleece’s stretch properties eliminate the need for elastic while maintaining a snug, comfortable fit. I always cut my hat band with the stretch running across the width—this guarantees the hat hugs your head perfectly.
Start by cutting your pattern pieces precisely, following the grainline markings. For my Adult Medium hat, I cut the band at 7.5 by 22 inches. Sew the main body segments right sides together, then attach the band with the stretch oriented lengthwise. I press seams open to reduce bulk.
The color-blocking opportunities are endless. I’ve added jingle bells and alternating fabric colors for authentic jester flair. Pre-wash your fleece to prevent shrinkage after assembly.
Five-Peak Festival Jester Hat

Festival season transformed my jester hat-making when I discovered the five-peak design. The starburst effect immediately catches attention at parades and carnivals.
I start by cutting five symmetrical peaks from cotton velveteen, then add interfacing for structure. Color-blocking bold fabrics—think Mardi Gras purples, golds, and greens—creates maximum visual impact. I attach gold jingle bells to each peak using reinforced stitching, ensuring they withstand enthusiastic dancing.
The fitted base requires elastic or fabric ties for secure wear during long festival days. I always line my hats to hide internal seams and improve comfort. For customization, I’ve swapped bells for LED lights at night events and added sequins for extra sparkle. Professional hatmakers focus on American-made quality craftsmanship that ensures heirloom-worthy results.
This five-peak version honors medieval jester traditions while perfectly suiting modern celebration aesthetics.
Halloween Themed Glitter Jester Hat

After years of making traditional jester hats, I’ve found Halloween versions with glitter fabric create the most dramatic costume centerpieces. I start by selecting party satin or sequin mesh in classic Halloween colors—black, orange, and purple work beautifully together.
For construction, I use a four-point pattern with tapered horns. I line the fabric with black cotton to prevent skin irritation during long trick-or-treat sessions. French seams keep glitter from fraying everywhere. I stuff the horns with polyfill and insert floral wire so they bend into playful shapes.
My favorite embellishments include mini jingle bells at each tip and hot-fix rhinestones creating spiderweb patterns. I attach a fitted stretch band for security. Pro tip: if noise bothers you, stuff bells with foam to mute jingling at indoor parties. You can also create unstuffed hat variations that maintain shape while reducing bulk for younger children.
Theater Performance Character Jester Hat

Creating jester hats for theater taught me that historical accuracy matters less than stage presence. I’ve learned to prioritize visibility and movement over perfect period details.
Here’s my approach: I build three floppy points using wire-stiffened felt, allowing dynamic movement during dance sequences. I attach oversized bells to each point—they’re louder than authentic ones, but audiences hear every jingle. I use motley fabric in bold contrasts that read clearly from the back row.
For functionality, I add elastic chin straps for security during acrobatics and include hidden pockets in the crown for surprise props. I’ve incorporated removable donkey ears using snaps, enabling quick character transformations between scenes. Professional jesters historically mastered juggling, dancing, singing, which influences how I design hats that won’t interfere with these multiple performance skills.
The key? Test everything under stage lights before final production.
Custom Color Block Jester Hat With Brooches

While stage jester hats demand durability for performance wear, I’ve found that custom color block designs with brooches let me express more personal creativity. I start by sewing contrasting fabric strips together before cutting my pattern—this guarantees precise color placement across each horn. For my last project, I used bright satiny cottons in purple and gold, creating four dramatic points with wire inserts for sculptable shapes.
The brooch element truly personalizes the design. I attach vintage brooches at the horn tips using secure hand-stitching, though removable pins work for washing. I’ve also added bells and tassels for Mardi Gras flair. The elastic band casing makes fitting easy, and I always press seams for crisp color shifts. When working with intricate decorative elements, I switch to a 75 Schmetz Quilting needle for better control and precision through multiple fabric layers. This technique transforms basic patterns into wearable art.
Mini Jester Hat Fascinator Style

When I discovered mini jester hat fascinators, I realized I could capture all the whimsy of a full-sized jester hat in a compact, wearable accessory that’s perfect for costume parties, Renaissance fairs, or even cocktail events.
I start by cutting a 3–5 inch diameter circle from buckram or stiffened felt. I sandwich two-sided fusible interfacing between fabric layers for the brim, then thread millinery wire through a channel along the edge for shaping. The wire lets me mold asymmetrical curves that add visual drama.
For the crown, I use poster board covered in bold striped fabric, attaching miniature bells and tassels with hot glue. I finish by sewing a metal comb to the base for secure attachment. The result? A playful fascinator that stays put through hours of wear.
Conclusion
I’ve sewn dozens of jester hats over the years, and I can tell you there’s nothing quite like the joy of watching your creation come to life! Start with the classic three-peak design if you’re new—I did, and it boosted my confidence tremendously. Don’t worry about perfection; my first hat had wonky bells, but everyone loved it anyway. Pick your favorite pattern and just plunge in—you’ll surprise yourself!