15 Best Hooded Cloak Sewing Ideas You Need To Try!
I’ll never forget the first hooded cloak I made—the pattern seemed intimidating, but once I cut that first piece of fabric, everything clicked into place. Over the years, I’ve discovered that creating these dramatic garments isn’t nearly as complex as it looks. Whether you’re drawn to medieval designs or modern minimalist styles, I’ve gathered fifteen techniques that’ll transform how you approach cloak-making. Let me show you what I’ve learned through countless projects and more than a few creative mistakes.
Key Takeaways
- Classic single-pattern cloaks require 3.75 yards of 60″ fabric with seamless back construction using fold-line alignment.
- Fully lined cloaks with wool or fleece add winter warmth using right-sides-together construction and topstitched edges.
- Custom-fit cloaks need neck, shoulder, and length measurements with reinforced hood attachment and ribbon closures.
- Brocade fabric with silk lining, velvet draping, and metallic trim creates luxurious cloaks for theatrical performances.
- Hood construction uses two-piece assembly, interfacing reinforcement, and the “hood sandwich” technique for professional results.
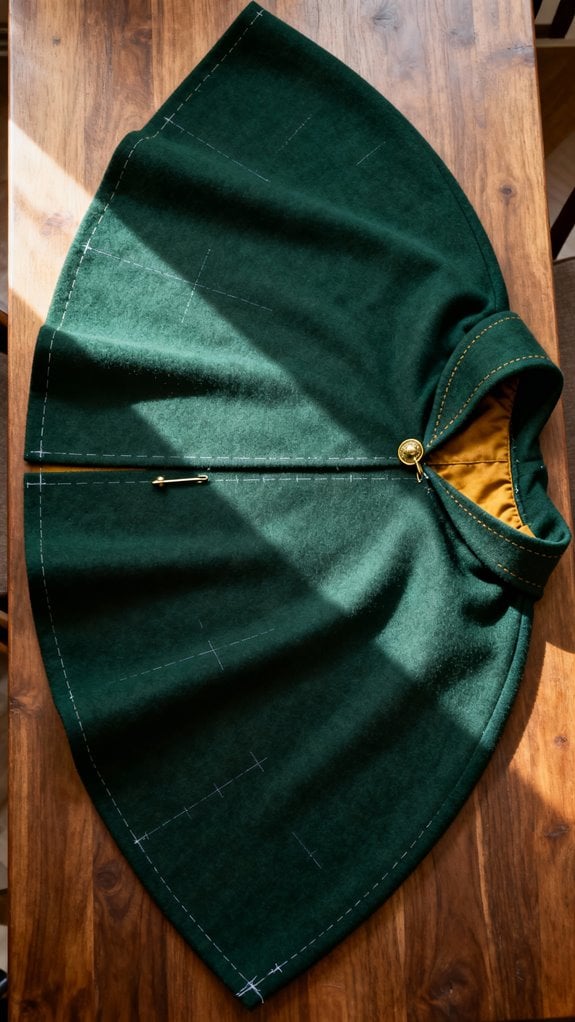
Classic Single-Pattern Long Hooded Cloak
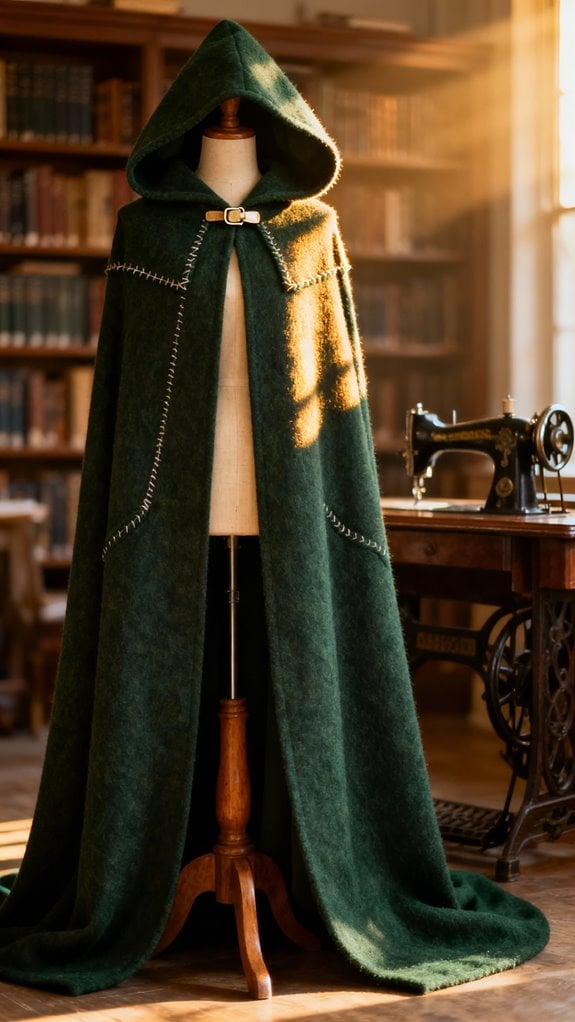
The beauty of a single-pattern cloak lies in its simplicity—you’re working with one master pattern piece that does double duty for both the back and front sections. I’ll guide you through my favorite approach: place your pattern’s blue line on folded fabric to cut one seamless back panel. Then, trim the pattern at those red lines around the neck and hem for your front pieces.
I typically use 3.75 yards of 60″ wide fleece or wool for the exterior, plus 0.75 yards for hood lining. The hood itself measures about 38″ circumference—cut on the fold to eliminate center seams. Join your back and front panels at the shoulders with ½” seam allowances, then attach the lined hood using the same measurement for durability and professional finish. When you sew the exterior hood pieces together, remember to clip around curves so the hood lays properly against your shoulders. For a polished look, consider adding embellishments like trim or embroidery to personalize your cloak.
Seamless Back Hooded Cloak Cut on Fold
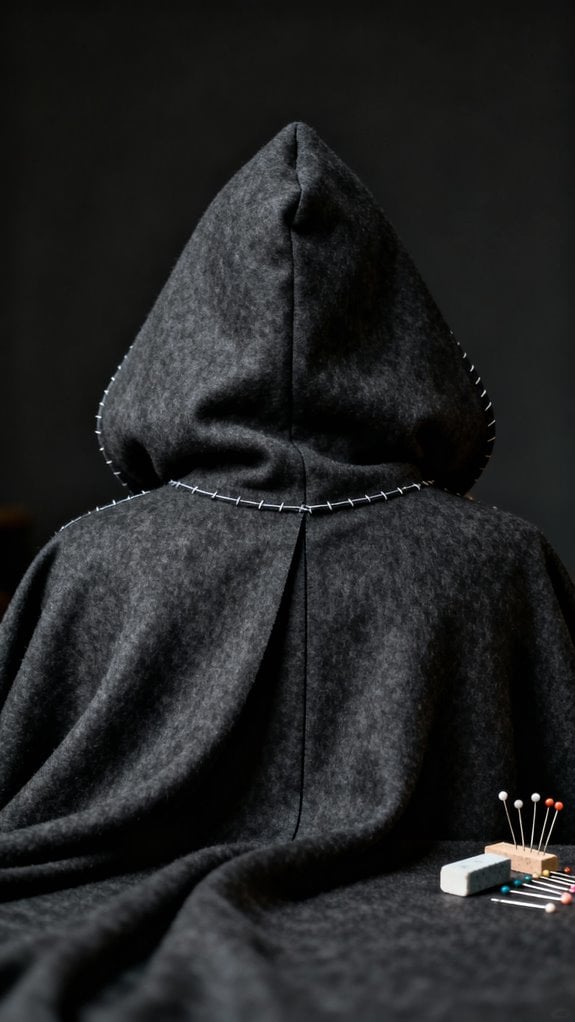
Cutting your cloak back on the fold transforms a potentially fiddly project into something remarkably straightforward. I’ve found that aligning the blue line on my pattern with the fabric fold creates one seamless piece—no center seam means superior drape and comfort. The .5-inch paper overhang helps me position everything perfectly. Additionally, using creativity in sewing allows for greater personalization in your projects.
I always verify the entire pattern fits on my folded fabric before cutting. After the back, I modify the same pattern for hood and front pieces, following the red guidelines for neckline curves. This dual-use approach saves pattern management headaches.
The curved hemline prevents tripping—I learned that the hard way! When I sew the hood’s exterior and lining right-sides-together using half-inch seams, everything aligns beautifully at the center back, creating that polished finish I’m after. I always roll the seam and press it into place to achieve a crisp color turn along the hood’s front edge.
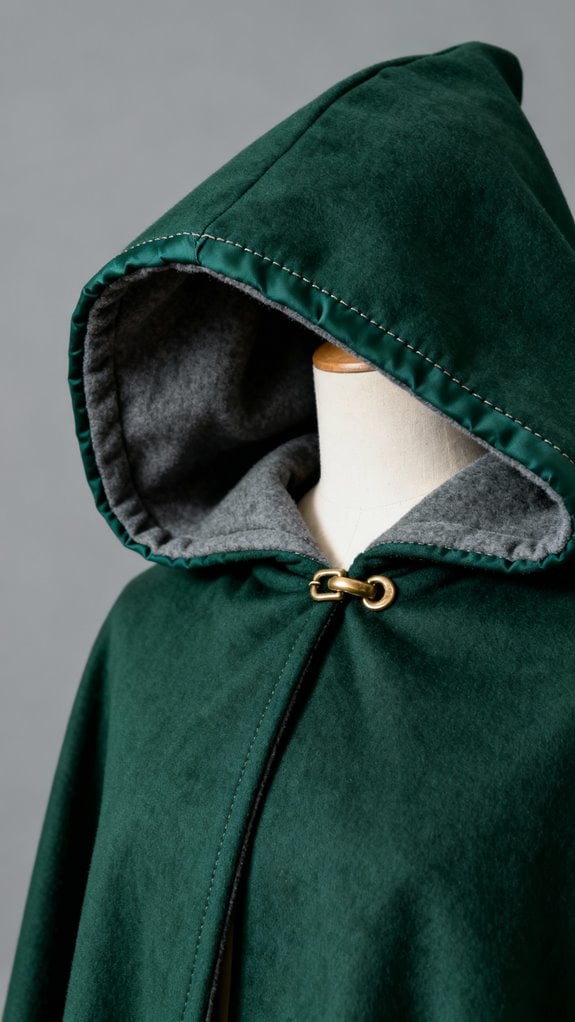
Fully Lined Hooded Cloak for Extra Warmth
While a seamless back creates beautiful drape, I’ve discovered that adding a full lining takes my hooded cloaks from pretty to genuinely practical for harsh winter weather. I always choose wool or fleece lining—satin looks lovely but won’t keep you warm. Incorporating insulated fabric options can significantly enhance the cloak’s ability to retain warmth.
My construction process is straightforward: I sew outer and lining layers with right sides facing, using 1/2 inch seam allowances. After ironing seams open, I pin around the bottom and sides, leaving the neckline open for turning. Once flipped right side out, I topstitch edges for durability.
The hood gets the same treatment. I cut lining using my outer hood as a template, then sew curved edges together before attaching to the body. This fully lined approach blocks wind effectively and slides easily over indoor clothes.
Self-Drafted Custom Fit Hooded Cloak

After years of adjusting store-bought patterns that never quite fit, I finally learned to draft my own hooded cloak from scratch—and I’ll never go back. I start by measuring my neck circumference, shoulder width, and desired length. For the cape radius, I divide my length by π—simple math that creates a perfect semicircle. I measure my head circumference and add ease for the hood, drafting it separately with custom depth. Choosing fabrics for comfort and style is essential, so I often opt for materials like wool or faux fur.
I always draft the front rise higher than the back to prevent tripping. After creating a paper pattern for test-fitting, I fold my fabric (58–60 inches works best) and cut the back piece on the fold. The front pieces stay separate for closures. I join the hood with a half-inch seam allowance and attach it to the neckline with reinforced stitching. For ties, I use ribbon or leather cording threaded through the front edges to secure the cloak comfortably.
Lightweight Cotton Beginner Hooded Cloak
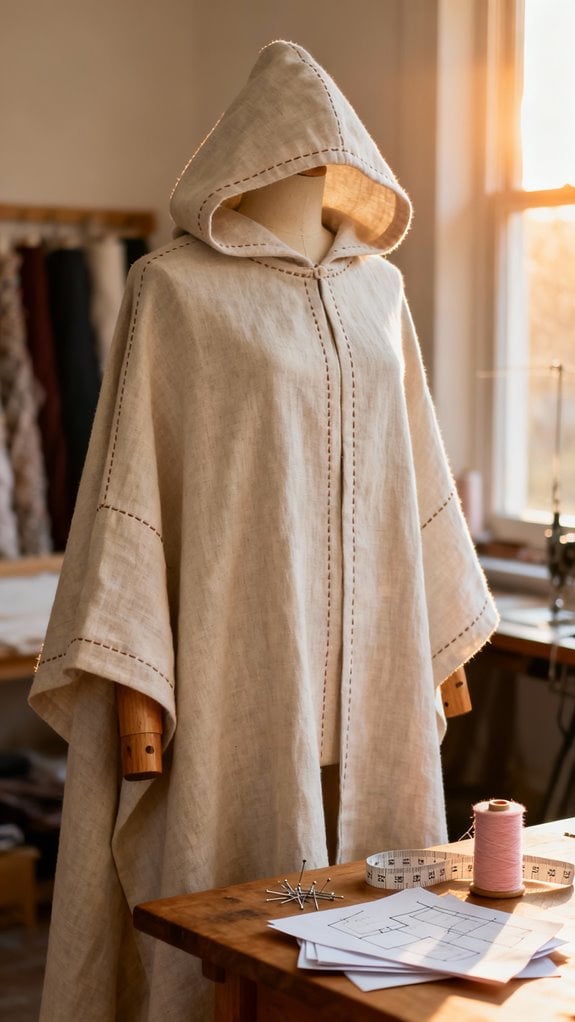
Cotton changed everything for me as a beginning cloak maker. I chose broadcloth for its affordability and forgiving nature—it sews, presses, and launders beautifully without the intimidation of slippery fabrics. This is similar to how choosing fabrics can greatly impact your sewing experience, as highlighted in apron-making.
For my first project, I used a simple half-circle pattern requiring 3 yards. I measured my shoulder width and desired length (48 inches), then drafted a rectangular hood 14 inches deep by 21 inches high. After pre-washing to prevent shrinkage, I pinned everything carefully before cutting.
Construction was straightforward: I joined the front panels to the back using ½-inch seams, attached the hood at the neckline, and pressed everything open for crisp edges. I finished with a double-folded hem and added simple fabric ties as closures. I used long straight stitches throughout to ensure all seams were secure and durable. The entire cloak took me just three hours to complete.
Luxurious Velvet Fantasy Hooded Cloak
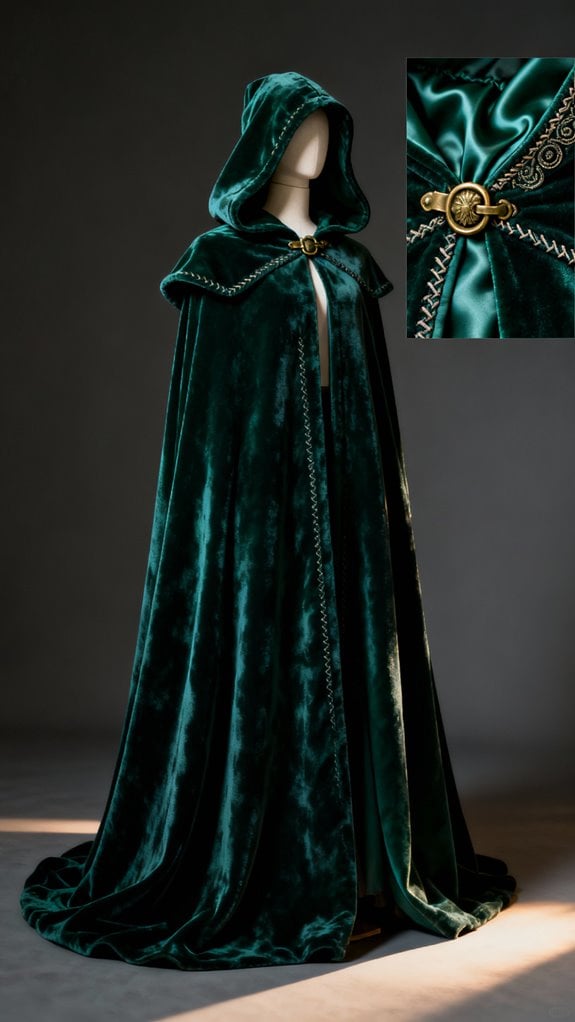
Velvet transformed my cloak-making from practical projects into wearable art. I discovered stretch velvet works beautifully for LARP events, allowing comfortable movement while maintaining that luxurious fantasy aesthetic. My first full-length cloak measured 130 cm from shoulder to ground, creating dramatic presence at medieval fairs. Incorporating beginner-friendly patterns can also help those new to sewing achieve stunning results.
I always finish raw edges carefully since velvet frays easily. Adding a satin lining elevated the comfort and presented polished interior seams. The shoulder seam placement creates an elegant drape I couldn’t achieve with simpler patterns. For dramatic costume effects, I incorporated heavily gathered back details that create stunning visual impact at special events.
For my elven-inspired design, I constructed an oversized hood and hand-sewn beaded trim along the edges. Using special needles prevented snags in the stretch fabric. The natural weight provides excellent insulation for outdoor events, and proper care through dry cleaning has kept it pristine through multiple seasons.
Oversized Pointed Hood for Cosplay
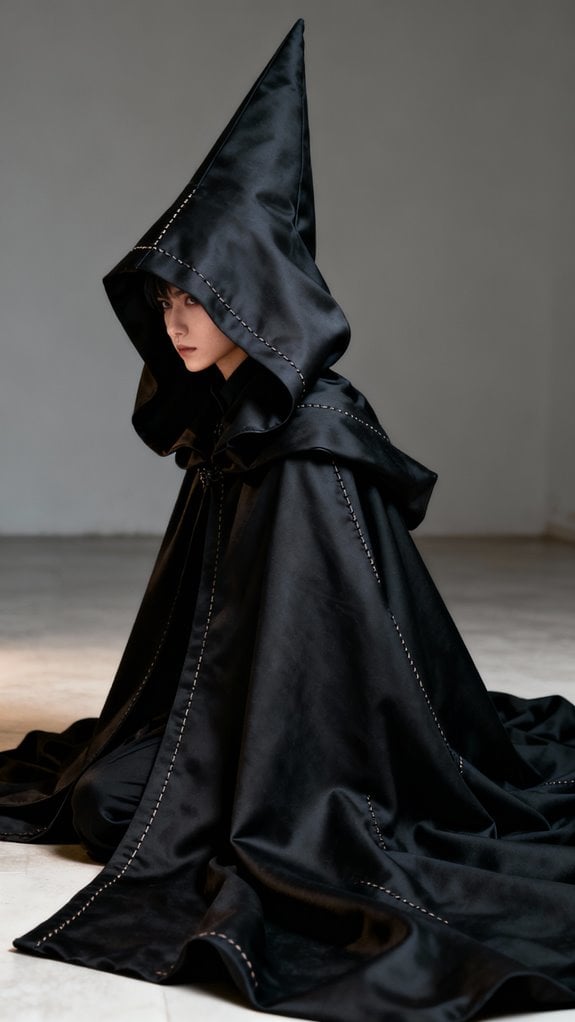
Creating an oversized pointed hood transformed my entire approach to cosplay projects. I now draft mine with 18-22 inch face openings and 22-inch depth for dramatic volume. The key is extending and sharply tapering the rear segment rather than rounding it—this creates that fantasy-perfect point.
I cut two identical fabric layers in medium-weight cotton or panne velvet, sewing with 1/4 inch allowances along top and back seams. The “sandwich” method works beautifully when attaching to the cloak neck: pin right sides together and carefully distribute excess fabric for even draping. Fleece eliminates hemming since the edges won’t fray, making it perfect for quick costume construction. Choosing the right fabric choices can enhance both the look and feel of your cloak.
My best discovery? Using a pencil to invert the pointed tip creates crisp definition. I reinforce mine with interfacing, add embroidery for character details, and always make the hood roomy enough to accommodate wigs without distortion.
Wizard-Style Hooded Cloak With Dramatic Drape
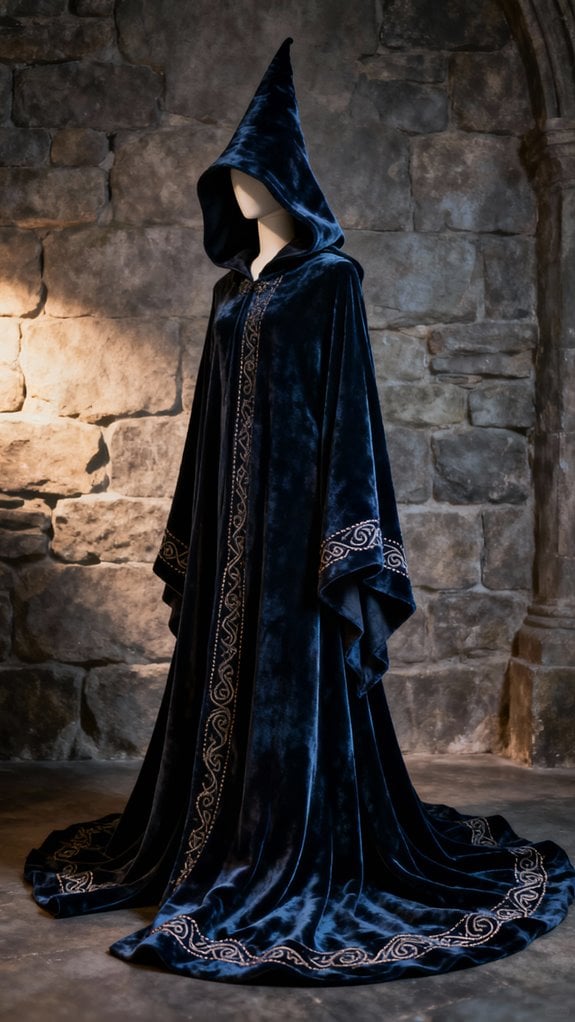
When I discovered floor-length wizard cloaks require nearly 5 yards of fabric, I learned why dramatic drape isn’t just about length—it’s about strategic fabric choice and construction. I’ve found that lightweight satin or velvet creates that magical flow, especially when lined for added weight. Additionally, using upcycled yarn not only enhances the cloak’s uniqueness but also contributes to eco-friendly fashion.
My favorite technique involves folding a large fabric piece in half to minimize seams while maximizing symmetry. I always curve the front hem upward to prevent tripping—learned that lesson during my first cosplay event! The hood makes or breaks the wizard aesthetic, so I construct it with two fabric pieces, adding extra material at the back for that authentic Harry Potter-inspired drape. I use accent fabric colors that match different Hogwarts Houses to personalize the hood lining.
I attach the hood by centering it at the neckline with half-inch seams, then finish with a simple tie fastening for adjustable comfort.
Gathered Back Hooded Cloak With Ruffled Trim
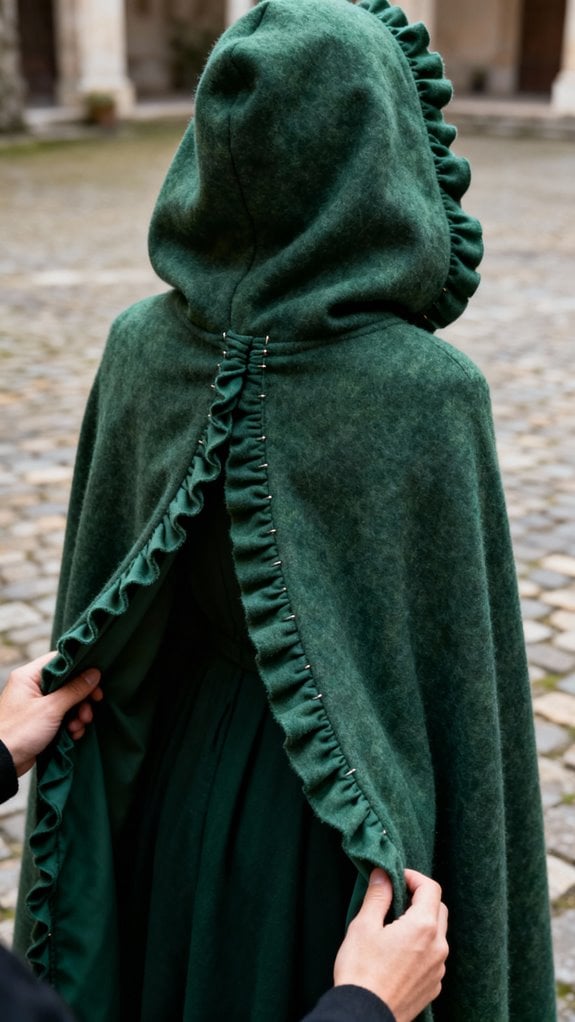
I’ve sewn three gathered-back cloaks, and each one taught me that strategic fullness transforms a simple design into pure drama. I add wide panels at the center-back seam, gathering them before attaching the hood. The key? Basting stitches let me adjust fullness evenly—no bunching.
For ruffled trim, I cut long fabric strips, hem them, then gather and topstitch around the hood and edges. My first attempt used heavy velvet for everything; the weight was exhausting. Now I pair wool bodies with lightweight cotton lawn ruffles for easier gathering.
I always line the hood before attaching it to the neckline—this adds structure and prevents sagging. When working with curves, I clip seam allowances generously. I create channels for hooping wire in the brim area to help the hood maintain its intended shape. The result? A sweeping, theatrical piece perfect for cosplay or Renaissance fairs.
Historical Costume Cloak With Hook-And-Eye Closure
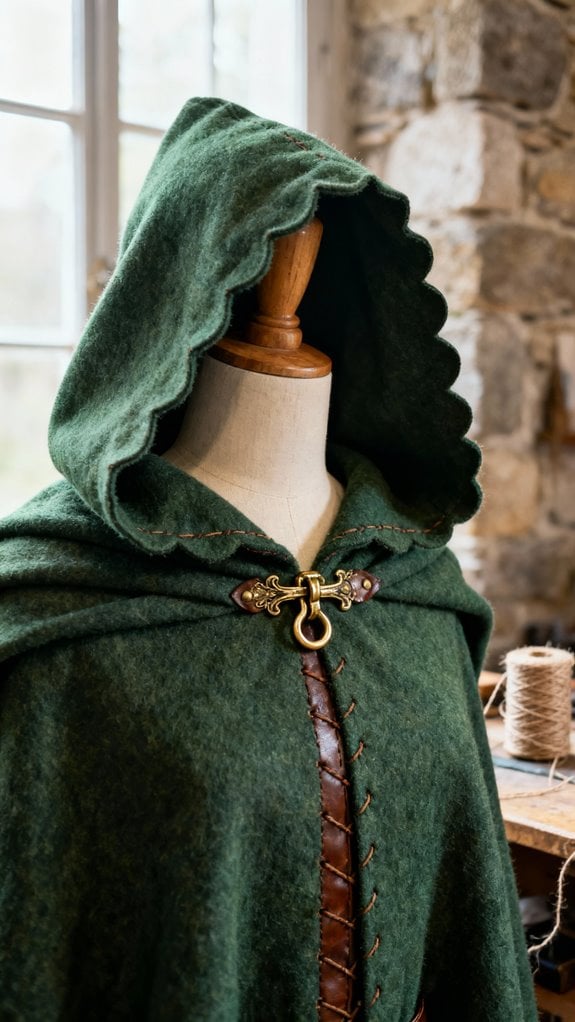
My first hook-and-eye cloak was a Victorian reproduction in midnight blue wool, and I’ll admit—I underestimated how much those tiny closures would elevate the entire piece. The discreet fastening at the neckline created an authentic finish that modern snaps simply can’t replicate.
I constructed the body and lining separately before joining them, which gave me clean internal seams. The yoke received flannel interlining for structure, then I cartridge-pleated the main body beneath it. For the hood, I measured my head circumference and opted for a curved design that provided better coverage than a rectangular cut. I added a contrasting color ruffle to trim the hood edge, which brought visual interest and softened the silhouette.
Hand-sewing the hook-and-eye sets took patience, but hiding them within the yoke facing made all the difference. The result felt genuinely period-appropriate.
Larp-Ready Hooded Cloak With Side Arm Openings
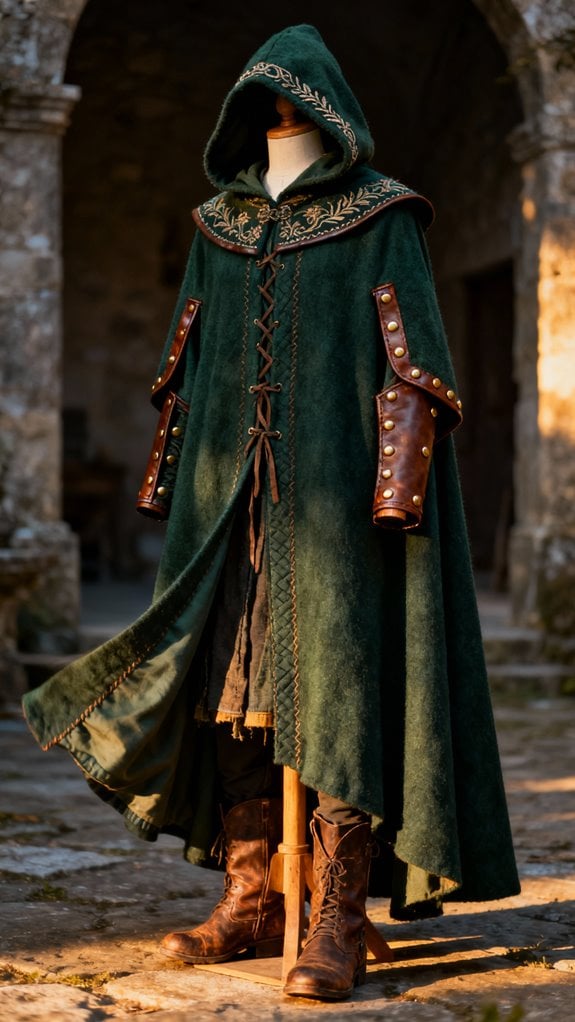
While historical accuracy served me well for Victorian reproductions, my LARP hobby demanded something far more practical. I needed full arm mobility for sword combat without exposing myself to cold winds. The solution? Strategic side arm openings positioned halfway down each side seam.
I used cotton canvas for durability and reinforced those slits with rolled hems on my serger—critical for preventing tears during intense battle scenes. The placement lets me draw weapons instantly while the cloak maintains core warmth. I measured from armpit to shoulder seam, adding overlap for comfort.
My semi-circle pattern creates dramatic drape, and the high collar closes with a single toggle. The high neck design provides both added style and essential warmth during outdoor events. For my ranger character, I deliberately left edges slightly weathered, contrasting sharply with my friend’s velvet nobleman cloak featuring pristine bound edges.
Simple Semi-Circle Hooded Cape Pattern
After years of drafting complex garment patterns, I’ve discovered that semi-circle cloaks remain the most forgiving project for beginners—the geometry does the work for you.
I measure from my neck’s base to where I want the hem (typically 45″ for myself), then use that as my radius when cutting. For 60-inch fabric, you’ll need 2.5-3.5 yards. I fold the fabric, mark my radius, and cut a semi-circle, leaving a 7″ diameter neck hole at the center.
The hood’s my favorite part. I trace an existing sweatshirt hood or draft a rectangle—mine’s 14″ tall and 11″ deep. After sewing the curved back seam with right sides together, I attach it to the cape’s neckline using my “hood sandwich” technique, then finish with ribbon ties. I always sew along the top and back edges only, leaving the front open for proper assembly.
Elf-Themed Hooded Cloak With Decorative Elements
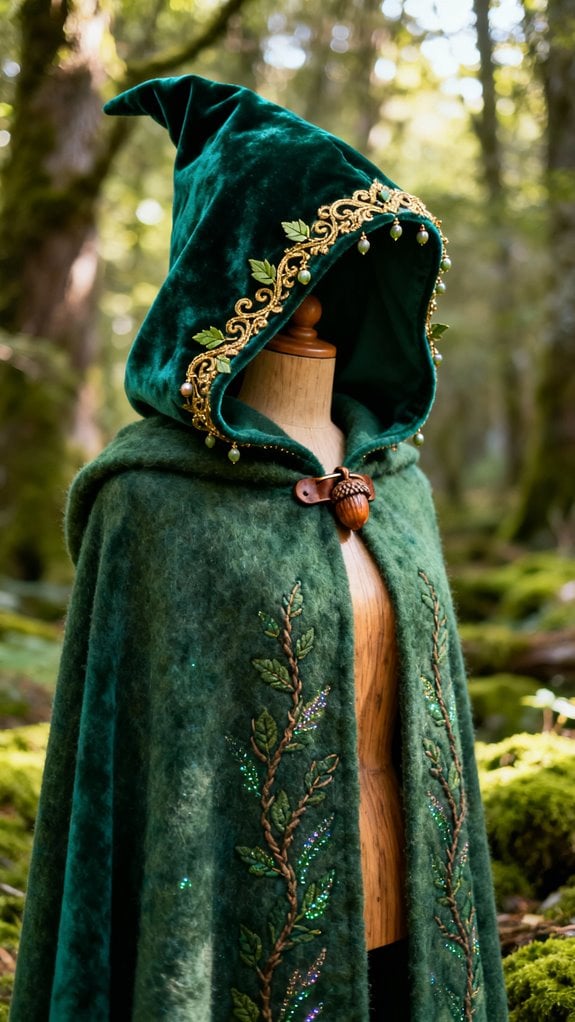
When I first designed an elf-themed cloak for my niece’s birthday, I learned that the magic lies in balancing fantasy aesthetics with practical construction. I chose forest-green wool and cut a longer, pointed hood to achieve that distinct elven silhouette. The hood attached at the neckline with careful centering and ½” seam allowances for durability.
For decoration, I hand-embroidered silver leaf motifs along the hood edge and added metallic trim at the hem. A leaf-shaped brooch provided the iconic look, but I installed hidden hook-and-eye fasteners underneath for actual closure security.
I customized the measurements to her height, extending the cloak to ankle-length for dramatic flow. After pressing all seams and trimming excess fabric, the finished piece captured that mythical elven aesthetic she’d dreamed about.
French Seam Finished Lined Hooded Cloak
Since I first tackled a fully lined hooded cloak with French seams, I’ve considered it the gold standard for professional-looking garment interiors. I construct both the outer cloak and lining separately, using French seams throughout the lining assembly—sewing wrong sides together at 1/4 inch, trimming close, then flipping and sewing right sides at 3/8 inch to encase all raw edges.
For the hood, I apply the same French seam technique along the inner curve before attaching it to the neckline. The trickiest part? Aligning both outer and lining layers at the neck while inserting the hood. I pin obsessively here, matching center points carefully. After sewing around the entire perimeter (leaving the neckline open initially for turning), I close the lining with hidden stitches for that seamless finish.
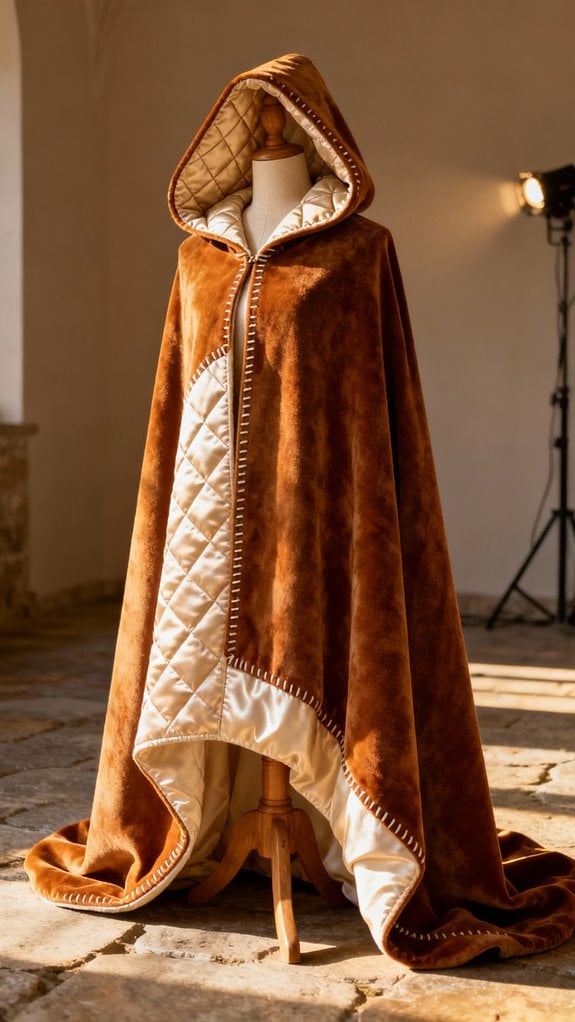
Embellished Brocade Hooded Cloak for Special Events

While French seams create polished interiors, the outer fabric steals the show when I’m sewing for gala events or theatrical performances. I’ve found brocade cloaks transform special occasions with their ornate, woven patterns and dramatic movement.
For my Renaissance fair cloak, I stabilized heavy brocade with silk lining, pressing seams carefully to prevent fraying. I tailored the hood opening to my head circumference, adding a pointed shape for medieval flair. Gold-plated clasps and metallic trim along the front edges enhanced the opulence.
I measured from collarbone to floor for proper length, ensuring the fabric swept my ankles beautifully. Hidden stitches at visible edges maintained professional results. Adding velvet accents created rich texture that drew compliments all evening. Velvet works wonderfully as an alternative recommended fabric for dramatic cloaks, offering luxurious weight and drape. This cloak became my go-to statement piece for themed weddings and costume events.
Conclusion
I’ve sewn countless cloaks over the years, and each one taught me something new about fabric drape and fit. My first attempt was laughably lopsided, but that didn’t stop me! I encourage you to start with a simple pattern—perhaps the beginner cotton cloak—and work your way up. Don’t worry about perfection; focus on enjoying the process. Trust me, there’s nothing quite like wrapping yourself in something you’ve created with your own hands.
