15 Best Bird Sewing Ideas You Need To Try!
I’ve been sewing fabric birds for years, and I can tell you there’s something magical about watching a flat piece of cloth transform into a charming little creature. Whether you’re looking for quick gift ideas, ways to use up fabric scraps, or simply want to add handmade charm to your home, these 15 bird projects offer something special for every skill level. Let me show you which ones have become my absolute favorites and why they’ll become yours too.
Key Takeaways
- Quick patchwork bird softies use fabric scraps and take one to two hours to complete with basic quarter-inch seam allowances.
- Felt bird ornaments feature raw edge appliqué, bead eyes, and ribbon accents for seasonal decorating and gift-giving.
- Lavender-scented bird sachets filled with dried buds freshen drawers while repelling moths with decorative appeal.
- Bird-themed pillow covers use envelope-back construction with stenciled silhouettes, felt appliqués, and embroidered details.
- Catnip-filled bird toys with fusible interfacing provide durable playthings, while mobiles with ribbons and bells entertain children.
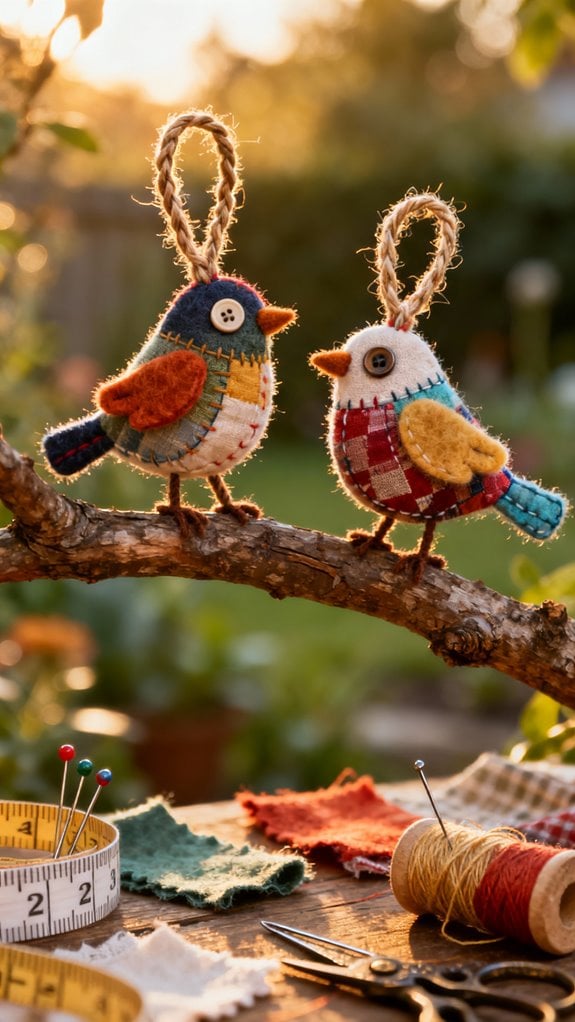
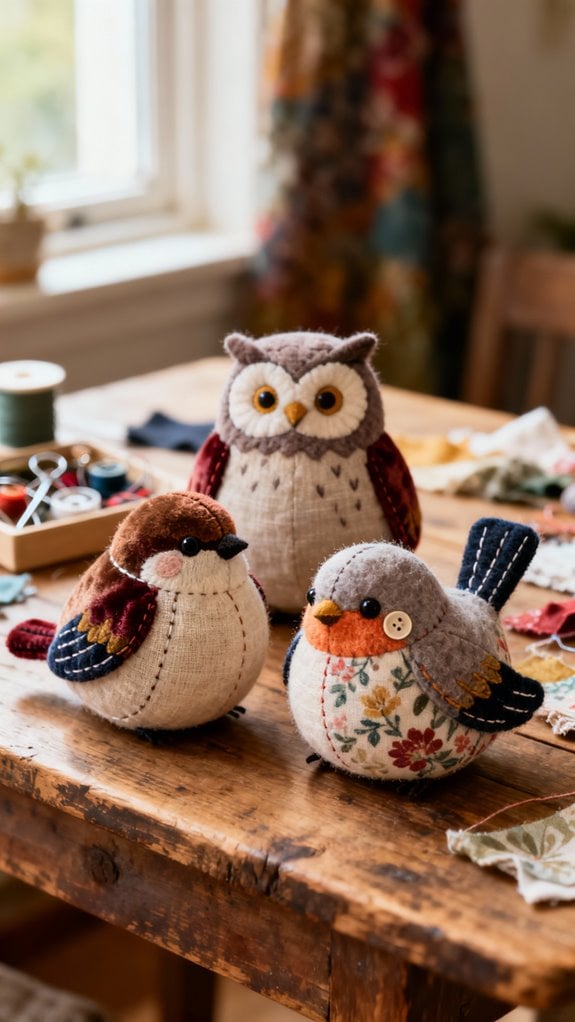
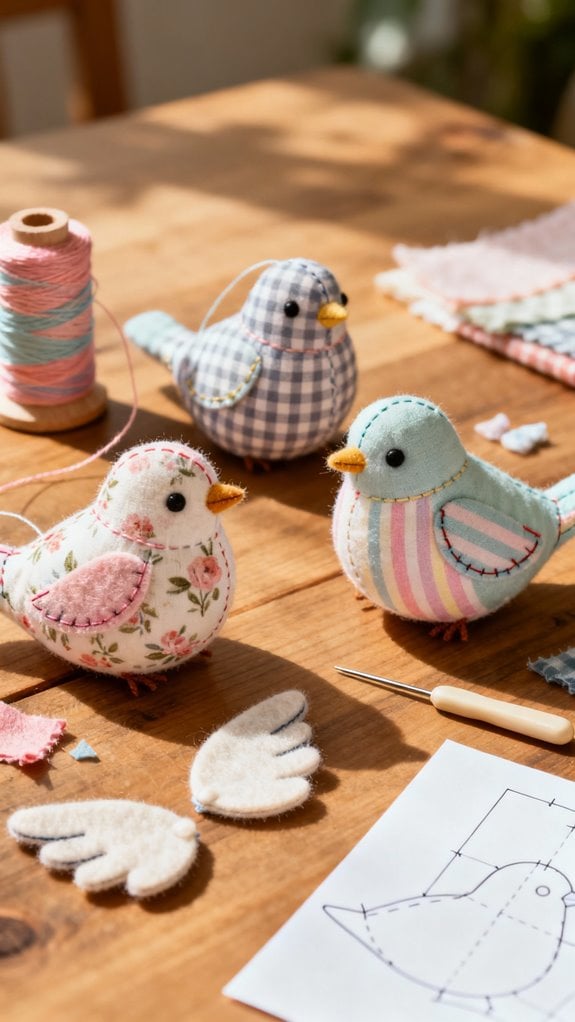
Patchwork Bird Softies for Easy Gift-Making
These adorable patchwork bird softies have become my go-to project whenever I need a quick, charming gift. I can complete each bird in one to two hours, making them perfect for last-minute occasions. I love using fabric scraps from previous projects—it’s economical and gives new life to beautiful offcuts. Additionally, these softies can be personalized with creative fabric choices, allowing each bird to reflect its recipient’s style.
Here’s my basic approach: I piece the body sections with a quarter-inch seam allowance, then notch the curved edges before turning. For eyes, I typically sew on two black beads, though French knots work beautifully too. After stuffing with polyester filling, I close the opening using a ladder stitch. For a more polished look, I sometimes add embroidered eyelashes using black perle cotton right next to the eyes.
These 4½-by-4-inch cuties work wonderfully as ornaments or garland elements. I’ve made several using country-style florals for spring gifts, and they’re always well-received!
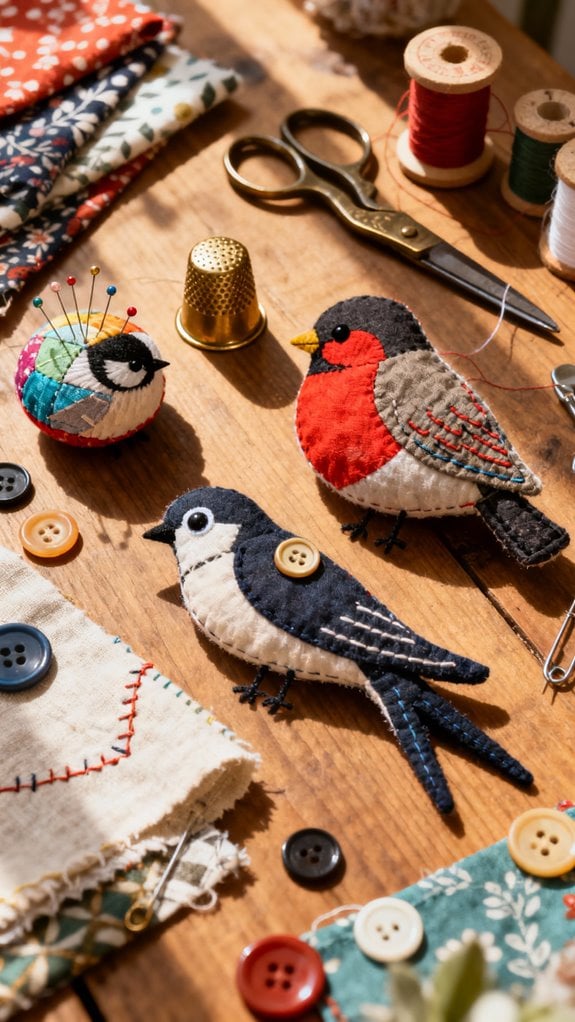
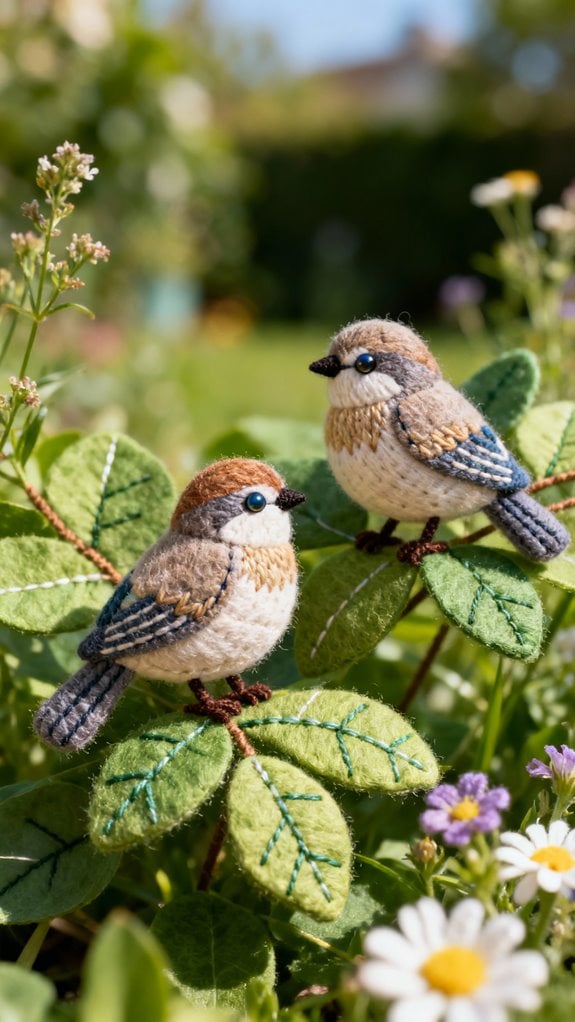
Vibrant Felt Birds With Embroidered Details
While patchwork birds offer quick satisfaction, I’ve discovered that felt birds with embroidered details create stunning statement pieces worth the extra time investment. I use wool blend felt in cheerful colors like banana cream and mac & cheese, then transfer patterns using Sulky Sticky Fabri-solvy stabilizer. To ensure durability, it’s important to choose high-quality materials that withstand wear and tear.
My go-to stitches include backstitch for outlines, lazy daisy for floral motifs, and French knots for eyes. I create textured breasts by alternating split stitch with French knots, and embellish wings with feather stitch patterns.
For assembly, I whipstitch pieces using 2-strand embroidery thread, insert the beak between face layers, and attach wings through the body center. I stuff from head to tail, adding pennies at the base for stability. After stitching, I soak pieces in cold water to dissolve the stabilizer, then lay them flat on a towel to dry. These projects take a couple evenings but they’re completely portable!
Articulating Wing Birds That Move Like Real Ones

I’ll admit, creating articulated wings that actually move took my bird crafts from cute decorations to jaw-dropping art pieces!
I started by building a frame using oak wood with wooden cleats as pivot points, mimicking a real bird’s three-bone structure. The key is arranging feathers in superimposed rows while keeping everything flexible. I attached strings to control the wing movement—wrapping them around joints lets me adjust the opening width perfectly. To enhance the design, I incorporated customization tips that allow for unique embellishments.
Here’s what made mine work: I used foam sheets to conceal the mechanism and create that slightly deeper back section for realism. Four layers of mesh fabric prevent snagging during movement. I painted with flexible paint to avoid cracking, then added loops and zippers for easy storage. For feather attachment, I drilled 14 vertically positioned holes in the main row of my wing bag, which created the perfect foundation for inserting foam feathers with wooden skewers. The result? Wings that fold and unfold just like nature intended!
Bird-Themed Decorative Pillow Covers
After mastering those articulated wings, I discovered that bird-themed pillow covers offer the perfect gateway project for anyone wanting gorgeous results without complex mechanics.
I’ll grab about 1/2 yard of sturdy cotton or linen for my pillow front. For a 16×16 inch cover, I’m using the envelope-back method—it’s brilliantly simple and makes washing effortless. Creative placemat sewing ideas can also inspire variations in your pillow designs.
Here’s my favorite technique: I’ll trace bird silhouettes using freezer paper, then stencil with fabric paint for crisp edges. Alternatively, I’ll cut felt birds and topstitch them as appliques for dimensional texture.
I’m adding embroidered details around the wings and piping along the edges for polish. What’s fantastic? I’m using fabric scraps, making this incredibly budget-friendly.
The transformation happens quickly—within an afternoon, I’ve created custom decor that perfectly matches my style. These decorative pillows work beautifully for babies, kids, teens, and even dorm rooms, making them versatile gifts for any age group.
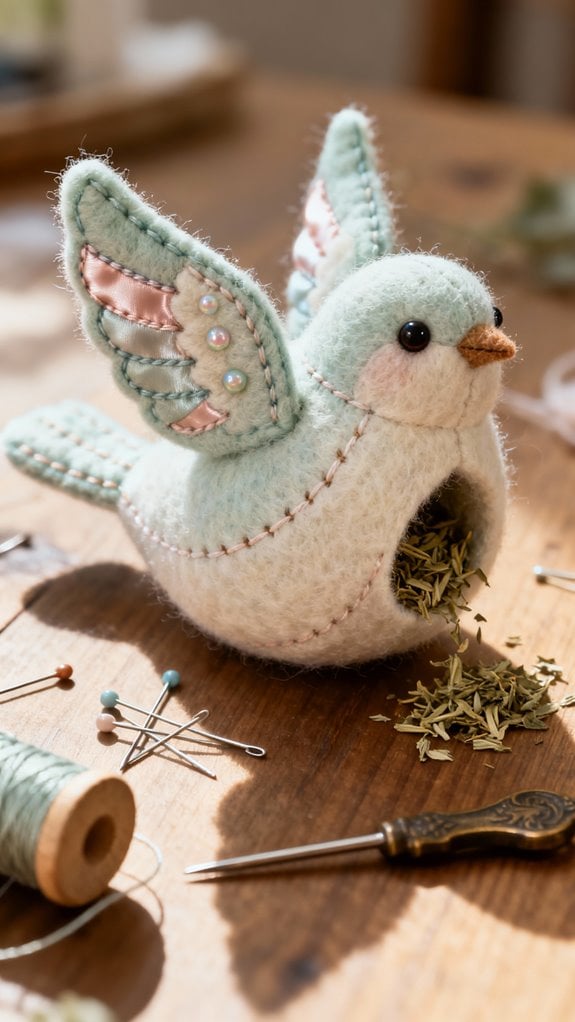
Fabric Bird Pin Cushions for Your Sewing Room
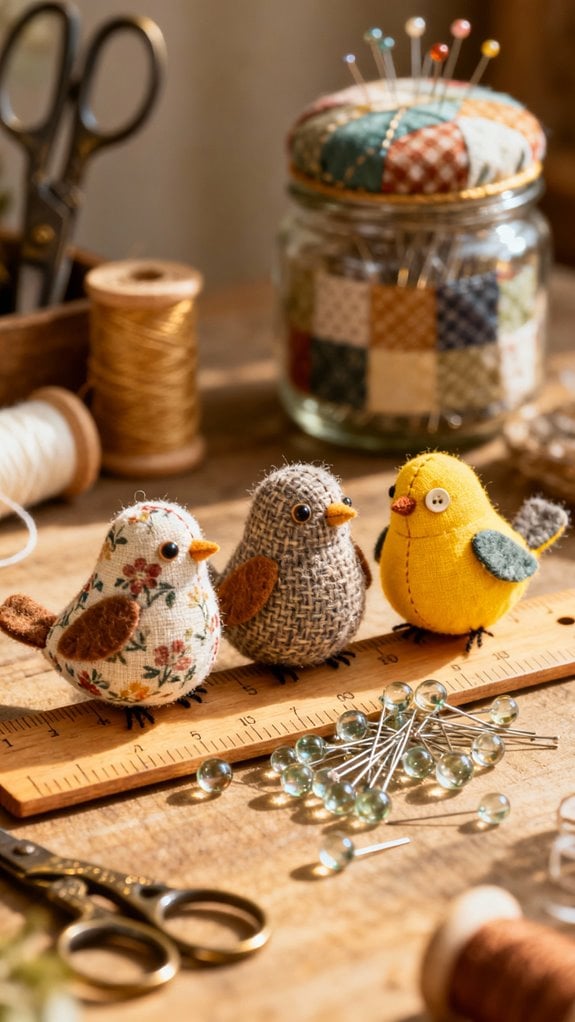
The charming addition of handmade bird pincushions transformed my cluttered sewing table into an organized, whimsical workspace. I start by pre-washing my fabrics—one main 20″ x 20″ print plus two coordinating smaller pieces. After transferring pattern markings with a chalk pencil, I cut two body pieces, one belly, and four wing sections.
I embroider the wing tops using stem stitch with three strands of floss, then sew them to the bottoms, leaving openings for turning. After ironing the open edge under 1/4 inch, I sew a blanket stitch to close each wing securely. After hand-sewing 5mm wooden beads as eyes, I assemble the body with 1/4″ seams, incorporating a hanging ribbon. Once turned and stuffed with polyester fiberfill, I close the opening with a blind stitch. Pro tip: never stick pins directly into your bird—use only the nest base! This project showcases beginner-friendly techniques that make it accessible for all skill levels.
Catnip-Filled Bird Toys for Your Pets
While my cats ignore every expensive store-bought toy, they go absolutely bonkers for handmade fabric birds stuffed with catnip. I cut two matching bird shapes with 1/4-inch seam allowance, pin right sides together, and sew around the perimeter leaving a 1.5-inch opening. After trimming seams with pinking shears, I turn it right side out and use a chopstick to push out the beak for definition. I fill the body 3/4 full with cotton batting, then funnel in 1-2 tablespoons of dried catnip along with a bell. For a sturdier toy that withstands rough play, consider ironing fusible interfacing onto the wrong side of your fabric pieces before sewing. Once I’ve distributed the remaining stuffing evenly, I hand-stitch the opening closed. To make the toy even more appealing, you can incorporate fun accessories like ribbons or bells that enhance the play experience. For extra engagement, I add knotted corners so my cats can grip during their wild play sessions.
Whimsical Bird Mobiles on Natural Branches
Creating a mobile from scratch transformed my daughter’s nursery from plain white walls into an enchanted forest canopy. I collected branches during our weekend hike, choosing ones with natural offshoots for multiple suspension points.
Here’s my process: Download free bird templates and cut fabric pieces from felt scraps. Sew bodies by hand or machine, leaving openings for light stuffing. Insert wings and tails through pre-cut slots, securing with hot glue. I sanded branches thoroughly to prevent splinters—safety first! Using embroidery can also enhance the facial details of your birds for an extra touch.
Connect branches using eye hooks or tied ribbons, experimenting with balance before different flower types can add visual interest to your overall design. Suspend birds at varying heights using nylon thread. I attached mine with thread wrapped around their centers to mimic feet.
Install a sturdy cup hook in your ceiling, then hang and adjust until balanced perfectly.
Lavender-Scented Bird Sachets
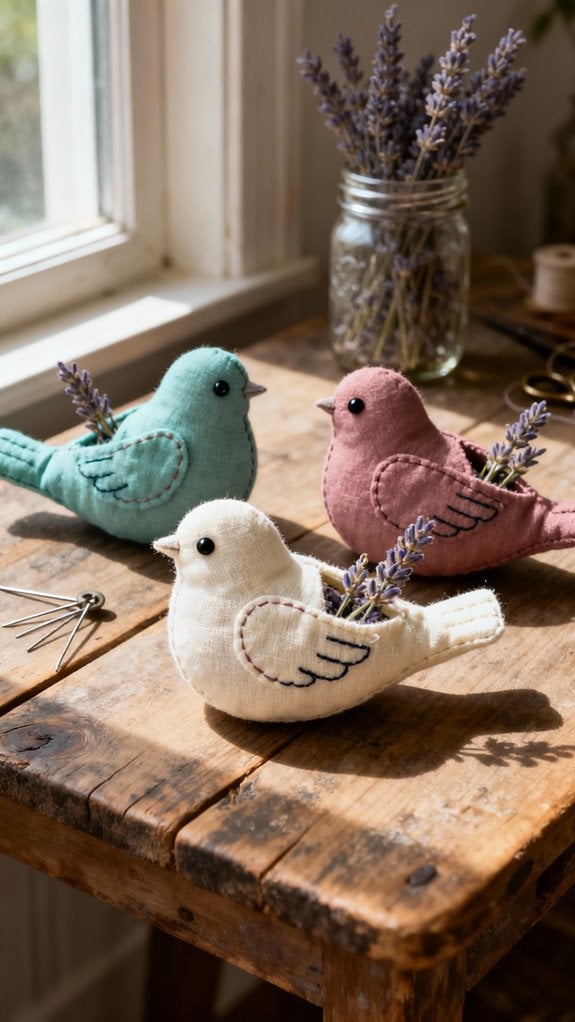
After experimenting with three-dimensional bird projects, I discovered these little lavender sachets pack maximum charm into minimal effort—perfect for anyone who wants quick, giftable results. Adding a personal touch with simple appliqué techniques can elevate your design even further.
I start by tracing my 13–15cm bird pattern onto cotton or felt, cutting mirrored front and back pieces. Before assembly, I appliqué details like the tummy panel and beak—it’s easier now than later. Then I place the pieces right sides together and stitch around the perimeter, leaving a small opening.
Once turned right-side-out, I fill each bird with 1–2 tablespoons of dried lavender buds, sometimes mixing in polyfil for extra plumpness. I close the opening with a ladder stitch and add a ribbon loop for hanging. To refresh the aroma, I simply massage the sachet gently, which releases more fragrance from the dried lavender buds inside.
These sachets naturally repel moths while freshening drawers and closets—I’ve gifted dozens as teacher presents and housewarming favors!
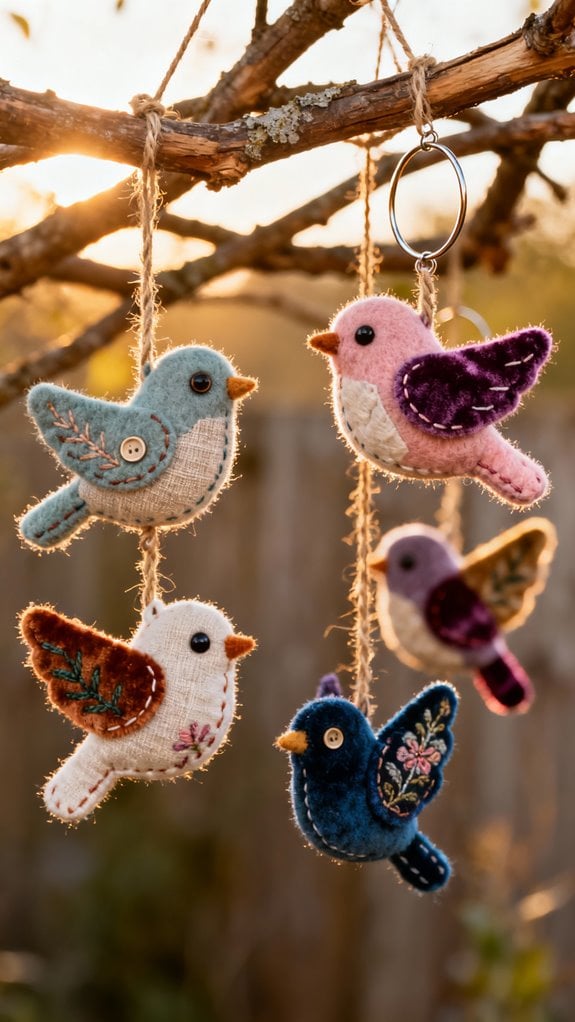
Seasonal Bird Ornaments From Scrap Fabric
My fabric scrap basket overflows year-round, so I’ve turned those colorful remnants into seasonal bird ornaments that keep giving long after the first stitch.
I start with raw edge appliqué using fusible web to bond fabric scraps and felt into doves, quail, owls, or finches. Small beads become eyes while ribbons add festive accents. Each ornament takes under an hour—perfect for batch crafting.
For padded birds, I sandwich wadding between fabric layers and secure with glue. No sewing required makes this ideal for crafting parties.
Standing birds need firm felt bodies with paperclip legs. I trace mirrored patterns, heat-bond the layers, then outline shapes with free-motion embroidery. The scribble appliqué technique creates a charming doodled effect that adds personality to each bird.
Patchwork birds maximize scraps beautifully. I piece together 5″ x 9″ fabric sections before cutting bird shapes, creating texture that single-fabric versions lack.
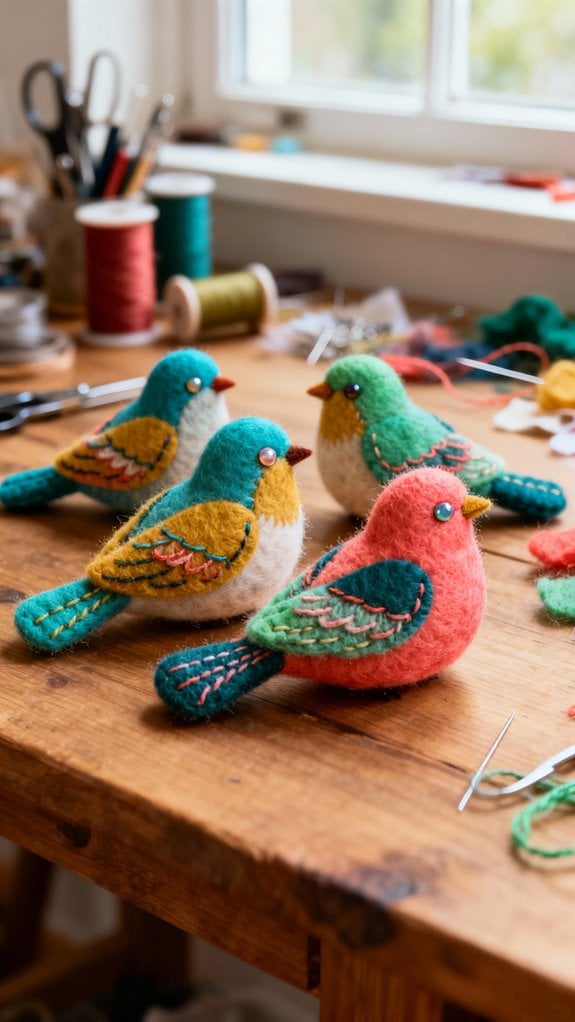
Chubby Bird Designs With Unique Shapes
Round, plump bird shapes steal my heart every time because they’re forgiving to sew and irresistibly adorable on display. I start with medium-weight minky or fleece—20-30% stretch creates those gorgeous curved seams without frustration. My finished birds measure roughly 4.5″ wide by 5.5″ long, standing 8-9″ tall.
Here’s my process: I sew darts carefully, matching notches precisely for that iconic “puffed” look. Firm, even stuffing along those darts is critical—don’t skimp here! I customize each bird using oversized beaks, color-blocked cheeks, or embroidered crests for personality. Layered wing stripes and contrasting tail fabrics make each unique.
For poseable wings, I insert wire armatures before closing seams. Ladder stitching finishes everything neatly. The result? Whimsical “borb” creations perfect for clustered displays or gifting. These projects are fun and easy to follow for crafters of all levels, transforming soft fabrics into magical stuffed birds.
Spring-Inspired Pastel Birds With Floral Prints
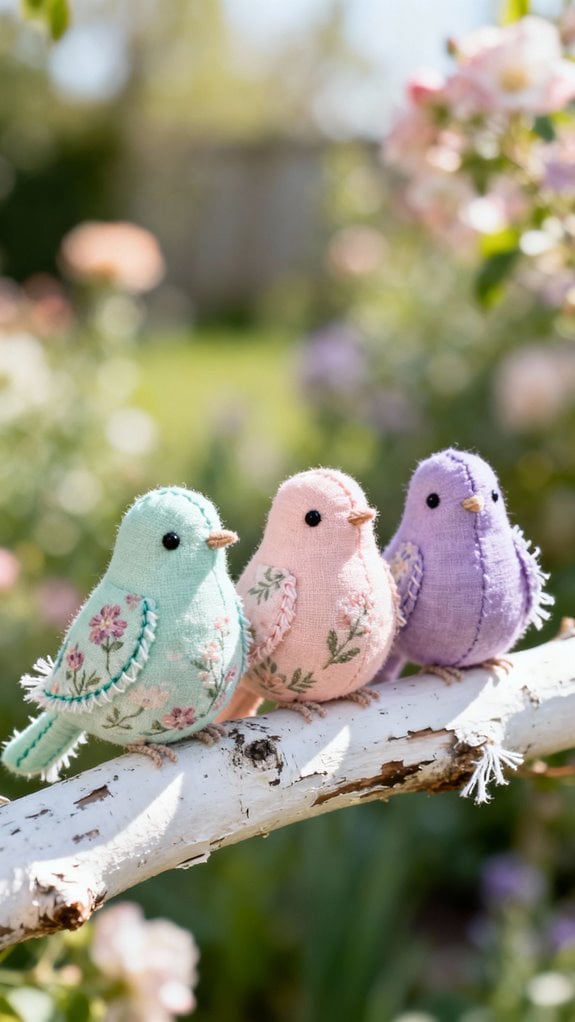
When spring arrives, I immediately reach for pastels and floral prints because they transform simple bird softies into seasonal showstoppers.
I start by gathering fat quarters in soft pinks, mint greens, and buttery yellows—mixing florals with coordinating solids. Using a free downloadable template, I cut body pieces with a 1/4-inch seam allowance, choosing contrasting fabrics for wings and tummy panels.
Here’s my process: I sew body pieces right sides together, leaving a gap for turning. After stuffing with polyester filling, I close the opening with invisible ladder stitches. Then I attach wings with small stitches and add black beads for eyes.
I finish each bird with baker’s twine for hanging, creating charming ornaments that celebrate spring’s renewal and garden-fresh aesthetic. Each project takes 1-2 hours, making them perfect for a leisurely afternoon of crafting.
Birds With Fine Wire Legs for Realistic Detail

Adding wire legs transforms decorative bird softies into sculptural pieces that can perch, stand, and strike natural poses. I start with 19-gauge soft annealed wire—it’s workable yet sturdy enough for stability. Using round-nosed pliers, I bend separate segments into three forward toes and one back talon, wrapping wire at the ankle for double thickness on larger birds. I hammer the toes slightly to flatten footpads for realistic ground contact.
Before closing my bird’s seam, I insert the legs and pack stuffing firmly around them. Wrapping florist tape up to the ankle gives grip, then I cover everything with wrapped yarn for texture. For the upper leg section, I bend wire at the top to create double thickness for added strength before wrapping again with floral tape. A quick coat of acrylic paint adds species-specific color. The best part? I can bend legs after assembly to perfect the stance.
Nature-Themed Birds With Leaves and Flowers
Because nature offers endless inspiration, I’ve found that combining fabric birds with leaves and flowers creates pieces that feel alive and balanced. I start by selecting a bird pattern, then surround it with appliquéd leaves and embroidered flowers for dimension.
For fresh leaf projects, I collect pliable green leaves and stitch them directly onto fabric using embroidery thread and blunt needles—perfect for temporary art pieces. When I need durability, I opt for printed cotton featuring birds nestled among botanical elements.
My favorite technique involves layering: I appliqué a large bird first, then add smaller fabric leaves and hand-stitched flowers around it. This approach builds fine motor skills while creating beautiful designs. Earth tones with floral accent colors work beautifully. These nature-themed pieces transform everyday items—I’ve embellished tote bags, cushions, and children’s clothing, creating cheerful designs that celebrate ecosystems.
Eco-Friendly Birds From Recycled Fabrics
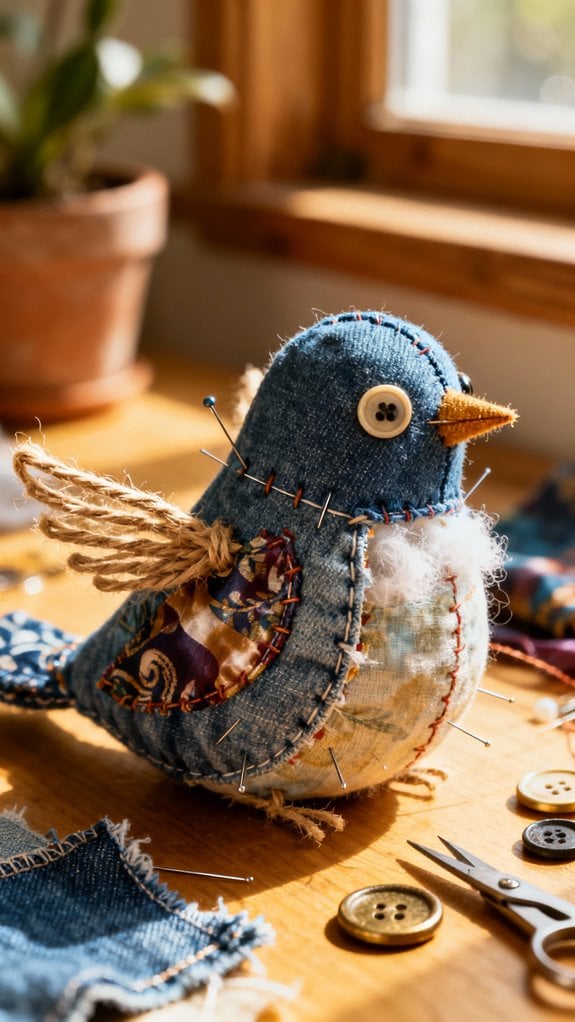
My fabric scrap bin has become a goldmine for creating charming upcycled birds that keep textiles out of landfills while adding character to my home. I’ve transformed felted wool sweaters into robins, bluebirds, and cardinals that now decorate my wreaths and plants.
Here’s my process: I iron scraps flat, then trace bird patterns directly onto the fabric. Using Bondaweb fusible web, I bond small pieces together on thick felt backing, creating composite sheets. I place baking paper on top while ironing to protect my equipment.
Free-motion embroidery adds delightful texture—I don’t worry about perfect stitches. French knots with white thread create realistic eyes. These birds work beautifully as pin cushions, brooches, or basket accents, giving unusable fabric scraps purposeful second lives. I’ve also discovered that incorporating paddle wire allows me to attach my finished birds to wreaths, plant stakes, and other decorative items.
Beginner-Friendly Simple Bird Patterns
When I first started sewing fabric birds, I chose quilting cotton and simple two-piece patterns that eliminated frustration and delivered quick wins. I downloaded free PDF patterns featuring symmetrical designs that I traced onto folded fabric—no complicated cutting required.
I increased my seam allowances to 3/8 inch, which made turning those tiny bodies much easier. Pinning before cutting prevented fabric shift, and I slowed down considerably around the head area where curves demanded precision.
For embellishments, I used black beads for eyes and added baker’s twine loops for hanging. Each bird took me about 90 minutes initially. I stuffed mine with polyester filling and paired contrasting fabrics for the belly.
My biggest tip? Complete one bird entirely before starting another—it reveals construction mistakes early. The comments section became invaluable for troubleshooting specific challenges and connecting with other bird pattern enthusiasts.
Conclusion
I’ve fallen in love with bird sewing projects, and I know you will too! Start with a simple felt bird if you’re new to this—I made my first one in an hour. Then, challenge yourself with articulating wings or wire legs. I’m currently hoarding fabric scraps for my next patchwork flock. Grab your supplies and let’s create something beautiful together. Your sewing space deserves its own little aviary!
