15 Best A Line Dress Sewing Ideas You Need To Try!
I’ve been sewing A-line dresses for years, and I can tell you they’re absolute wardrobe workhorses. They’re flattering on every body type, surprisingly simple to construct, and endlessly adaptable to your personal style. Whether you’re drawn to romantic puff sleeves or clean, modern lines, there’s an A-line variation that’ll speak to you. I’ve gathered my fifteen favorite designs that range from beginner-friendly to delightfully challenging—each one worth the effort you’ll invest.
Key Takeaways
- Add in-seam pockets 4–6 inches below the waist for practical storage without disrupting the flattering A-line silhouette.
- Create romantic puff sleeves using medium-weight cotton poplin to maintain structure and balance the A-line skirt shape.
- Incorporate keyhole necklines in teardrop, oval, or V-shapes for modest yet eye-catching design detail and visual interest.
- Transform dresses with adjustable hemlines by extending patterns 65 cm below hip line and adding side ties for gathering.
- Use princess seams instead of darts for beautiful contouring, and add decorative piping at seams for elevated design.
Classic Sleeveless A-Line Dress With Bias-Bound Armholes
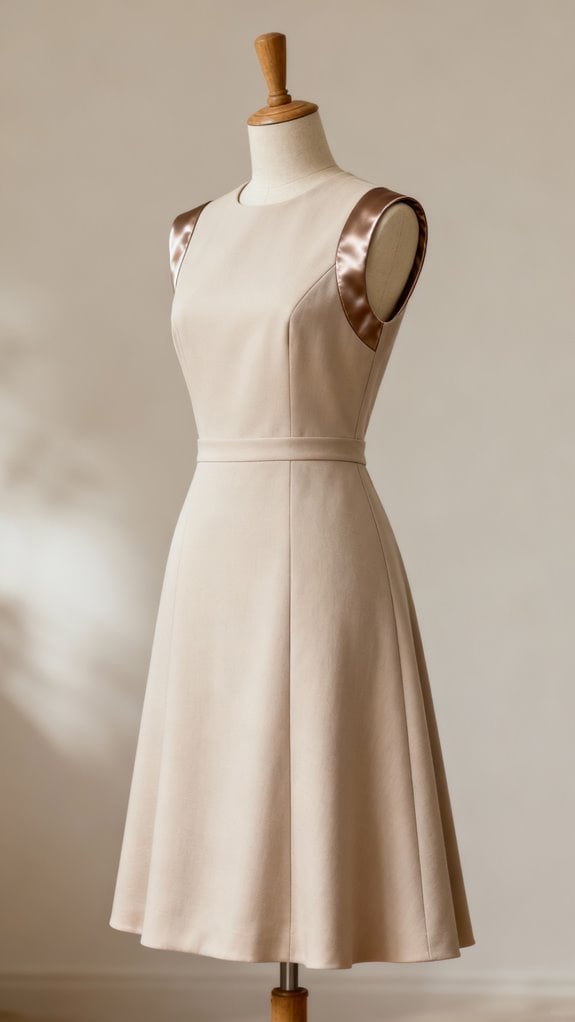
There’s something wonderfully satisfying about sewing a dress that flatters nearly everyone who tries it on, and that’s exactly what you’ll get with a classic sleeveless A-line. I’ve sewn this style in everything from crisp linen to drapey rayon, and each version works beautifully for different occasions. When selecting fabrics, consider sustainable practices like upcycling or using fabric scraps for a more eco-friendly approach.
The real game-changer here is using bias binding on the armholes instead of traditional facings. It’s lighter, lies flatter, and won’t flip out annoyingly during wear. I always press my side seams open first to reduce bulk, then carefully pin the binding around those curves to prevent any puckering. Position your needle in the outer crease of the binding when you’re ready to sew it around the armhole for the most accurate seam placement.
Here’s my tip: join your binding ends away from the seams, and don’t skip the understitching step. It keeps everything crisp and professional-looking, transforming your dress from homemade to handcrafted.
Long Sleeve A-Line Dress for Year-Round Wear
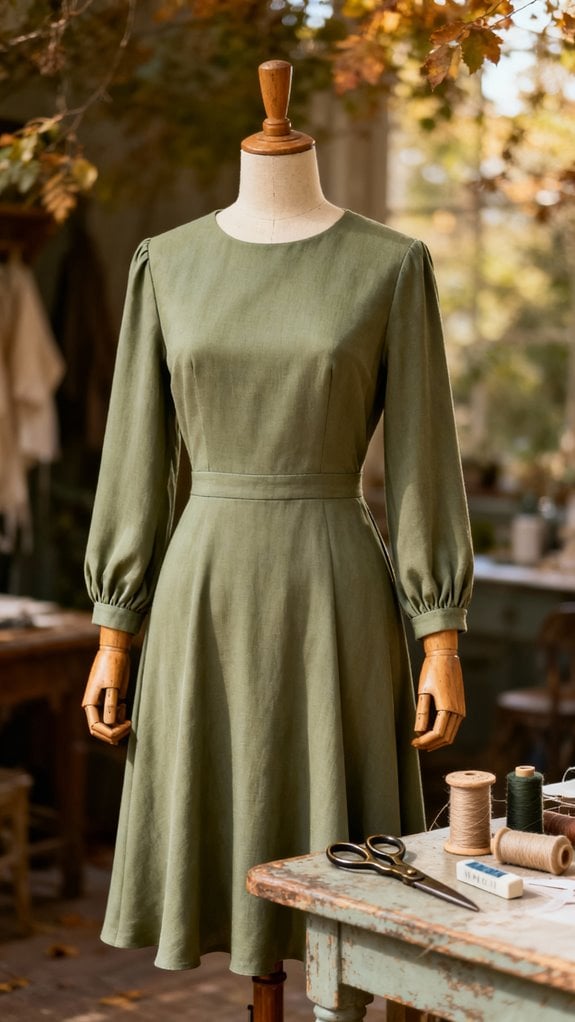
I’ve sewn at least a dozen A-line dresses over the years, but adding long sleeves transforms this pattern into something I reach for nearly every week. The versatility is unmatched—I pair mine with cardigans in winter and wear it solo during spring evenings.
I love experimenting with sleeve styles. Bell sleeves feel romantic, while tailored cuffs work perfectly for the office. My favorite version uses ponte knit with a boat neckline, falling just below my knee. The close-fitting armholes guarantee I can move freely without any pulling. Sewing techniques like using a serger for finishing edges can enhance the durability of these garments.
What makes this design brilliant is its adaptability. I’ve made versions in lightweight cotton for summer sun protection and cozy wool blends for autumn. The A-line silhouette flatters everyone, and minimal seam lines beautifully showcase bold prints. For those seeking patterns with multiple options, sleeve and length variations provide excellent customization possibilities at reasonable price points.
Spaghetti Strap Summer A-Line Dress
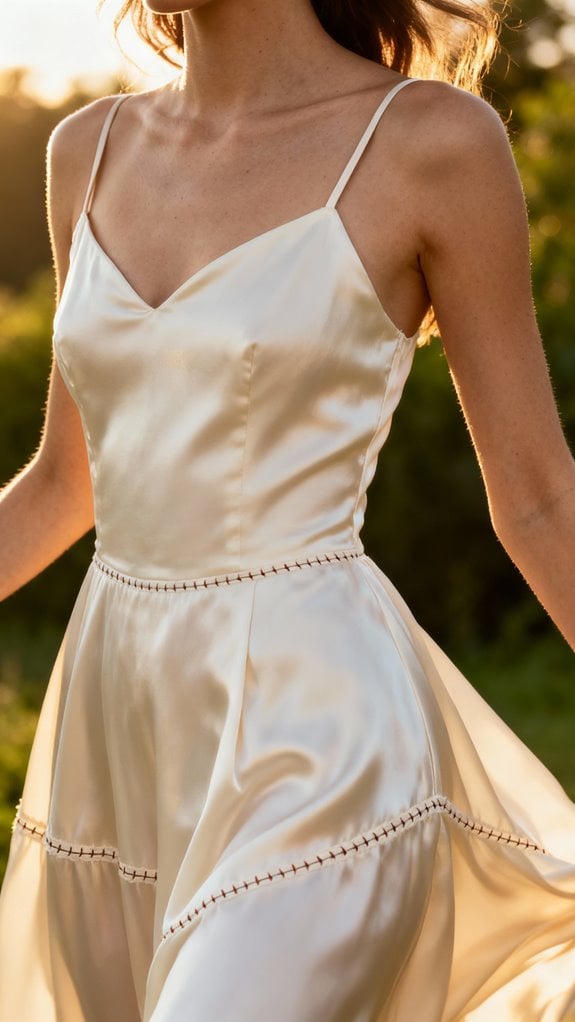
My favorite summer sewing project comes together in under an hour, and I wear the results all season long. I’ve made spaghetti strap A-line dresses in linen, cotton, and lightweight denim—each one perfect for hot weather. The construction is surprisingly simple. I cut four bodice pieces plus a back on the fold, then create those delicate straps using bias-cut tubes. The trickiest part? Applying bias binding to the armholes. But once you’ve mastered it, the finish looks professional.
I love that I can customize everything—neckline depth, strap placement, and length. Essential patterns for A-line dresses allow for endless creative possibilities. Mini versions work for casual weekends, while maxis feel elegant for dinner out. Before joining the skirt to the bodice, I leave 5 inches unstitched at the bottom of the side seams to create flattering slits.
With just 1–1.5 yards of fabric (about $11), you’ll have a breezy dress that actually fits.
A-Line Dress With Puff Sleeves for a Romantic Silhouette
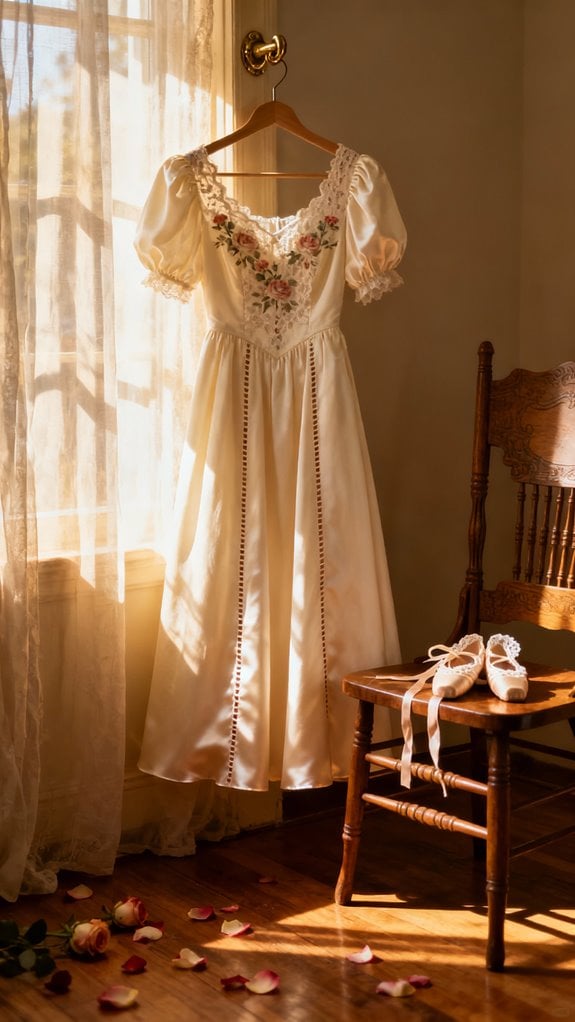
When I first added puff sleeves to an A-line dress, I couldn’t believe how one simple detail transformed the entire look from casual to swoon-worthy. The technique is surprisingly straightforward: I slice my sleeve pattern every inch, spread the pieces for fullness, then gather the cap with two rows of loose stitching. Adding unique details like puff sleeves can elevate the design of your dress significantly.
I’ve found that medium-weight cotton poplin holds the puff beautifully without going limp by afternoon. The gathered sleeves visually narrow your waist while the A-line skirt balances all that shoulder drama—no awkward bulk. I always pin the bottom of the sleeve pattern to keep it level before spacing out the sliced sections.
My best tip? Make a muslin mock-up first. You’ll dial in exactly how much puff flatters your frame. Add elastic casings at the cuffs to keep that romantic volume intact all day long.
Keyhole Neckline A-Line Dress for Added Detail
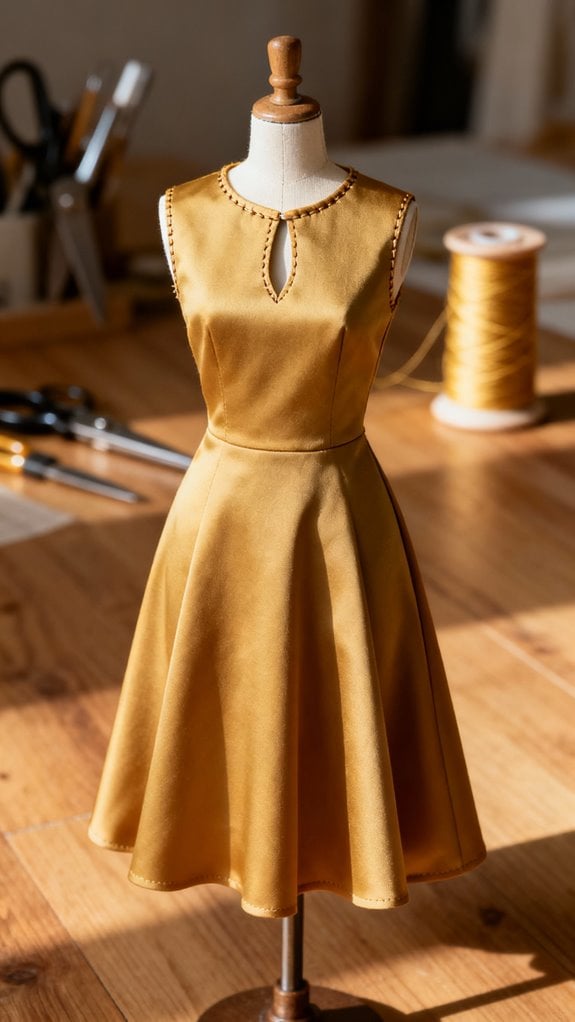
A keyhole neckline turns a simple A-line dress into something you’ll reach for again and again—it’s that perfect balance of modest and eye-catching.
I love experimenting with different keyhole shapes—teardrop, oval, or even a subtle V-shape—to see how each transforms the neckline’s character. You can place it center front for classic appeal or go off-center for something unexpected. In sewing, construction techniques like using a facing can help achieve a polished look.
The construction isn’t complicated. I mark my desired shape, use a facing to enclose the raw edges, and always stay stitch before cutting to prevent distortion. For closures, I’ve tried everything from simple fabric ties to decorative buttons. My favorite? A single long tie threaded through a channel—it gathers beautifully and adds romantic detail without fuss. For a choker-style keyhole design, the elevated neckline creates a bold, statement-making look that’s perfect for evening wear.
Deep V-Neck A-Line Dress With Modern Appeal
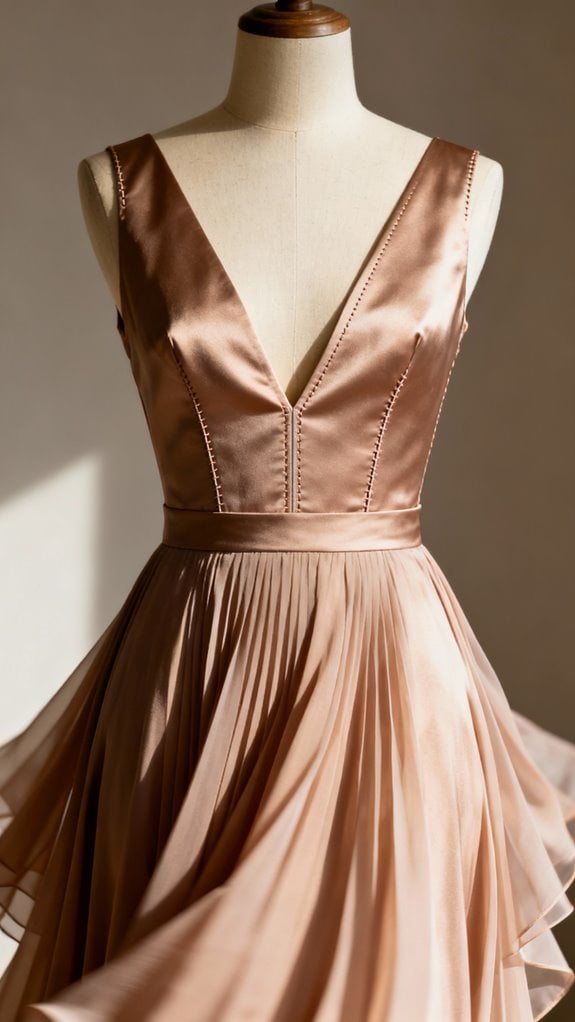
The deep V-neckline transforms an A-line dress from sweet to striking—it’s that one detail that makes people look twice. I’ve learned that getting this neckline right requires patience and multiple toiles, but it’s worth every adjustment.
I always stabilize the neckline with interfacing or tape to prevent stretching, and I finish edges with bias binding for durability. The real magic happens when you manipulate darts and princess seams to contour the bodice perfectly—this prevents gaping at the bust.
Choose silk charmeuse or lightweight crepe for beautiful drape, and don’t skip the lining. I recommend adding adjustable straps with rings for a modern touch. Whether you’re sewing a mini or maxi version, this style shifts effortlessly from daytime casual to evening elegance. Additionally, consider using fabrics like cotton or linen to enhance comfort and breathability in your design.
Four-Piece Beginner-Friendly A-Line Dress Pattern
Four pattern pieces are all you need to create your first A-line dress, and I promise it’s less intimidating than you think. When I tackled my first dress pattern, I chose this simple four-piece design: front bodice, back bodice, skirt, and sleeves. The beauty lies in its straightforward construction—just basic seams with minimal fussing over darts or complicated shaping. Additionally, the A-line shape is incredibly flattering for various body types, making it a popular choice among sewists looking to create flattering silhouettes.
I grabbed cotton jersey fabric and traced each piece carefully, making sure to mark my notches. The forgiving A-line silhouette meant my slight fitting mistakes didn’t matter much. Within two hours, I’d sewn something wearable! You’ll attach shoulder seams first, connect the skirt, then insert sleeves.
This pattern adapts easily to sleeveless versions or different sleeve lengths, making it perfect for building your sewing confidence. The dress closes with buttons on the shoulders, which adds a charming detail while keeping construction beginner-friendly.
A-Line Dress With In-Seam Pockets for Functionality
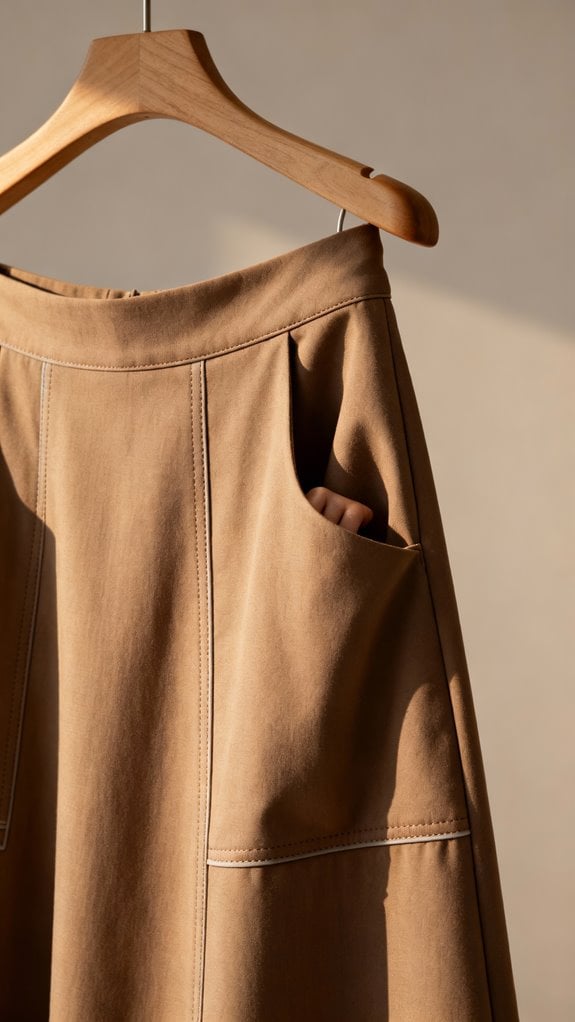
When I discovered how to add in-seam pockets to my A-line dresses, I couldn’t believe I’d spent years making garments without them. These hidden gems maintain the dress’s smooth silhouette while giving you practical storage for your phone and keys.
I position my pockets 4–6 inches below the waist for comfortable reach. The trick is cutting four mirror-image pieces and attaching them before completing the side seams. I use a slightly smaller seam allowance on the pocket opening to keep it invisible from the outside.
Understitching and pressing toward the pocket bag creates that crisp, professional finish. Whether you’re working with woven or stable knit fabrics, curved pocket shapes integrate seamlessly. I start by tracing around my hand on fabric to create a custom pocket pattern that’s perfectly sized for functionality. Additionally, adding lightweight fabrics to your A-line dress will enhance its drape and breathability, making it perfect for summer wear. Trust me—once you master this technique, you’ll never make a dress without pockets again.
Midi-Length A-Line Dress With Adjustable Hemline
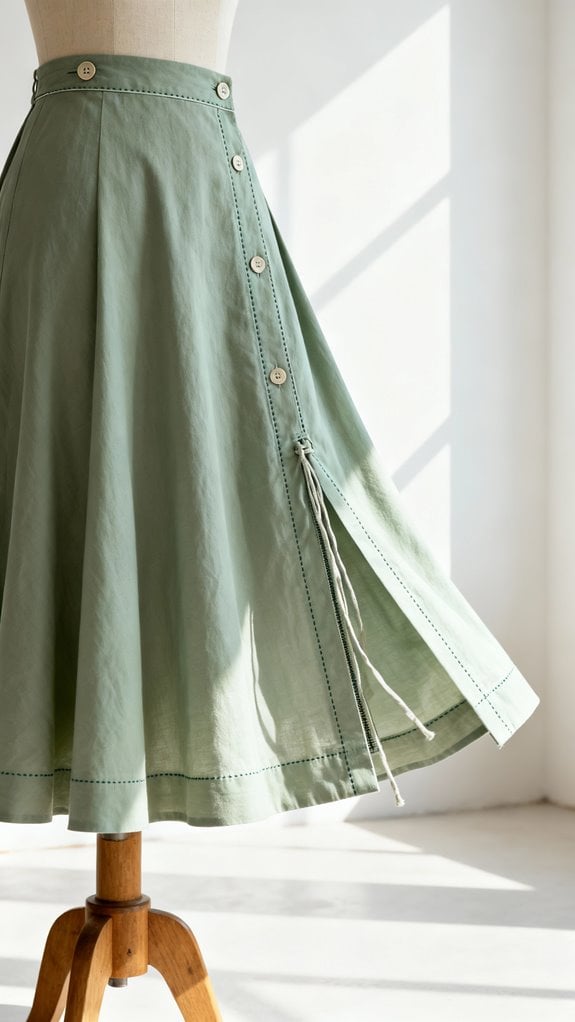
After years of sewing fixed-length dresses that looked perfect one day and dated the next, I finally cracked the code with adjustable hemlines on my midi A-line projects.
I start by extending my pattern 65 cm below the hip line, adding 1.5 cm seam allowance. The real magic happens with double-fold hems—I fold 1 cm initially, then 2–3 cm more, which lets me adjust the depth later.
For lightweight cottons and rayons, I use 3–3.5 mm stitch lengths near the inner fold edge. Side ties are my favorite hack for gathering flexibility. I pre-finish raw edges with zigzag stitching to prevent fraying.
This technique transforms one dress into multiple looks—formal or casual—just by adjusting the fold depth. The flattering A-line silhouette works beautifully for many body types, making it a versatile addition to any wardrobe. It’s incredibly practical.
Maxi A-Line Dress in Flowing Silk or Rayon
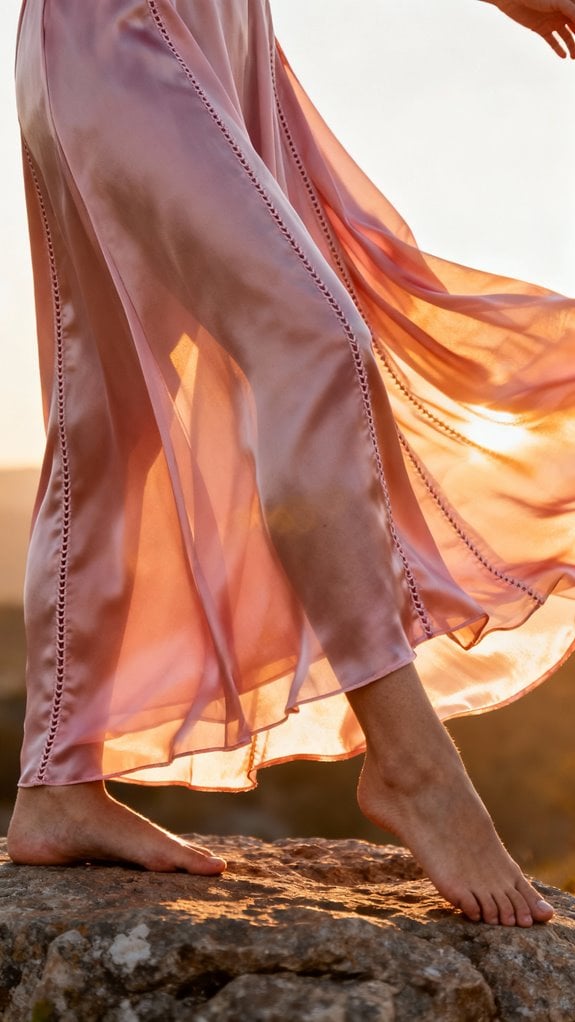
Since I fell in love with the dreamy movement of bias-cut fabrics, maxi A-line dresses in silk or rayon have become my go-to pattern for special occasions. I’ll be honest—silk can be slippery and intimidating, so I started with rayon and haven’t looked back. It drapes beautifully, costs less, and handles like a dream compared to satin.
I recommend choosing patterns with V-necklines or side slits for added elegance. Bias-cutting truly enhances the flow, though it requires accurate cutting and careful pinning. For bodices or sheer fabrics, I always line mine with coordinating fabric. When working with 45-inch wide fabric, plan for 2.25 to 2.65 yards depending on your size to ensure you have enough material for the full length.
These dresses work wonderfully for weddings and summer evenings. I’ve styled mine casually with sandals and dressed them up with heels and statement jewelry—they’re incredibly versatile and flattering.
A-Line Dress With Button-Back Closure and Placket
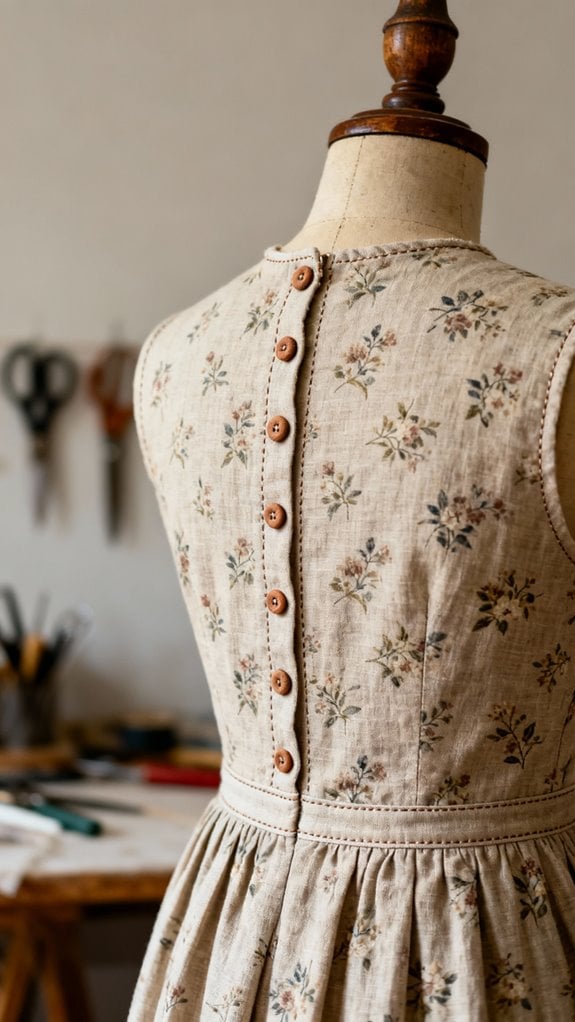
I discovered button-back closures quite by accident when I couldn’t reach the side zipper on one of my favorite dress patterns. Now I’ve transformed this A-line design into my go-to weekend dress with a practical button placket running down the back.
Here’s what makes it work: I straighten the center back seam, remove existing seam allowances, and add a 3/8 inch allowance to my new placket pieces. The key is interfacing those facings for structure and marking buttonholes evenly, starting 1/4 inch from the neckline.
I love adding elastic casing at the waist—it creates that flattering “snatched” effect without fussy darts. Cotton, linen, or African prints work beautifully, and you’ll appreciate how forgiving this silhouette is for various body shapes. This pattern hacking approach requires no extensive pattern-making skills, making it perfect for sewists who want to experiment with modifications.
Princess Seam A-Line Dress for Tailored Fit
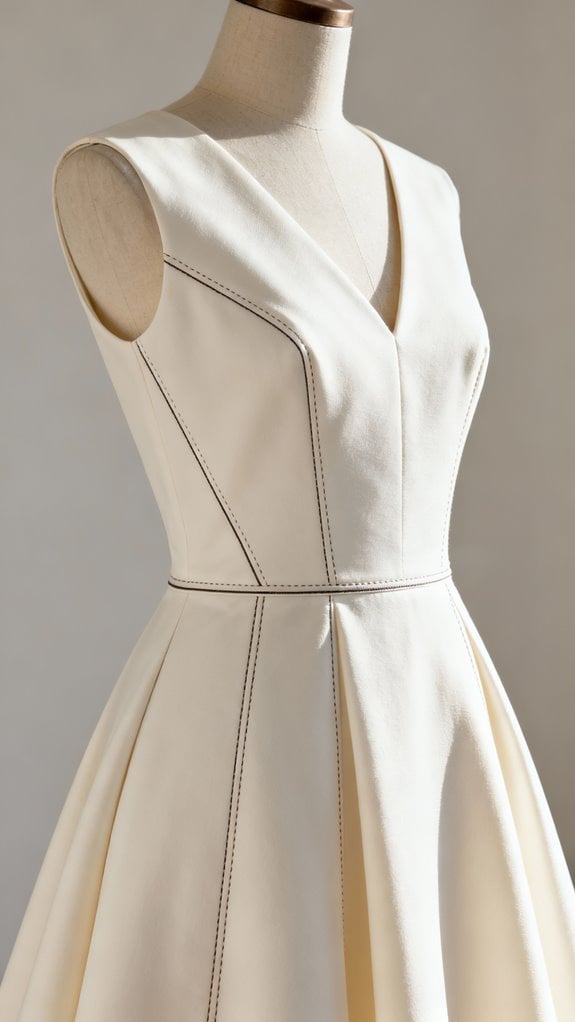
When I need a dress that actually fits my curves without constant tugging and adjusting, I turn to princess seams. These vertical panel lines contour beautifully over the bust, waist, and hips without requiring darts—creating that coveted tailored look.
I always start with a muslin test. It’s saved me countless times from fit disasters, letting me adjust curves exactly where my body needs them. The construction’s straightforward: sew curved panels together, understitch for structure, then assemble from top to bottom. I typically work with pattern paper with a grid, a bodice block, and a French curve to draft my pattern pieces accurately before cutting into my fashion fabric.
I recommend stable wovens or knits with 20% stretch—they shape those curves perfectly without fighting you. Want extra flair? I’ve color-blocked panels and added topstitching for drama. You can even sneak functional pockets into the side seams without disrupting that gorgeous A-line silhouette.
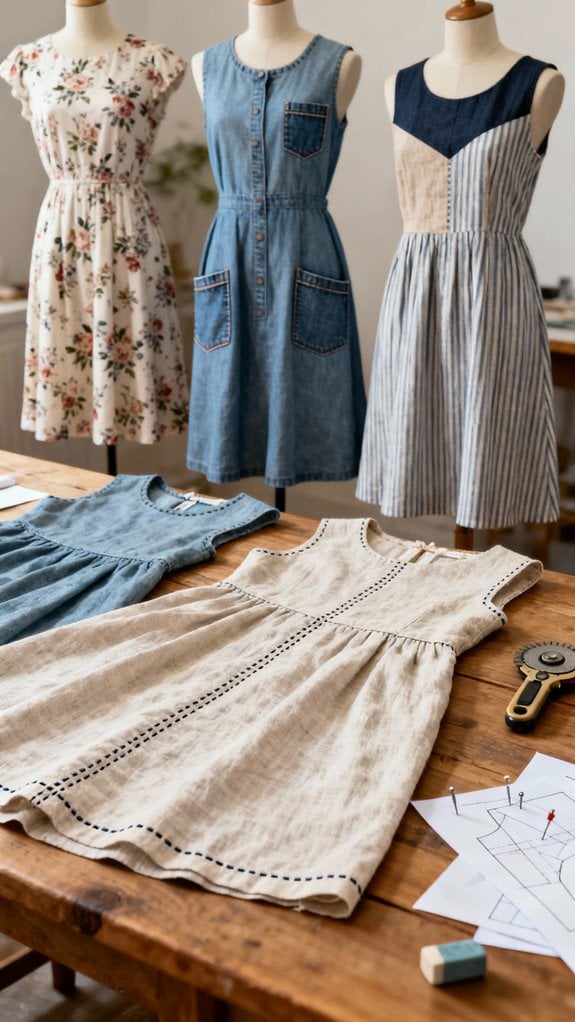
Mixed Fabric A-Line Dress With Bold Pattern Combinations
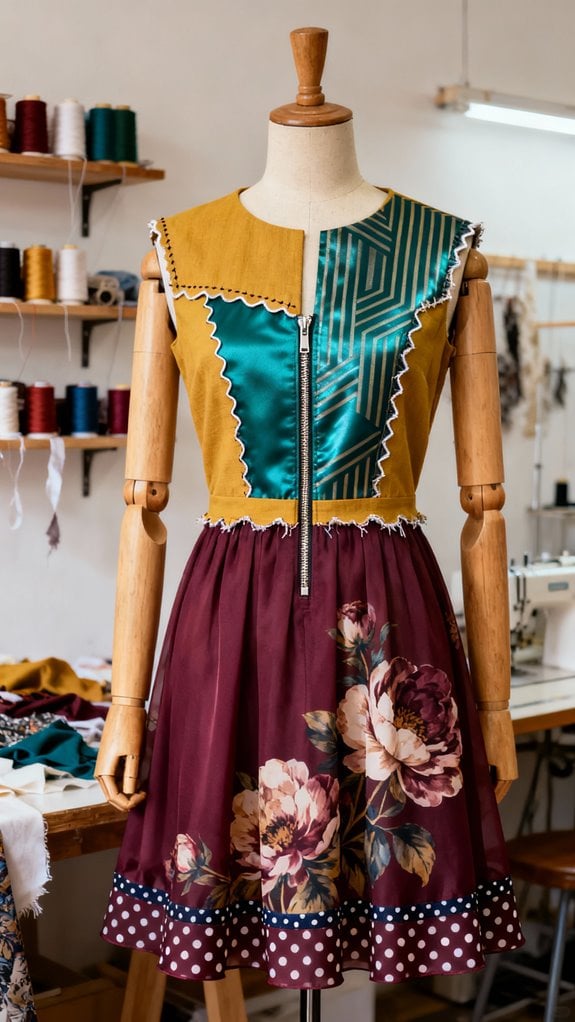
Princess seams taught me the power of structure, but mixing bold fabrics? That’s where I discovered true creative freedom. I’ll combine contrasting materials—think cotton with silk or linen with vibrant Ankara prints—to create stunning texture variations. The key is pre-washing everything to prevent uneven shrinkage disasters.
I strategically place bold geometrics on center panels while keeping side sections solid, drawing the eye exactly where I want it. Color blocking with strikingly different hues adds modern vibrancy. My favorite trick? Using topstitching along seams where fabrics meet—it stabilizes those tricky intersections beautifully.
For professional results, I press meticulously at each stage and match needle types to each fabric section. Adding piping in an accent color crisply defines those fabric shifts. A flash of contrasting color on the dress pockets instantly elevates the overall design with unexpected vibrancy. You’re fundamentally creating wearable art with endless combinations.
A-Line Dress With Decorative Piping and Topstitching
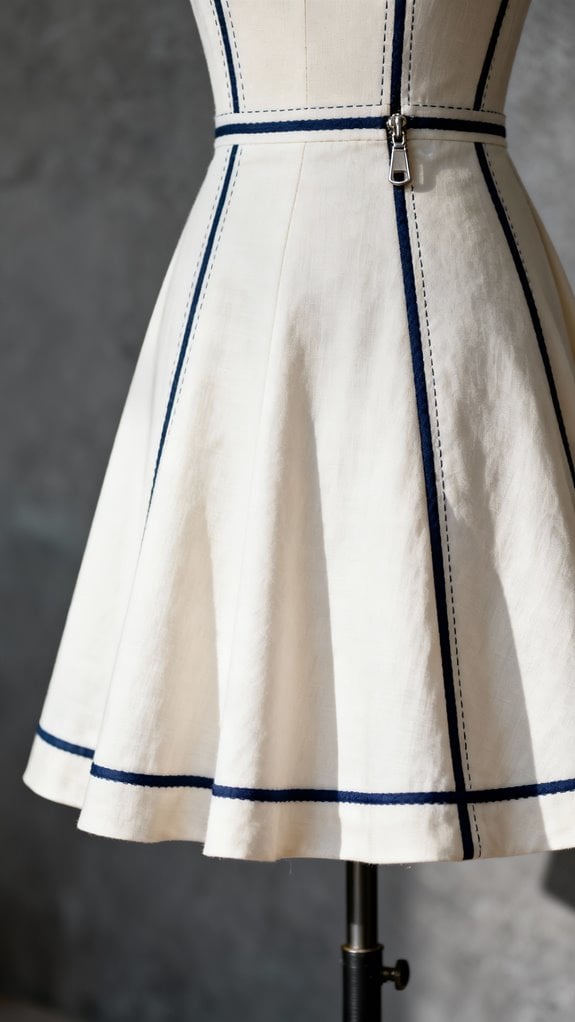
Decorative piping transformed my A-line dresses from homemade to haute couture the first time I stitched it along a neckline. I’ve learned that bias-cut strips create the smoothest finish, especially around curves. You’ll want medium-weight wovens like cotton or linen for structure.
I recommend placing piping at princess seams, waistlines, and hems for maximum visual impact. When I combine contrasting piping with topstitching, the results are stunning—it’s like adding jewelry to your garment.
My technique? Baste the piping first using a zipper foot, then topstitch 1/8″ from the edge for crisp definition. Self-made piping allows perfect color matching, though it requires about 7-11 meters for elaborate designs. The time investment pays off with professional-looking results that reinforce seams and add incredible durability. Choose cord widths between 1/16 to 3/16 inches for bodices to achieve the most polished appearance.
Customizable A-Line Dress Using Digital Pattern Tools

Since I discovered digital pattern tools three years ago, my A-line dress designs have become infinitely more precise and personalized than anything I achieved with paper patterns. I started with Adobe Illustrator, then explored PatternLab.London for automated block drafting, which revolutionized my workflow.
The precision is remarkable. I can input my exact measurements and watch the software create a custom-fitted A-line pattern instantly. The pen tool helps me draw perfect curves, while pathfinder tools make dart manipulation effortless. I’ve eliminated countless fitting issues simply by tweaking patterns digitally before cutting fabric.
What excites me most? The eco-friendly aspect—no more paper waste cluttering my sewing room. Programs like Seamly and Optitex offer affordable entry points, and their tutorials made learning surprisingly manageable. For those ready to advance beyond basic tools, CLO’s intuitive interface makes it the best option for beginners wanting to combine pattern making with 3D visualization of their A-line creations.
Conclusion
I can’t wait to see which A-line dress you’ll tackle first! I’ve sewn at least half of these styles myself, and honestly, each one taught me something new. Don’t stress about perfection—my first bias binding was wonky, but I wore that dress everywhere anyway. Start with a design that excites you, grab your favorite fabric, and just jump in. You’ve totally got this, and I’m cheering you on!
